


 |
|


| Robot Reference->Power Pack Info | |||
Librascope Power Pack Restoration
This is a bit overdue, but I wanted to tell the tale of my Power Pack... a REAL Librascope Power Pack! Click On Any Picture for a Larger Image
It was a long journey, over many years, with many major obstacles, and some might find it interesting. The story really starts when I originally built my robot back in 2000 - 2001. I was on a breakneck pace to get my robot finished for FrightVision 2001 in Cleveland Ohio, and when the previous Power Pack Builder in the club offered to trade me a Power Pack for a set of vents, I couldn't resist. This previous vendor had just sold his Power Pack business to Bill K, but said he had enough parts to build me one. This Power Pack was OK, the resistors were the wrong size, but not bad by our club standards, but I always planned to upgrade and build something much more accurate at some point. 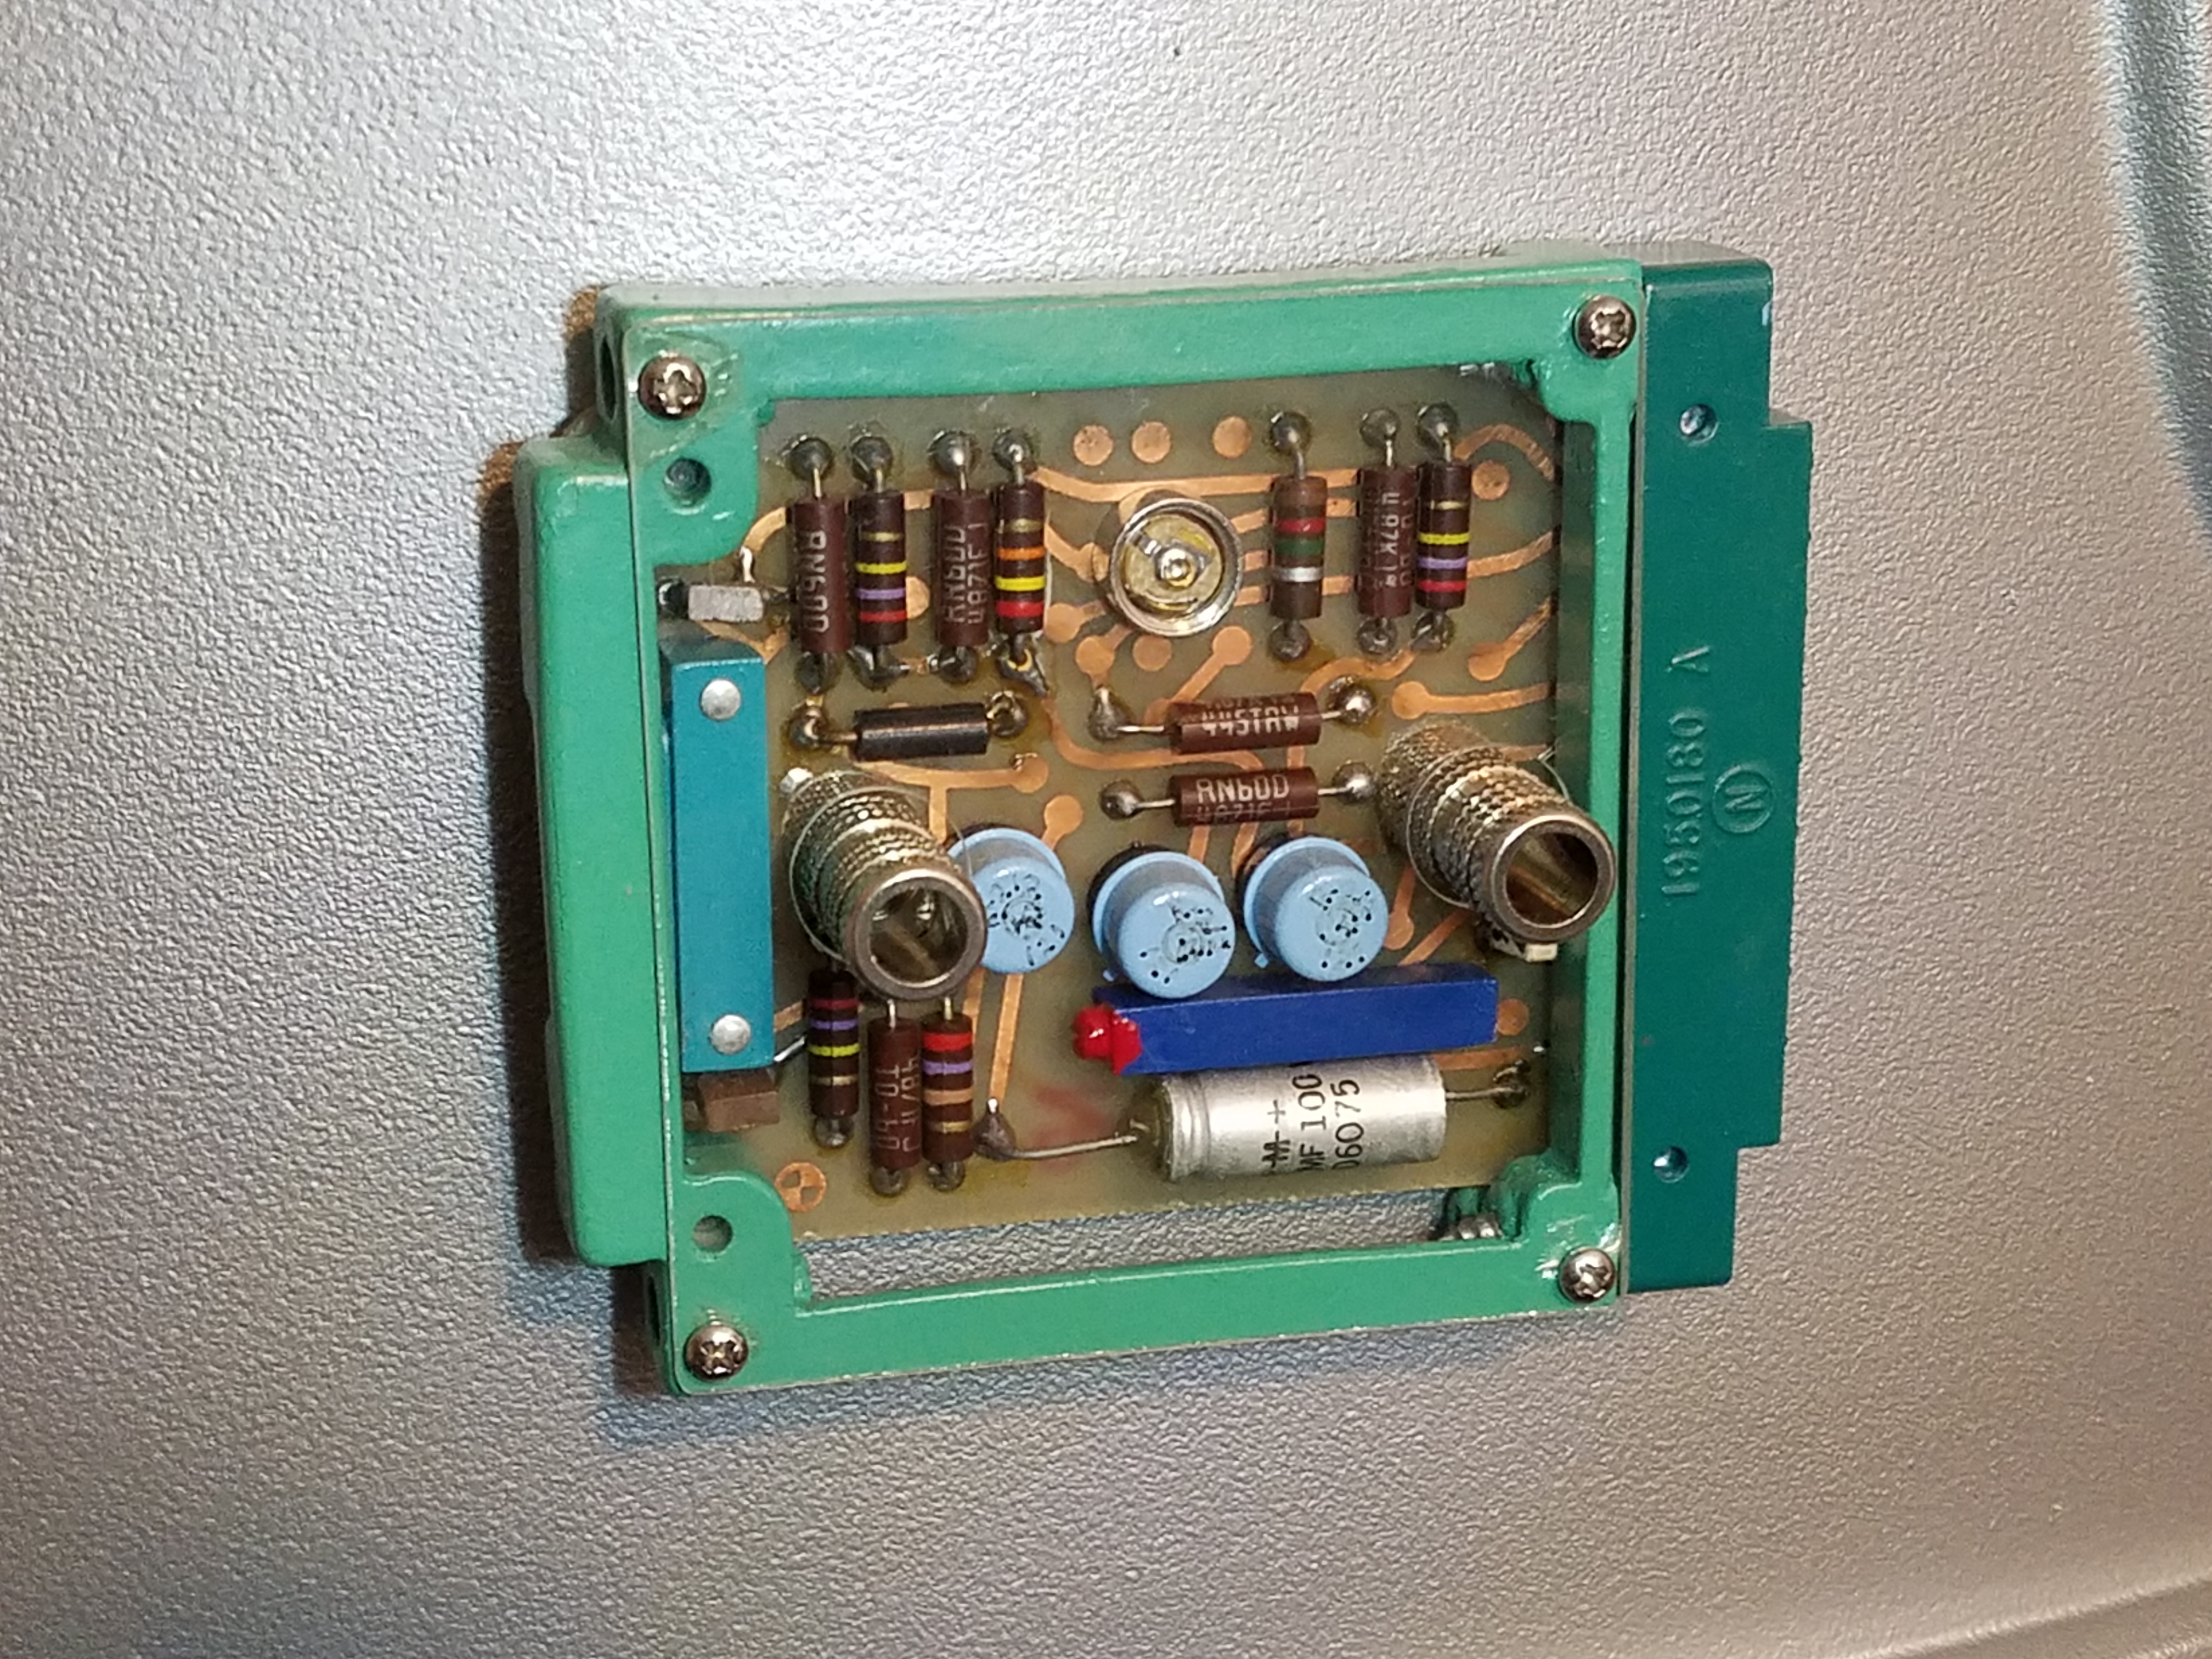
I drooled over the thought of getting a real Librascope card and creating a 100% authentic Power Pack, but those are extraordinarily rare. There was probably only about a dozen Librascope cards ever found of the type used to make the Hero Robot Power Pack, and that includes the 3 or so used on the original Hero Robot. The original builders got the Librascope card from Apex Surplus in LA where many of the LIS props where obtained, and the go-to place for movie and TV prop makers at the time. Fast forward to the late 1980'... Knowing this, a few early B9 enthusiasts in the LA area, went to Apex and described the part to the owner. As the story goes, he pulled a small box down off a shelf behind the counter, that had about 10 to 20 cards. Some like the Power Pack, and another version with the same frame but very different components. These early pioneers in B9 building got them cheap (maybe $10), but when the owner realized what he had, the price went way up. Right now two B9 Builders in the club that I know of, Brian Mix, and Marc Chabot have a correct Librascope card unchanged, and not converted to a B9 Power Pack. Brian has brought his to several club events (Wonderfest 2018) to let builders look at it and take pictures up close. I also believe Bill K has one that was disassembled to create molds and help provide club members with replicas for years. 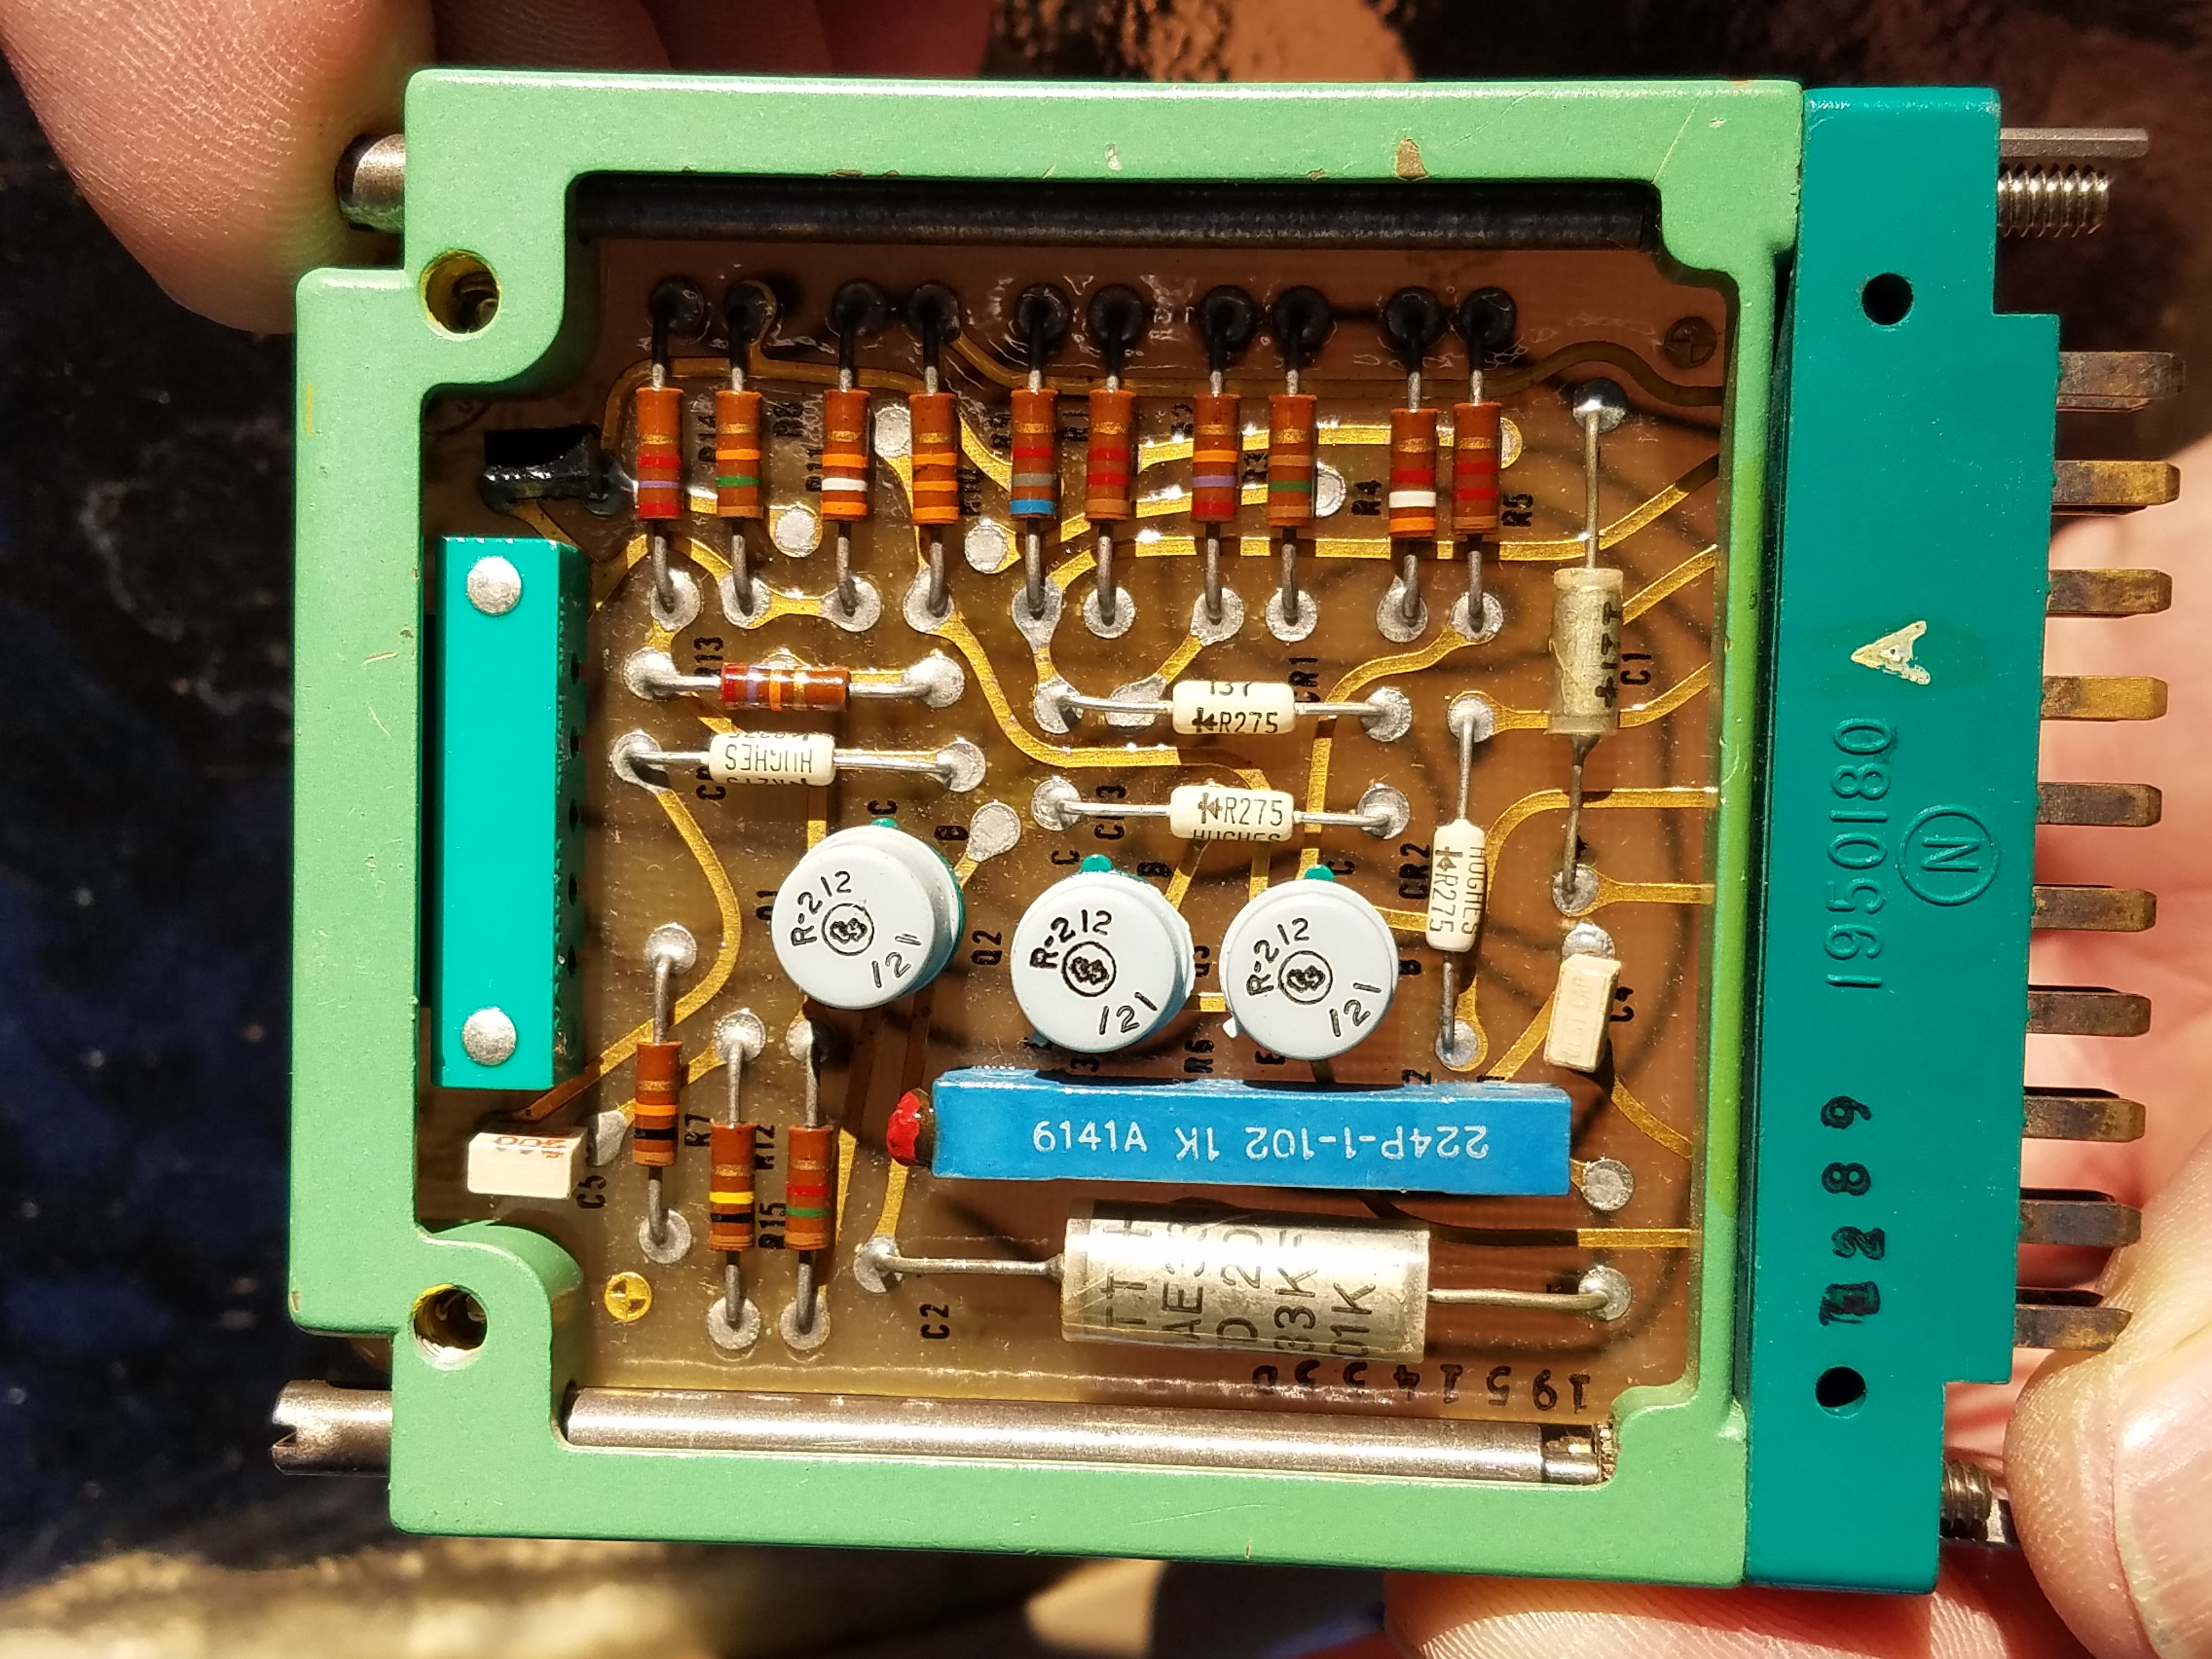
So back to my story.. Over the years I slowly acquired accurate Power Pack parts as I could find them including a very nice CNC aluminum frame and real connectors so I could one day make a very accurate Power Pack replica for my B9. But a rare occurrence in 2013 changed my direction. A REAL Librascope Power Pack came up on ebay! OMG! It had already been converted to a B9 Power Pack, but who cares! It was real and this opportunity never comes up.. 
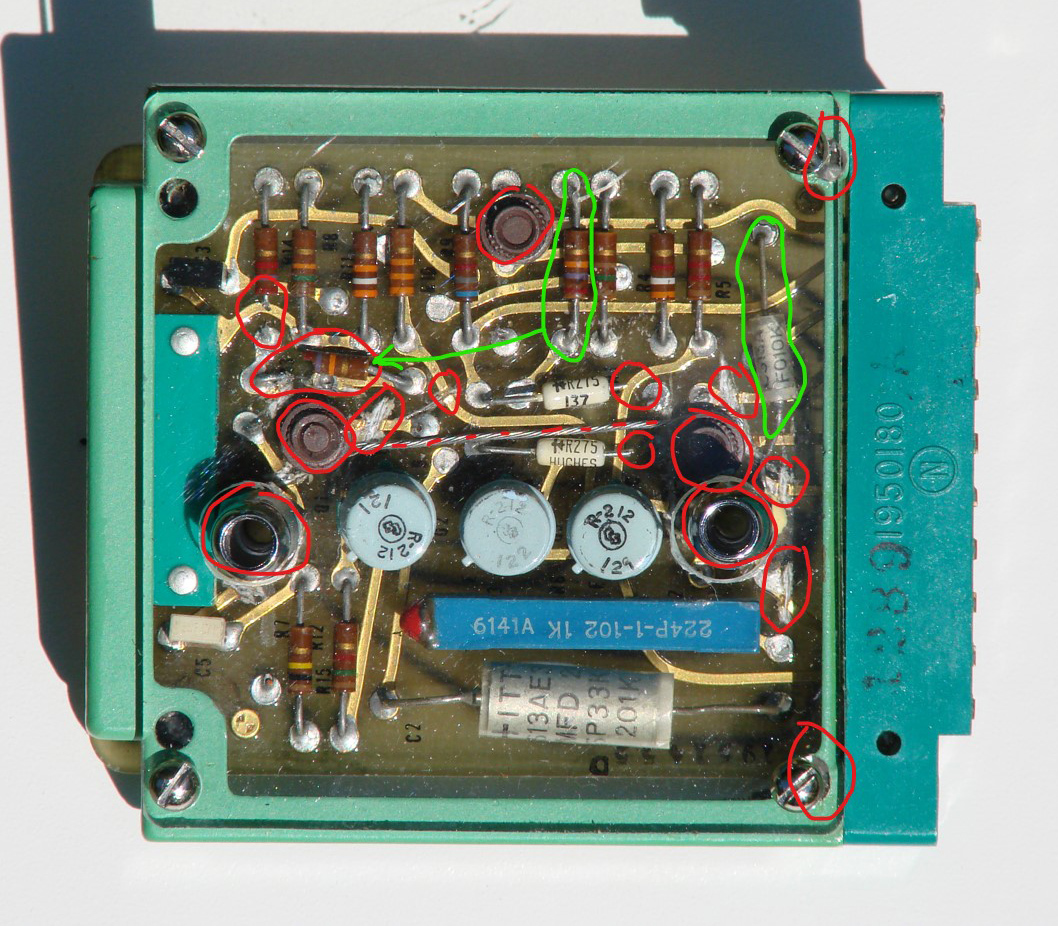
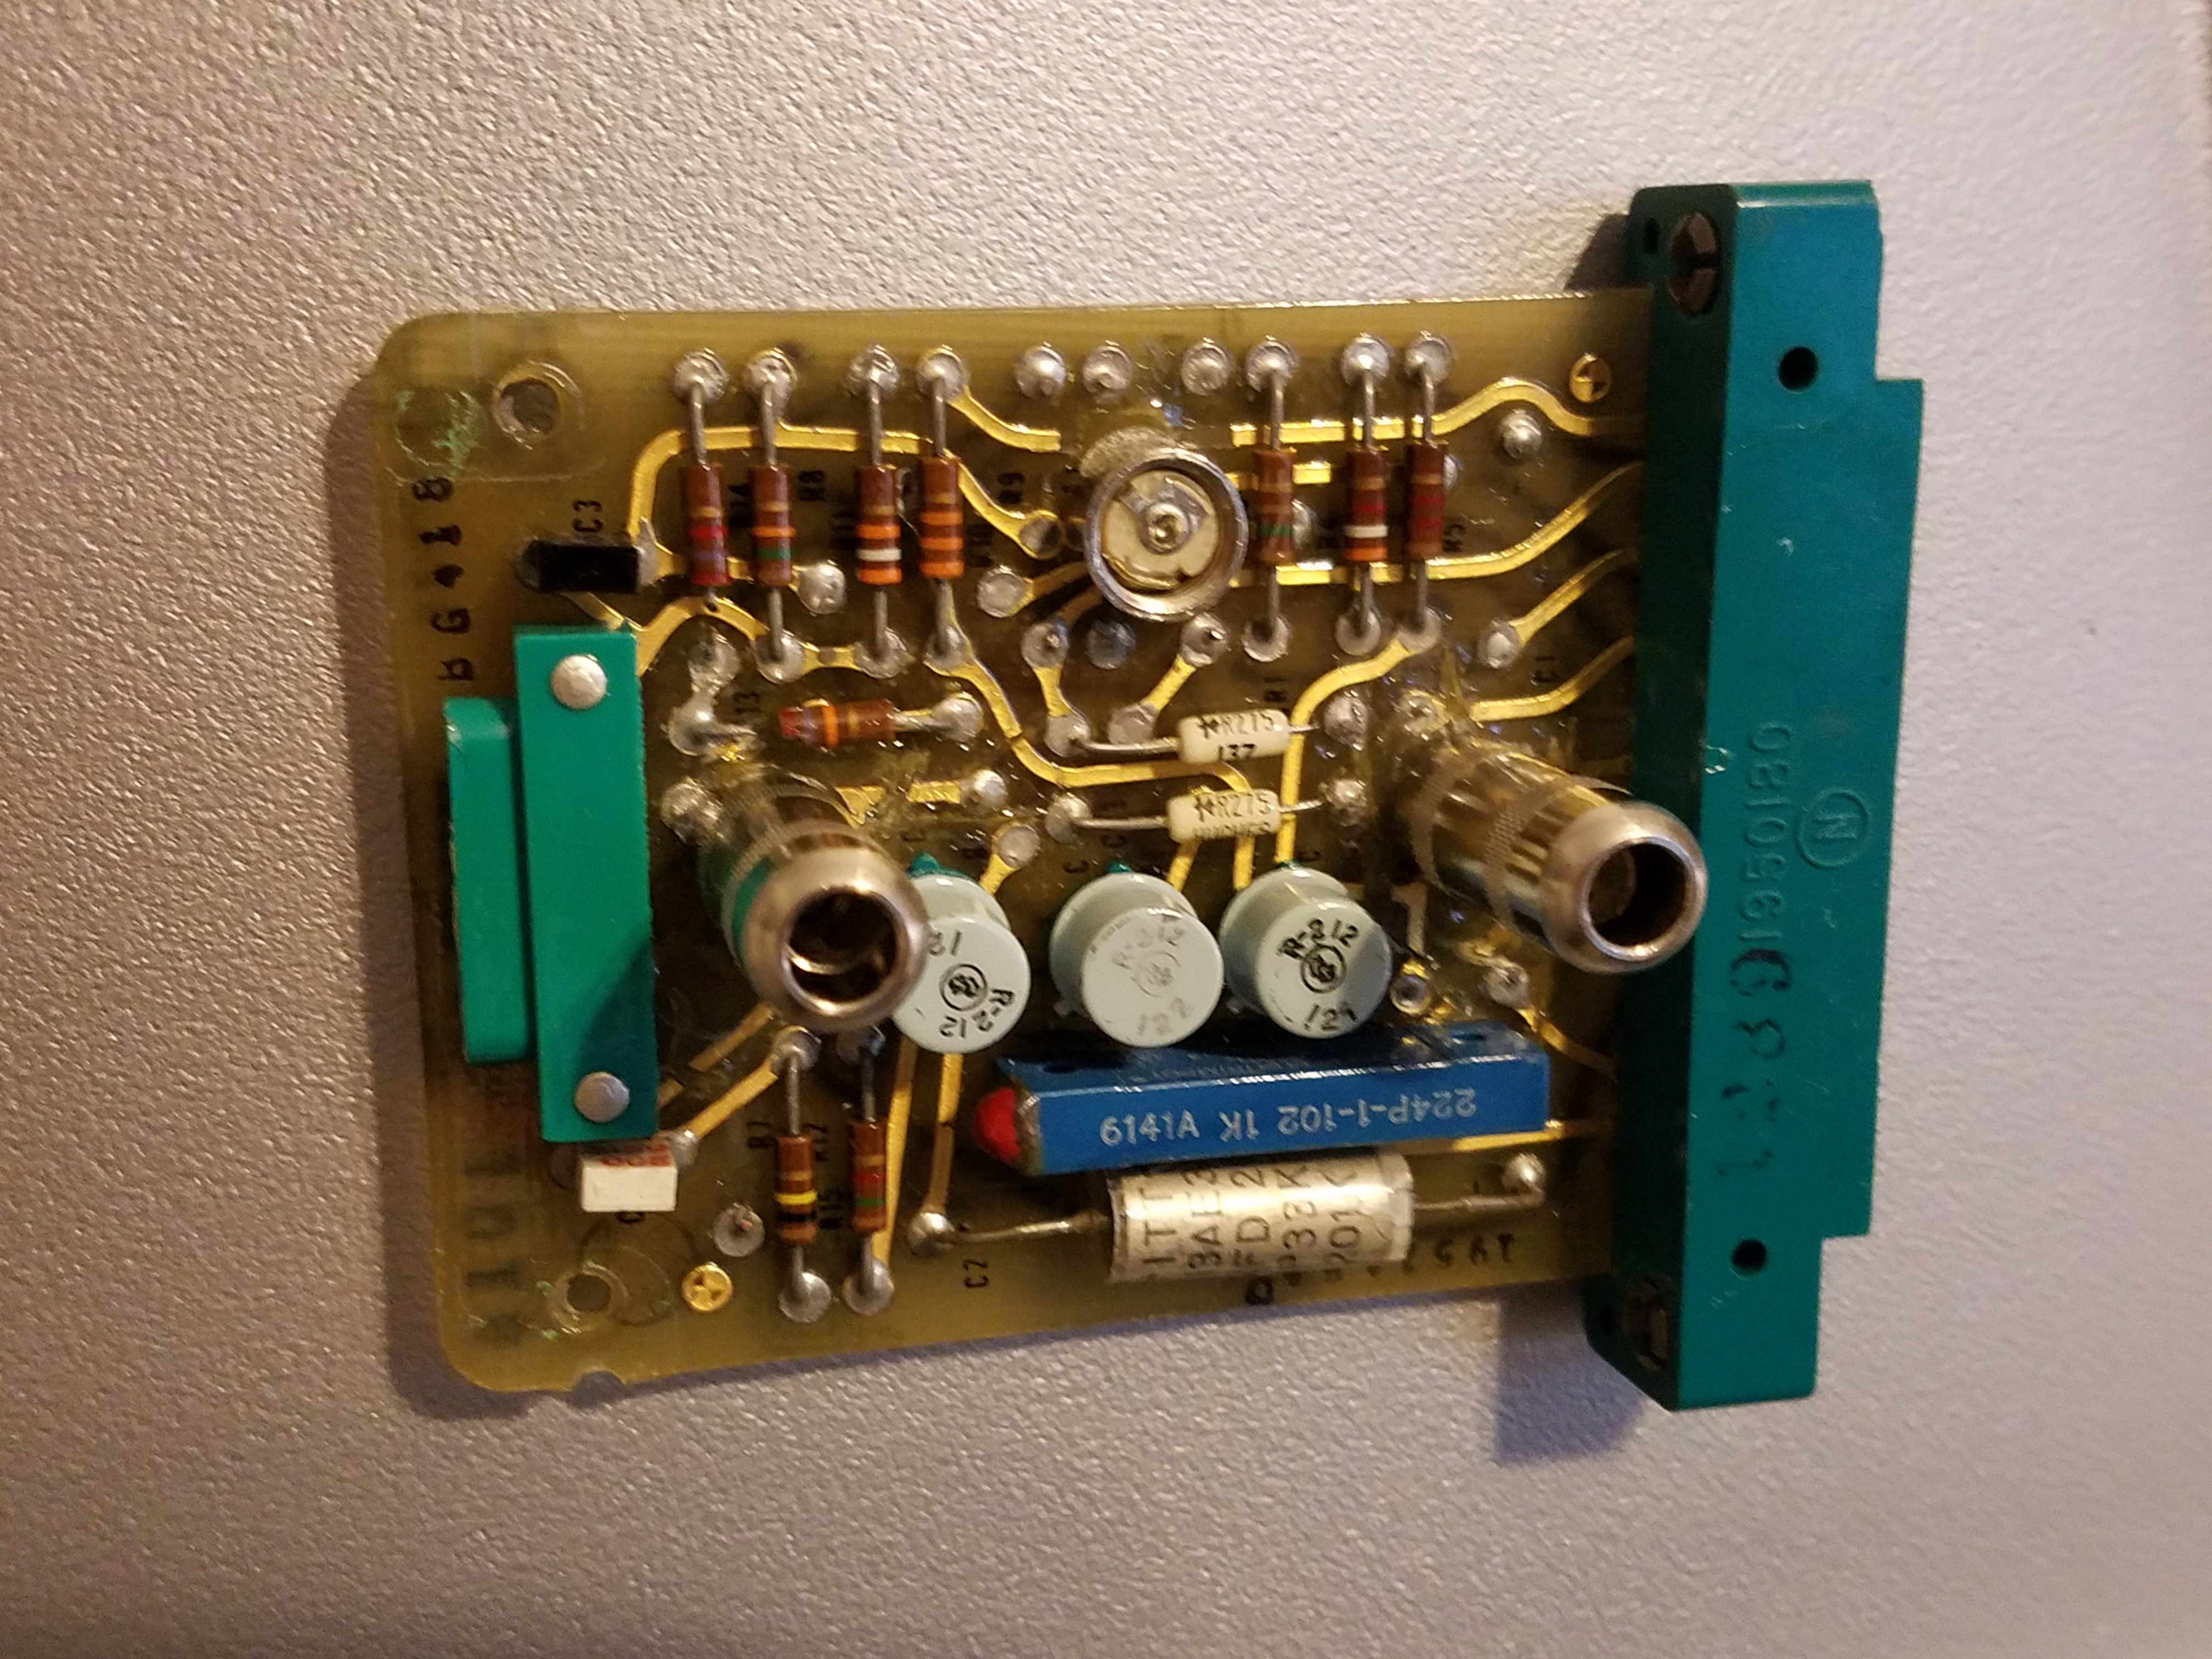
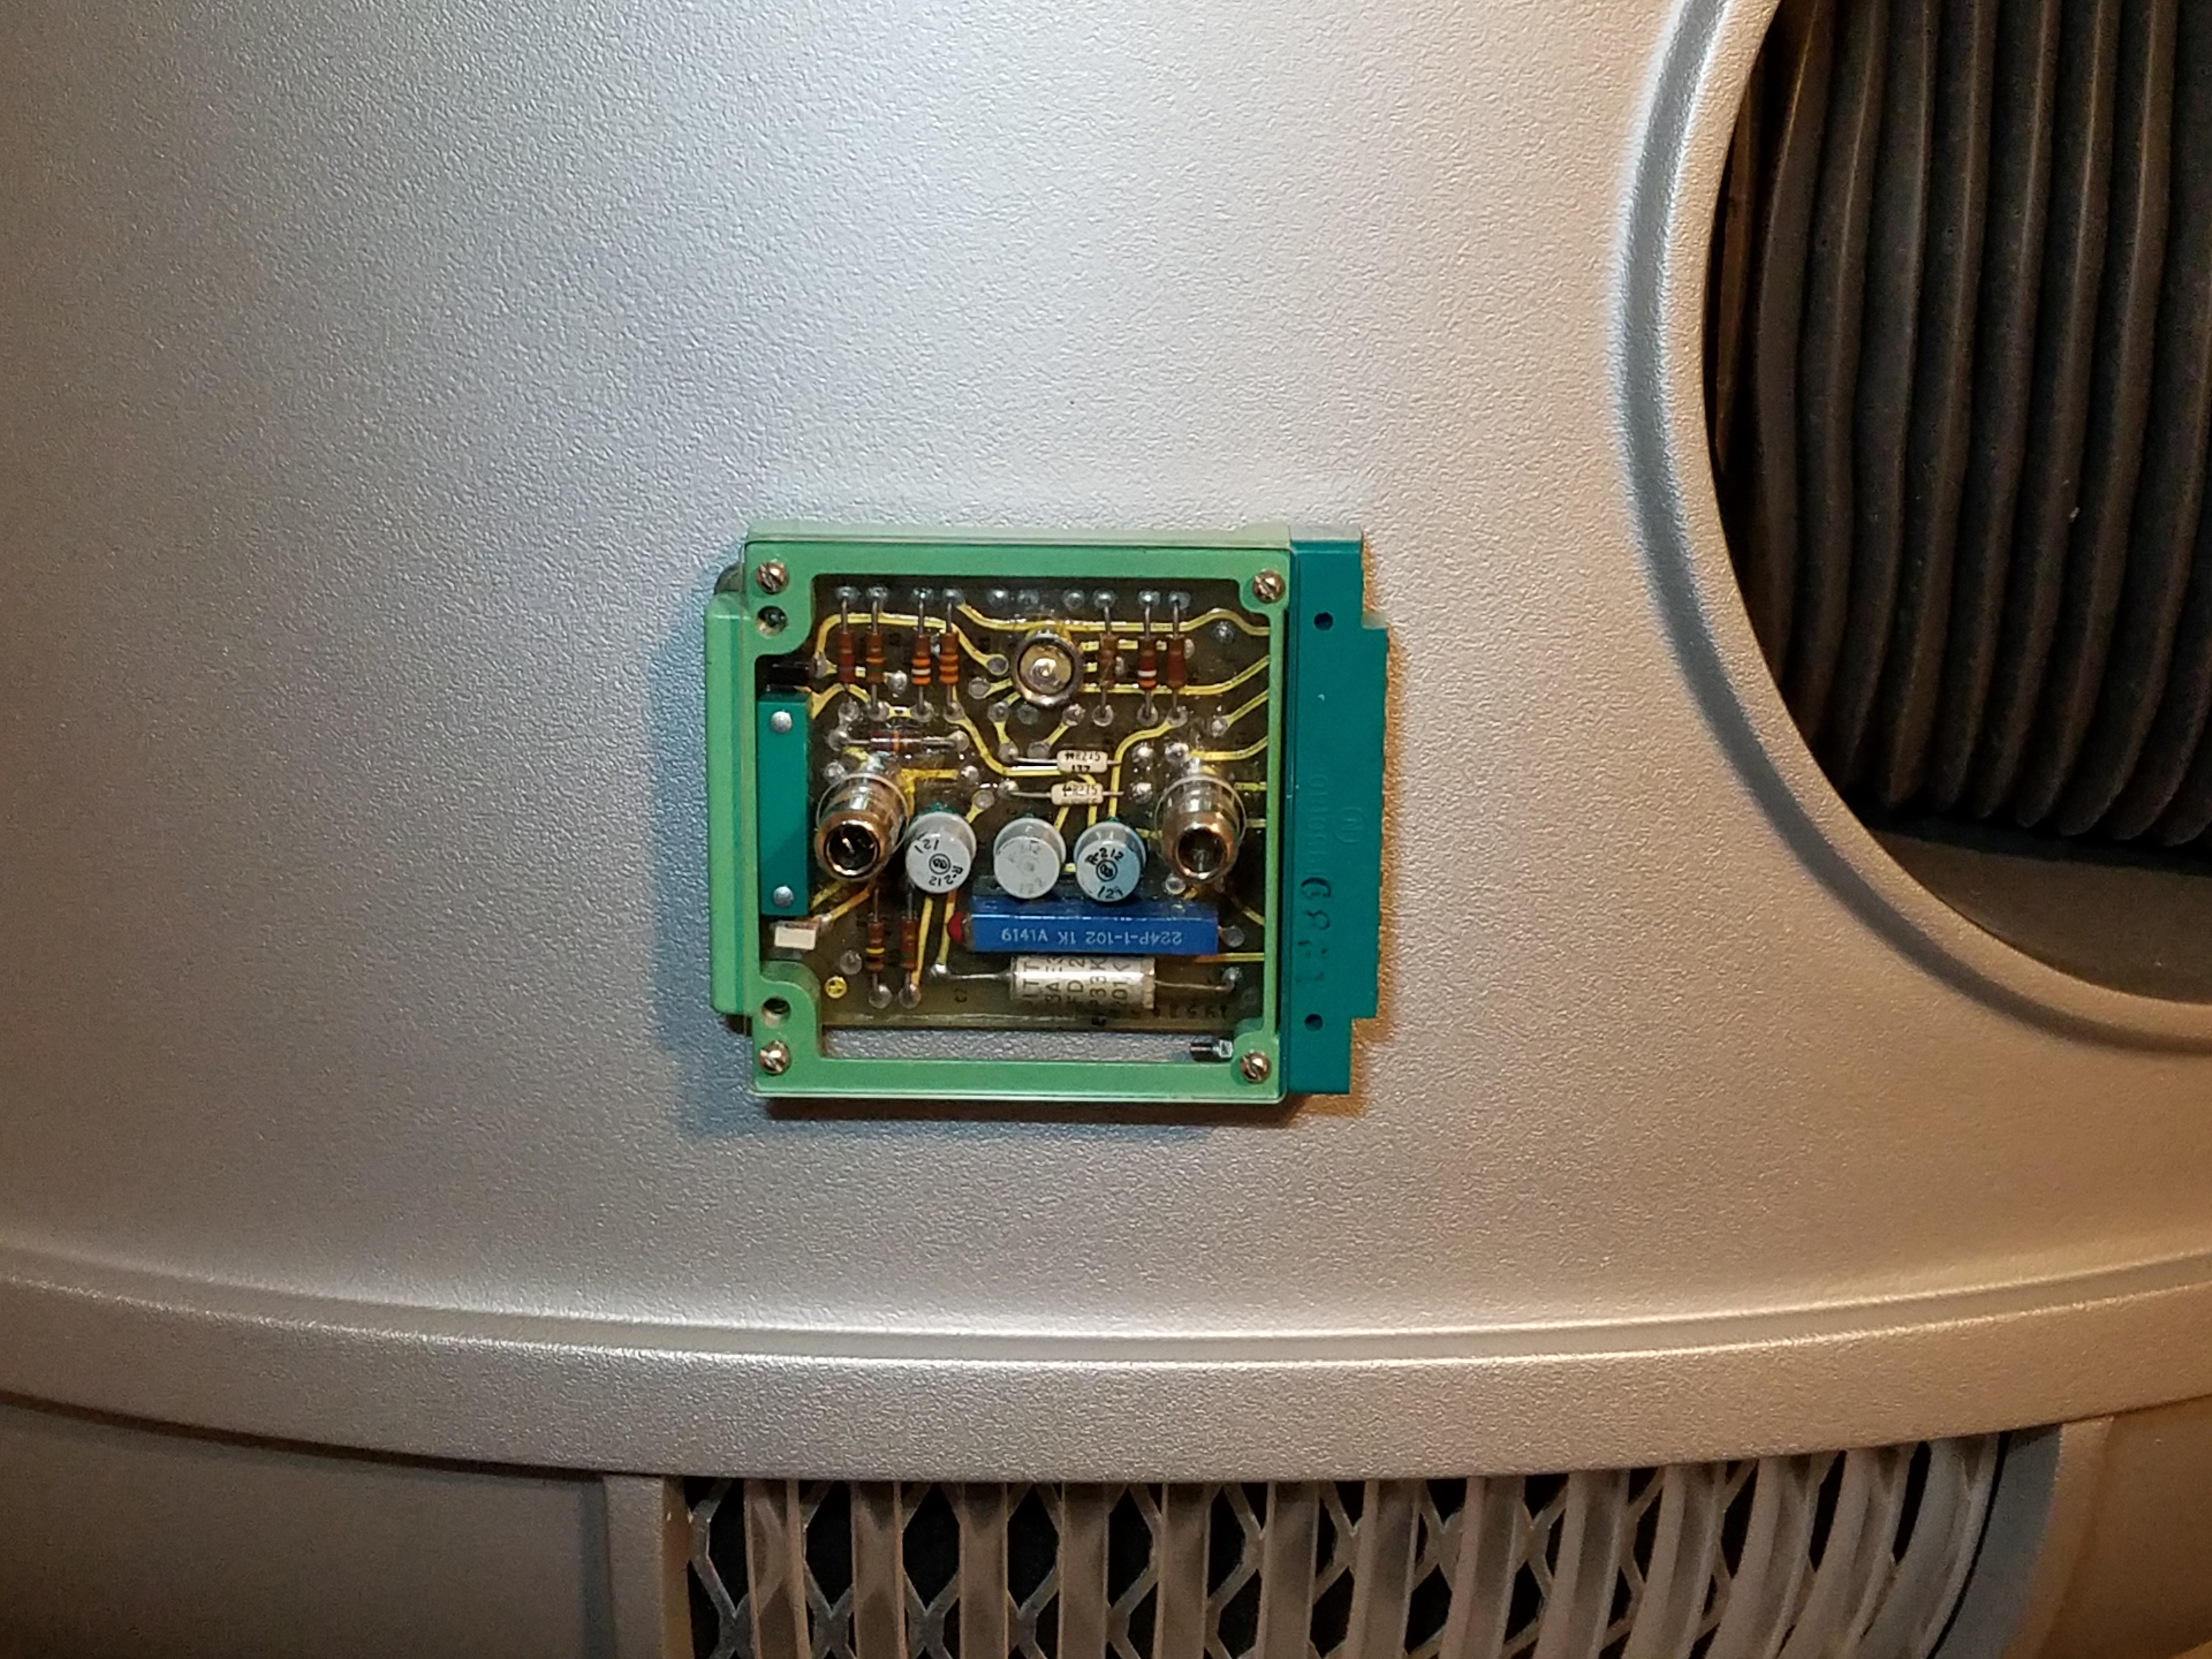
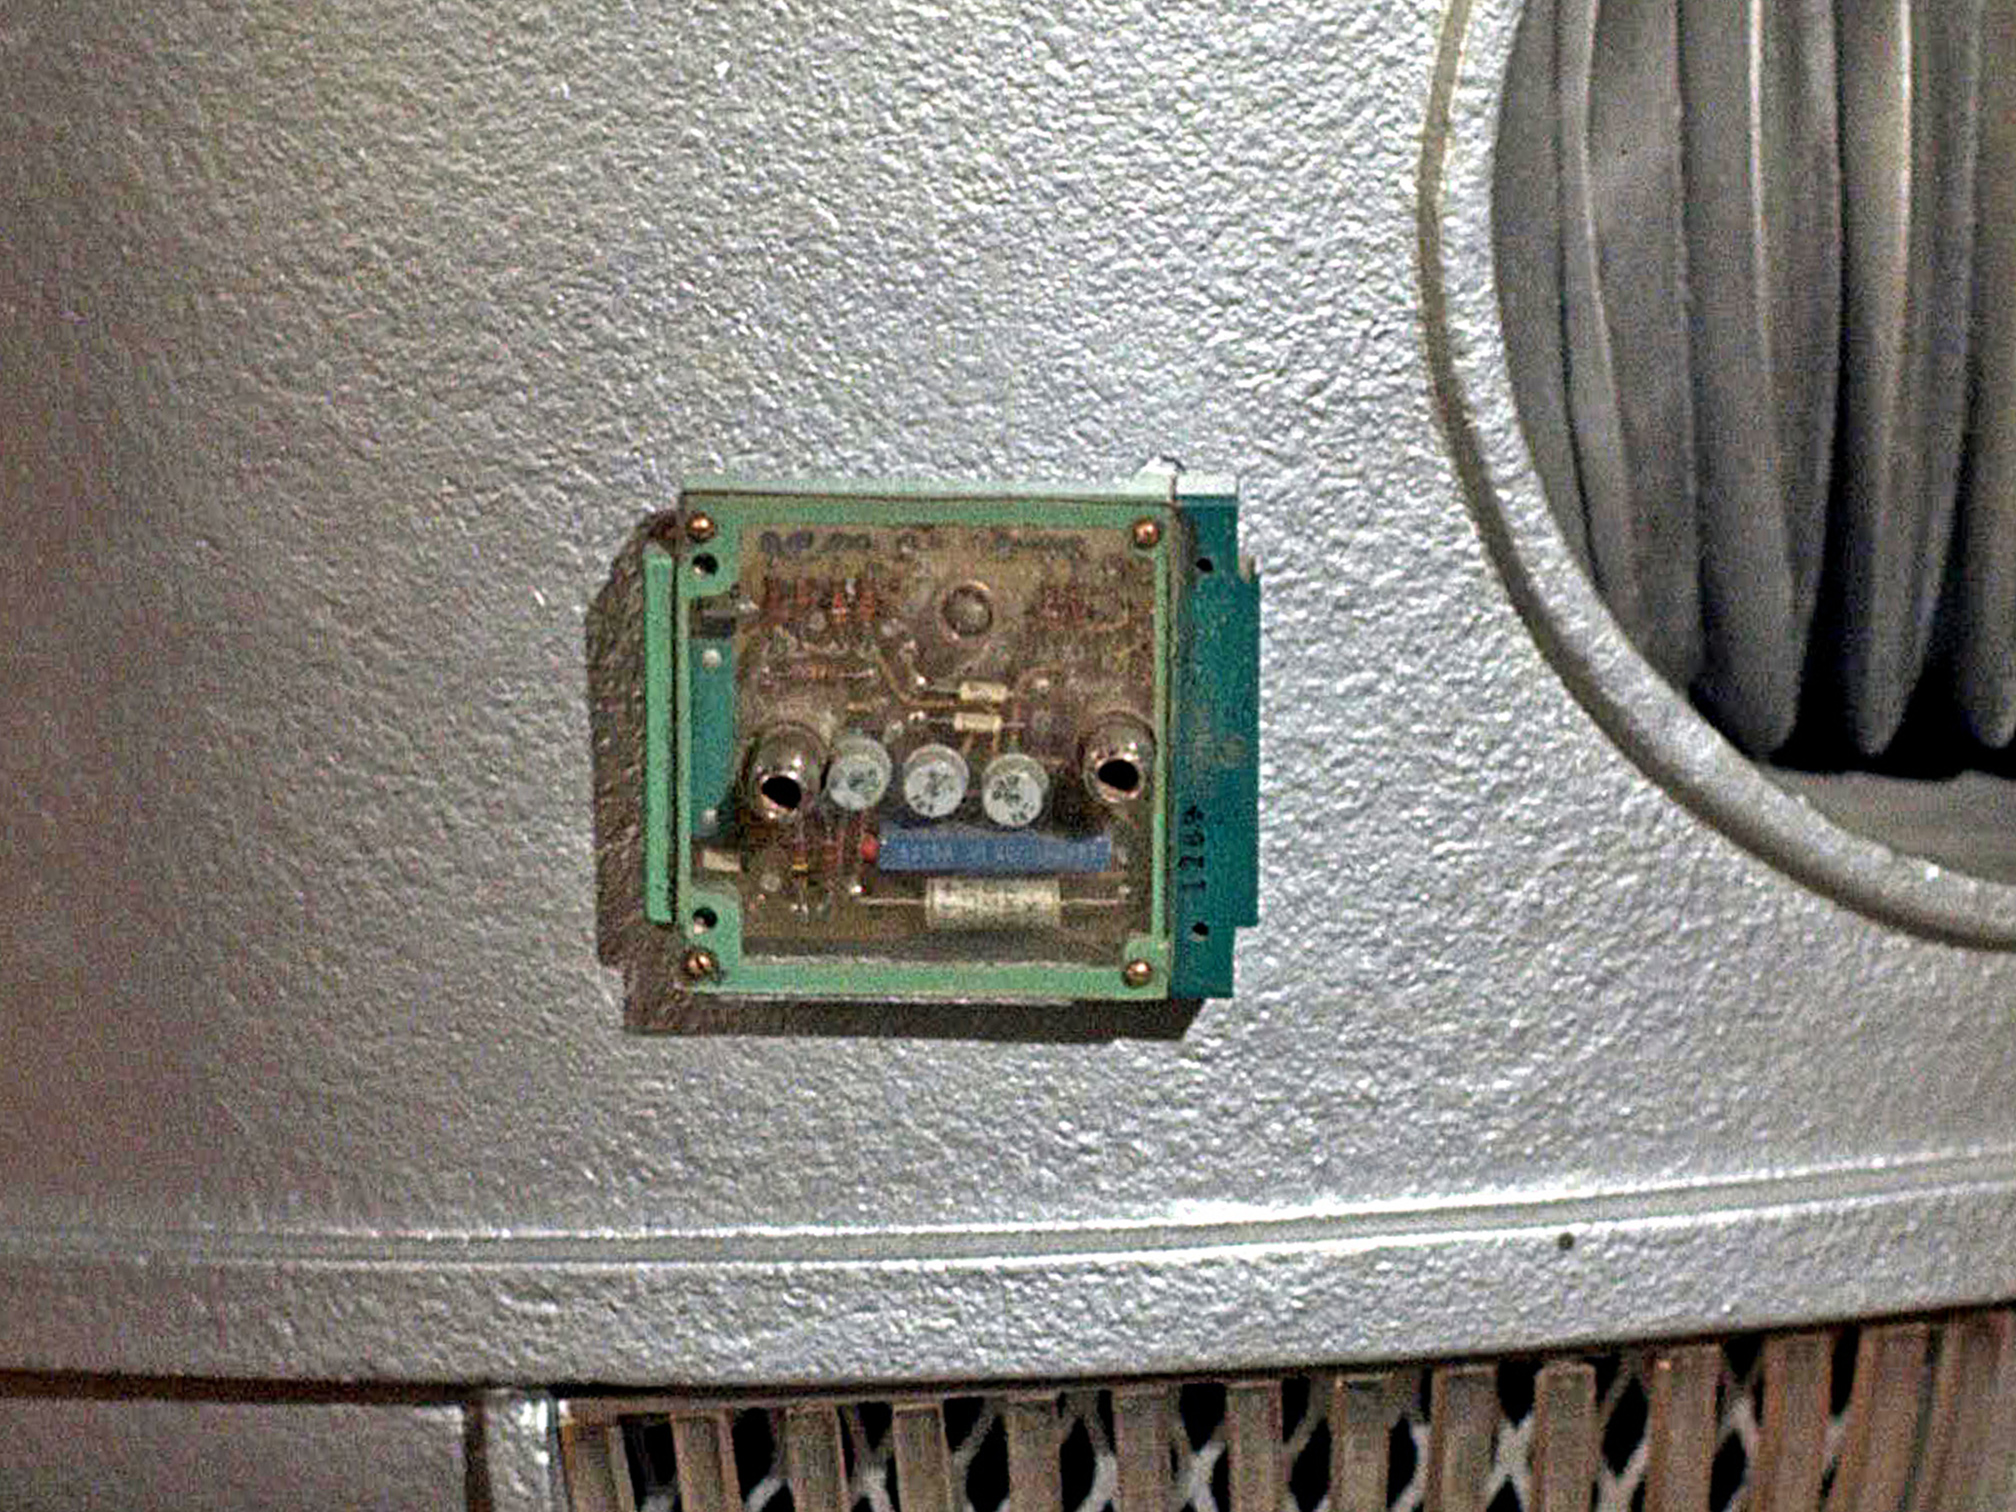
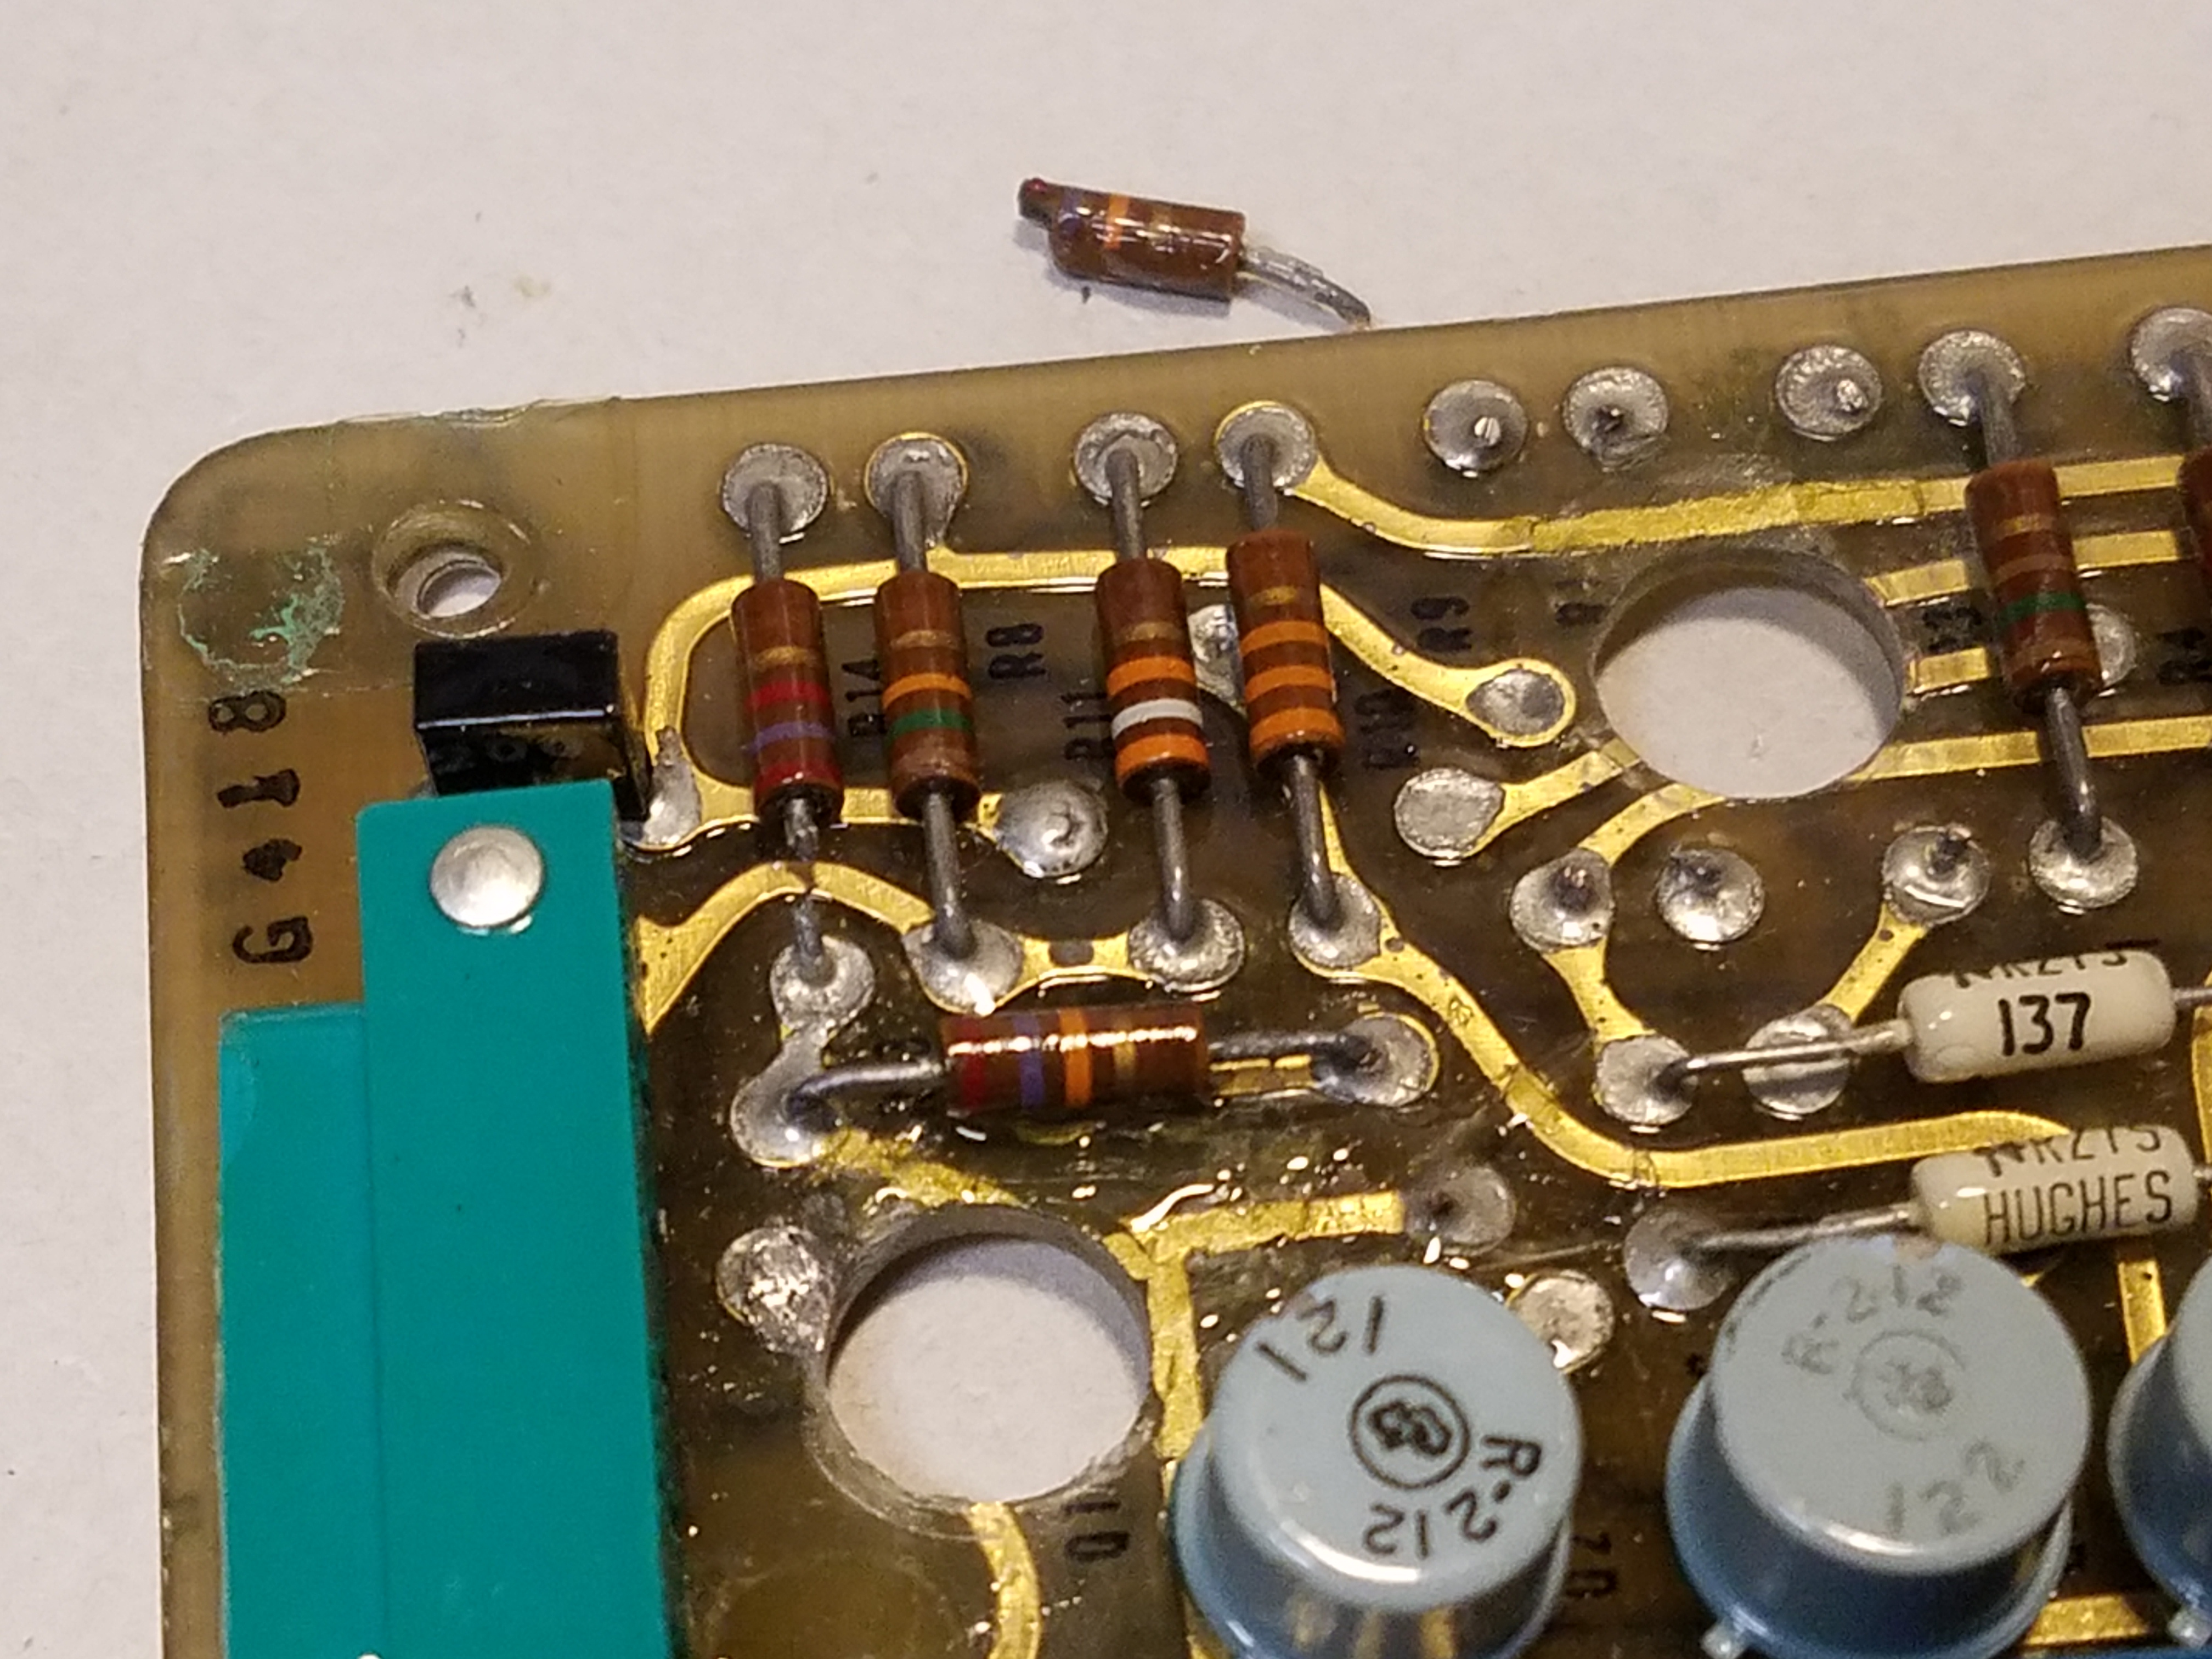
I bid and ended up winning it. Woohoo! My impossible dream had come true! Or did it.. When I received the Power Pack, I was very pleased to verify it was in fact a real Librascope card, but it had been seriously hacked up to turn it into a Power Pack. Many of the beautiful gold traces had been gauged and sliced, components inexplicably broken, many component leads cut, and a wire run from the left and right plugs. Not only that, the handles which should be the other side of the plugs were separate and there were two additional holes cut to mount the handles. The placement of the plugs and handles were also way off from our club standards. 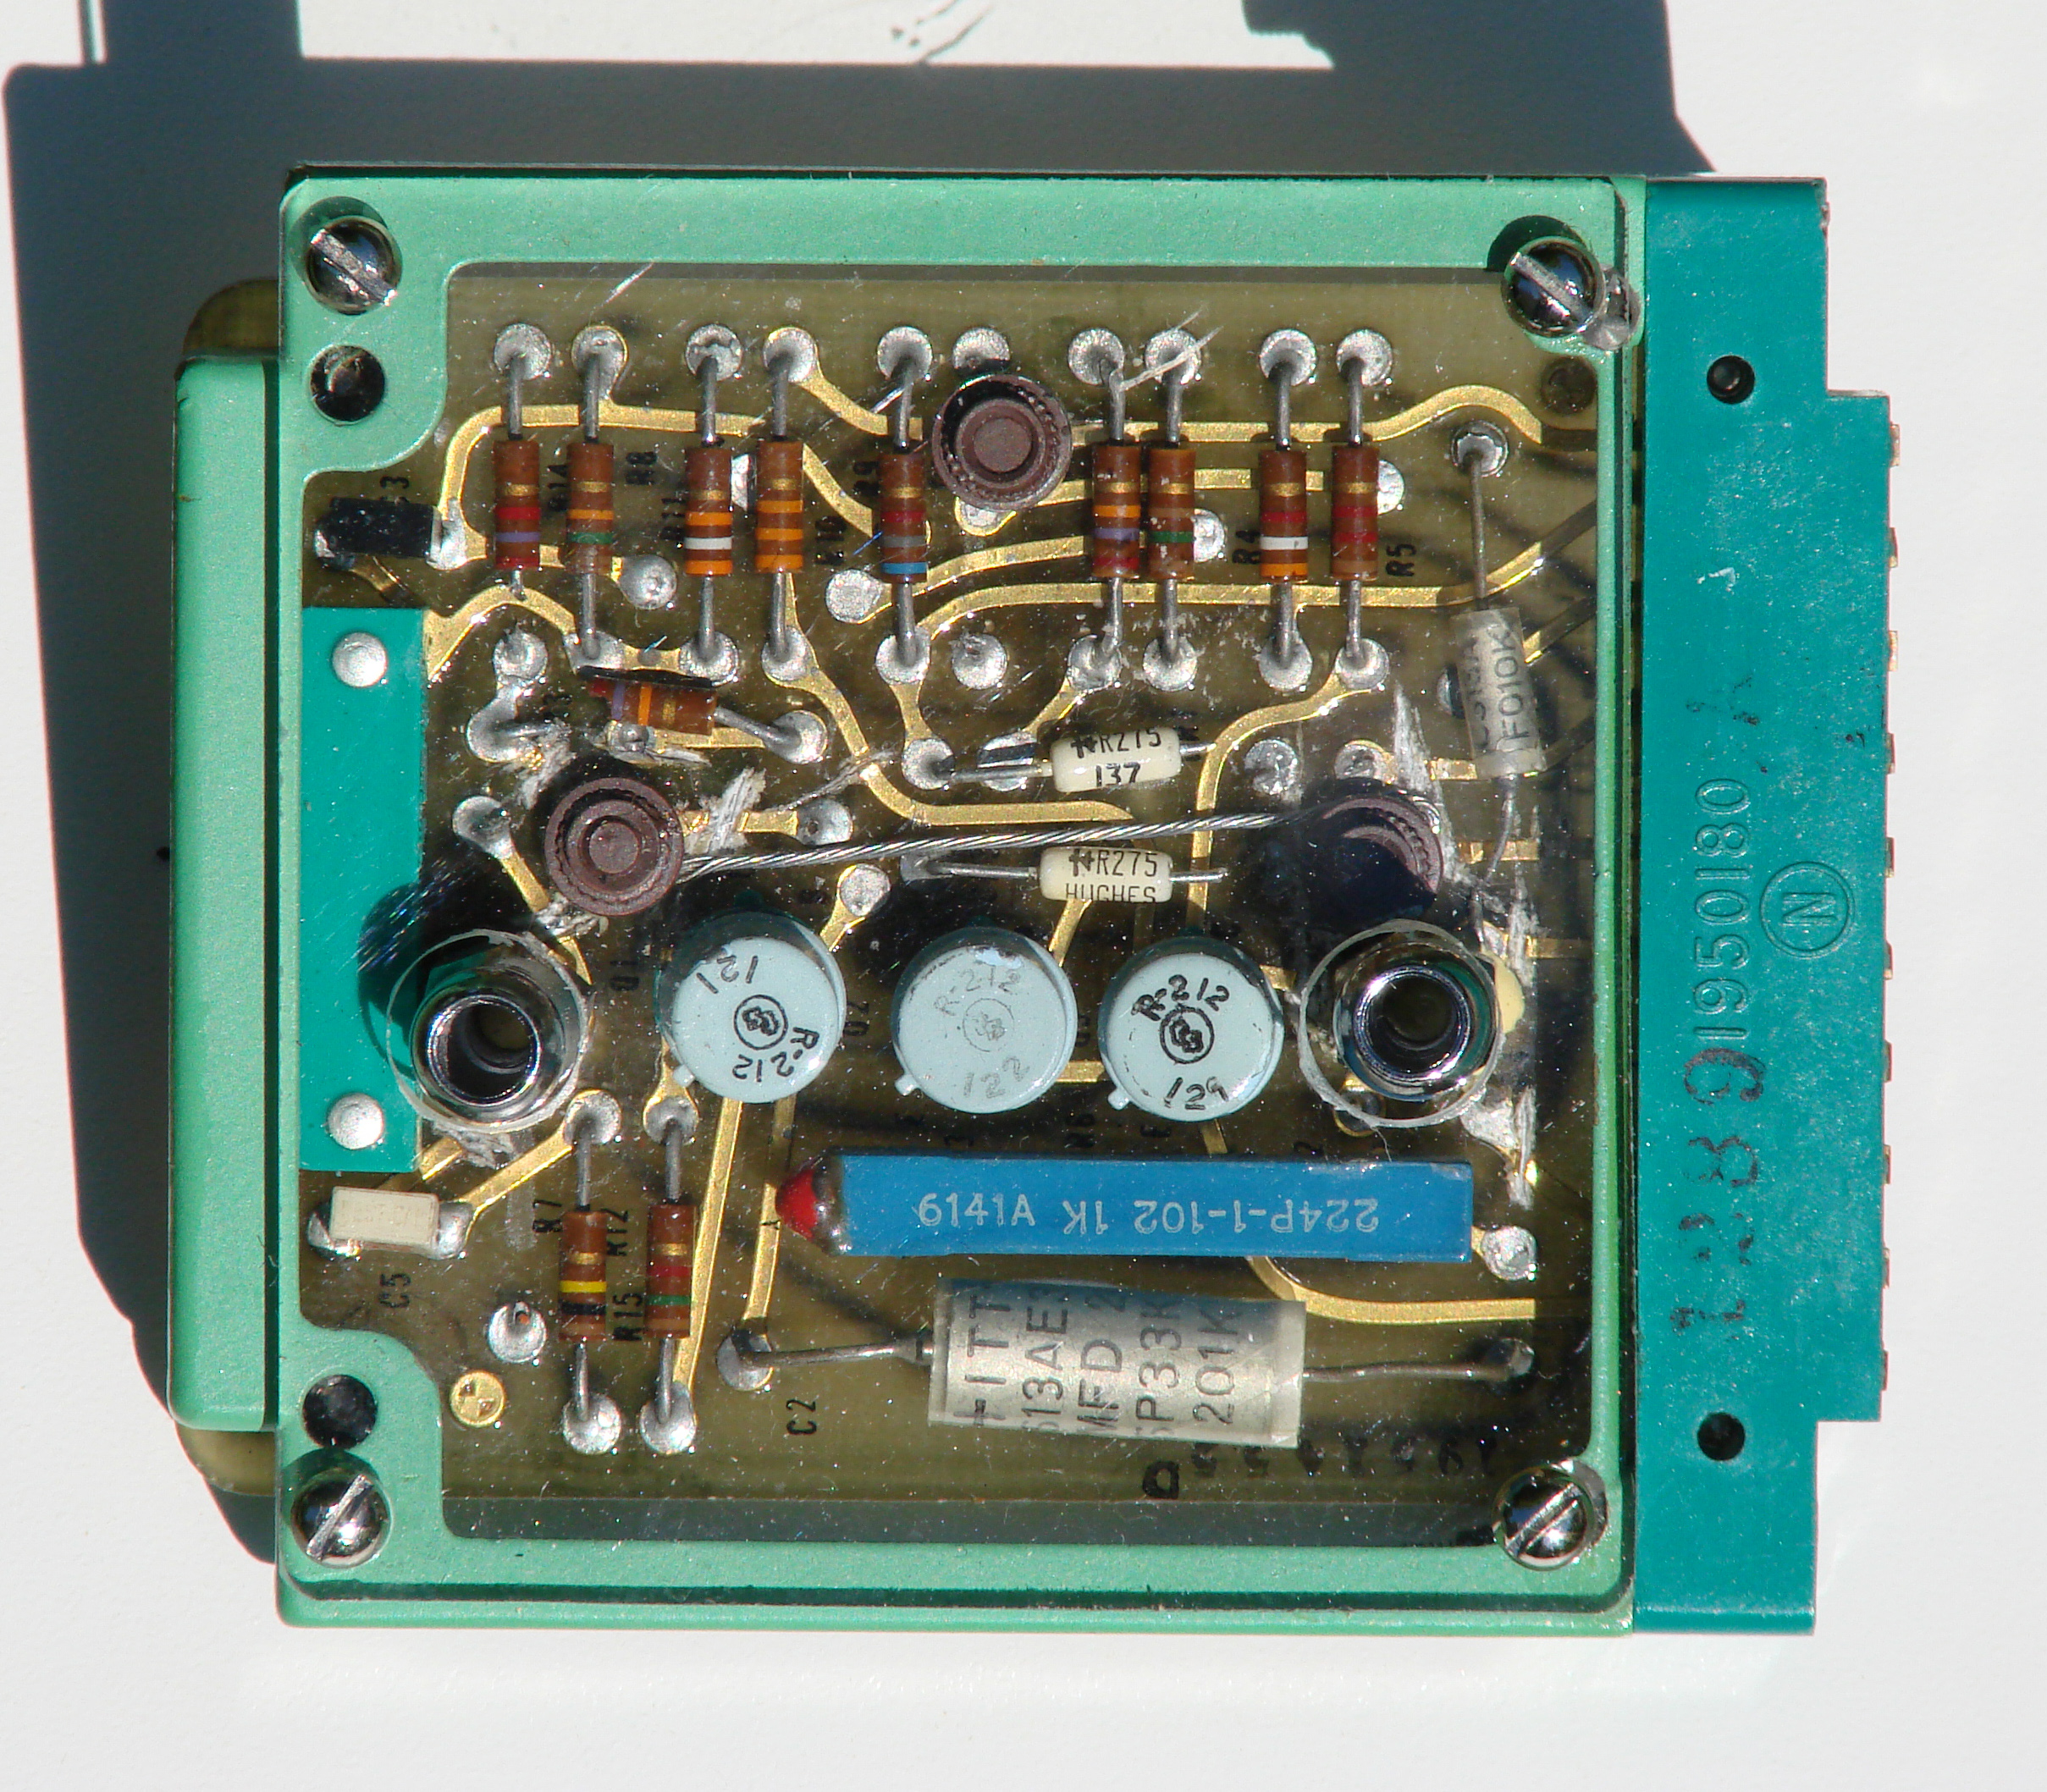
Here you can see my mark up's of the changes needing to be made to restore this back to it's original glory.
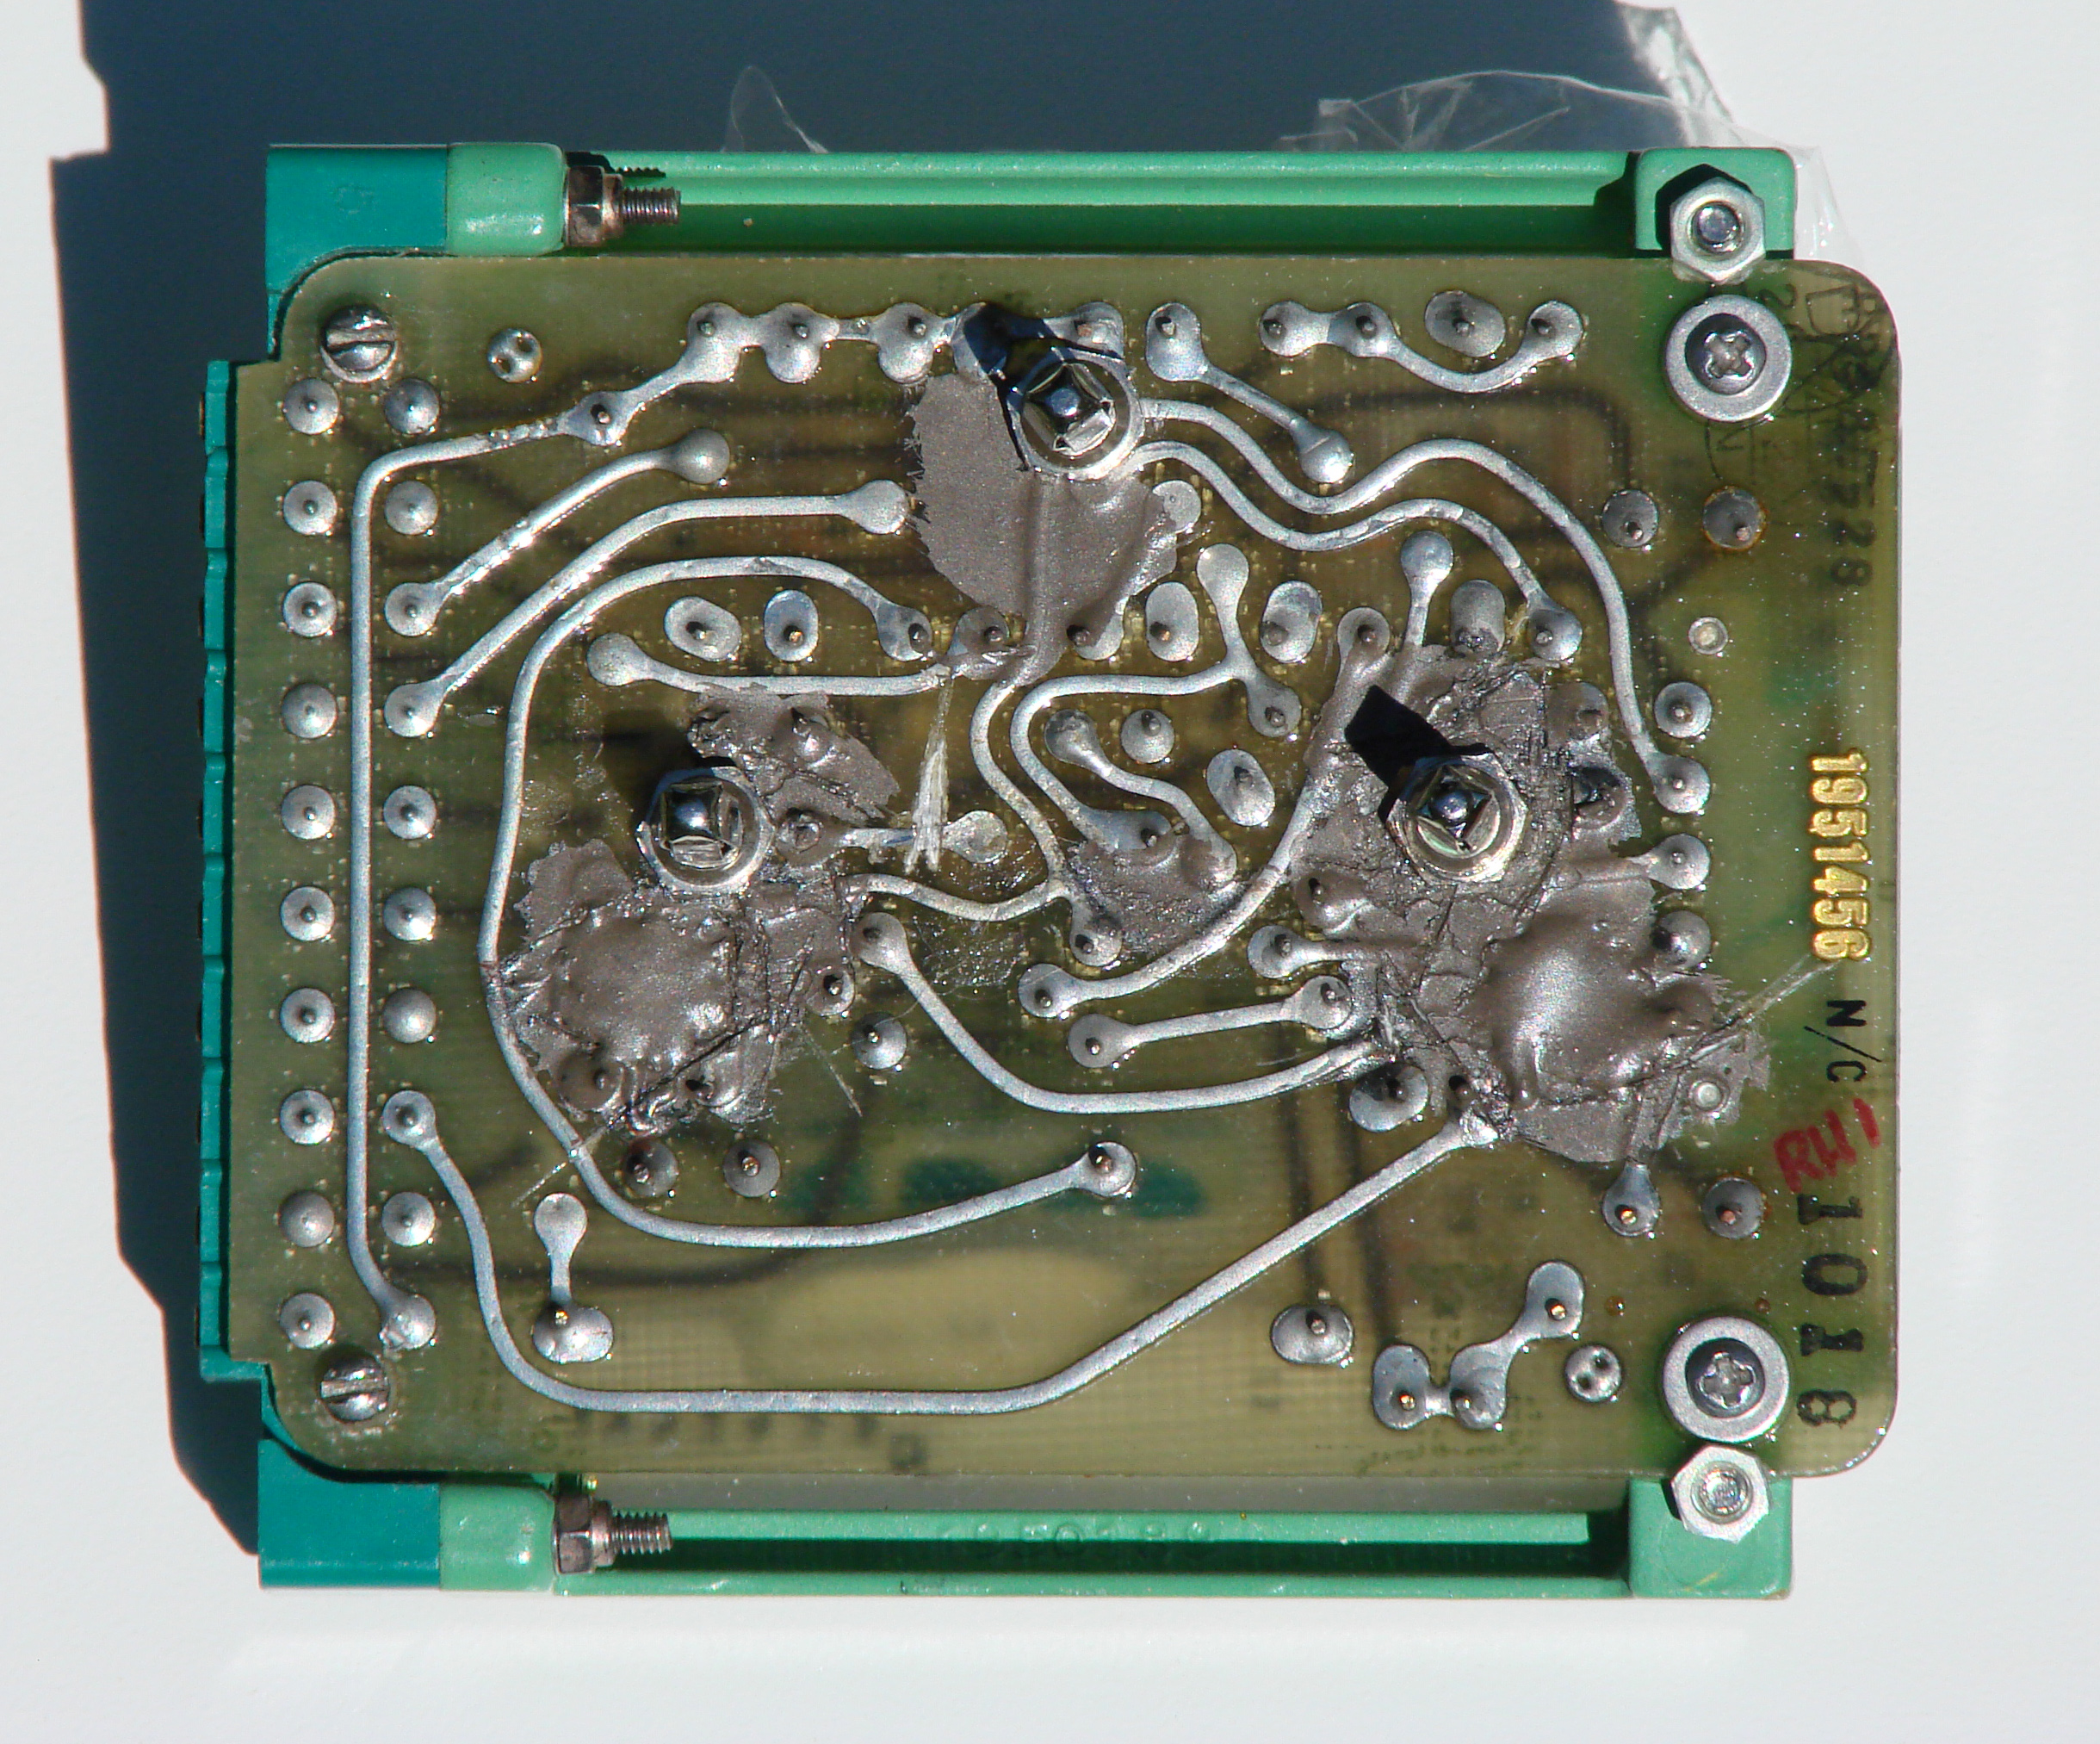
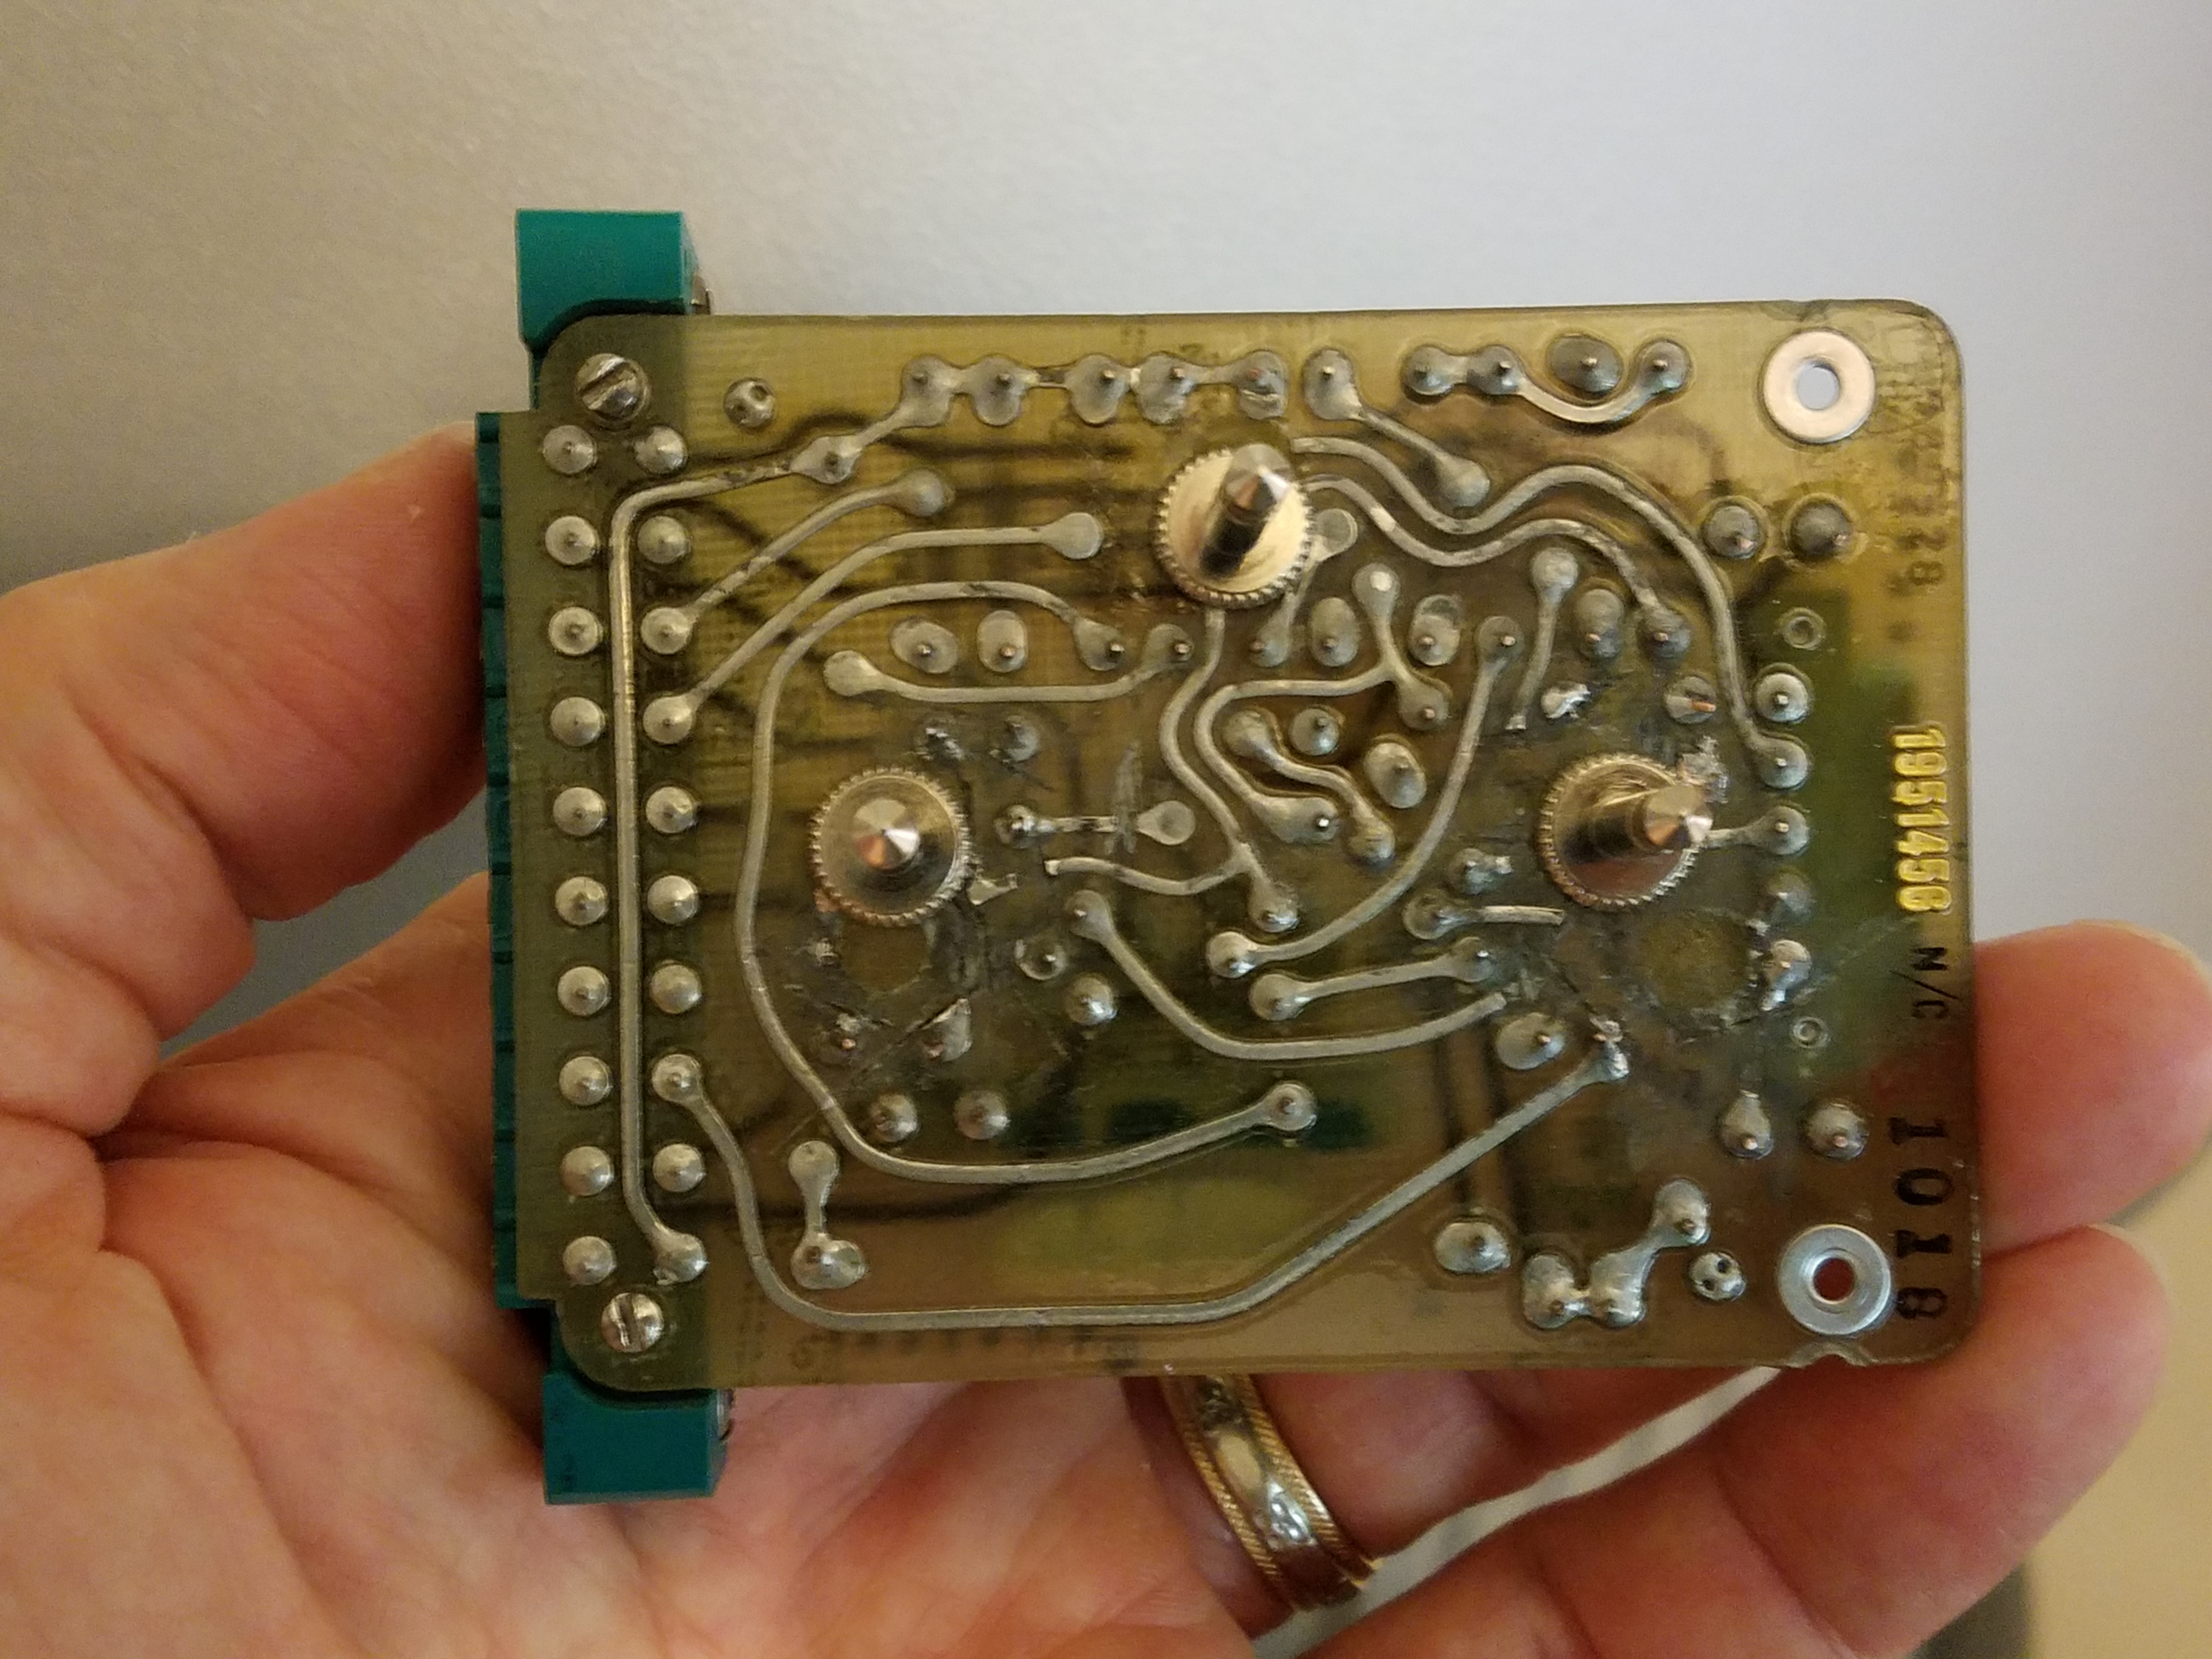
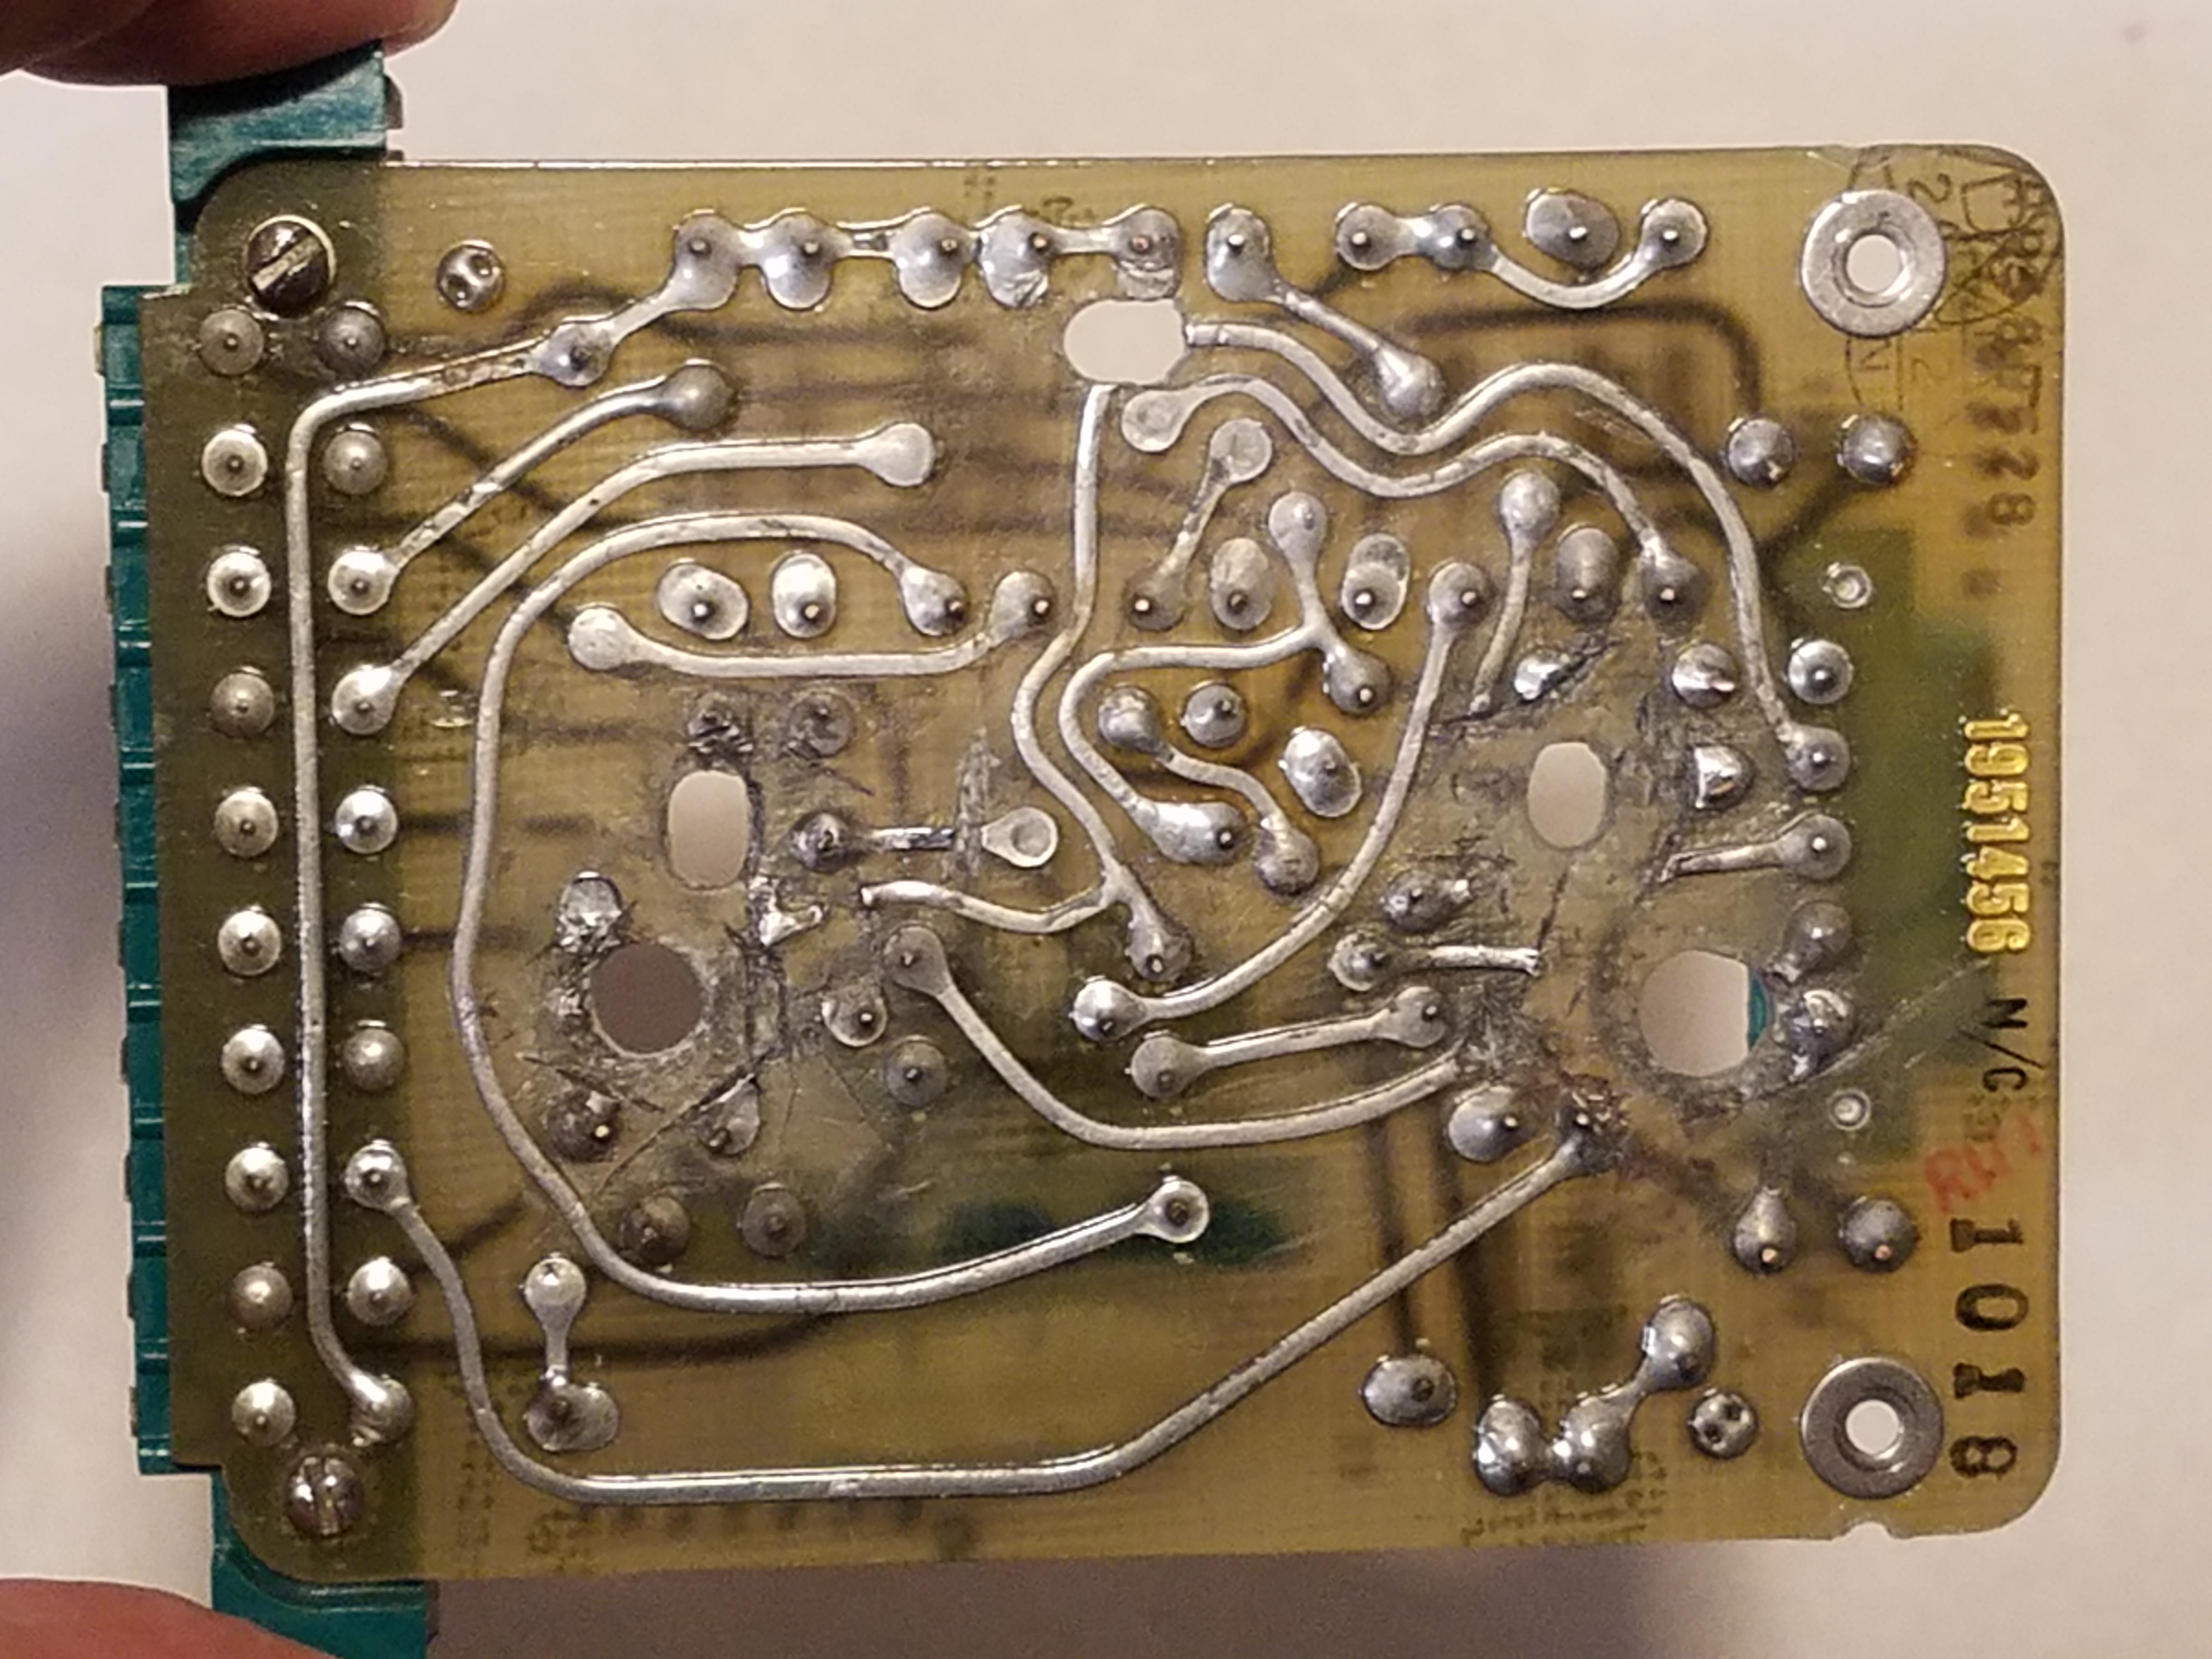
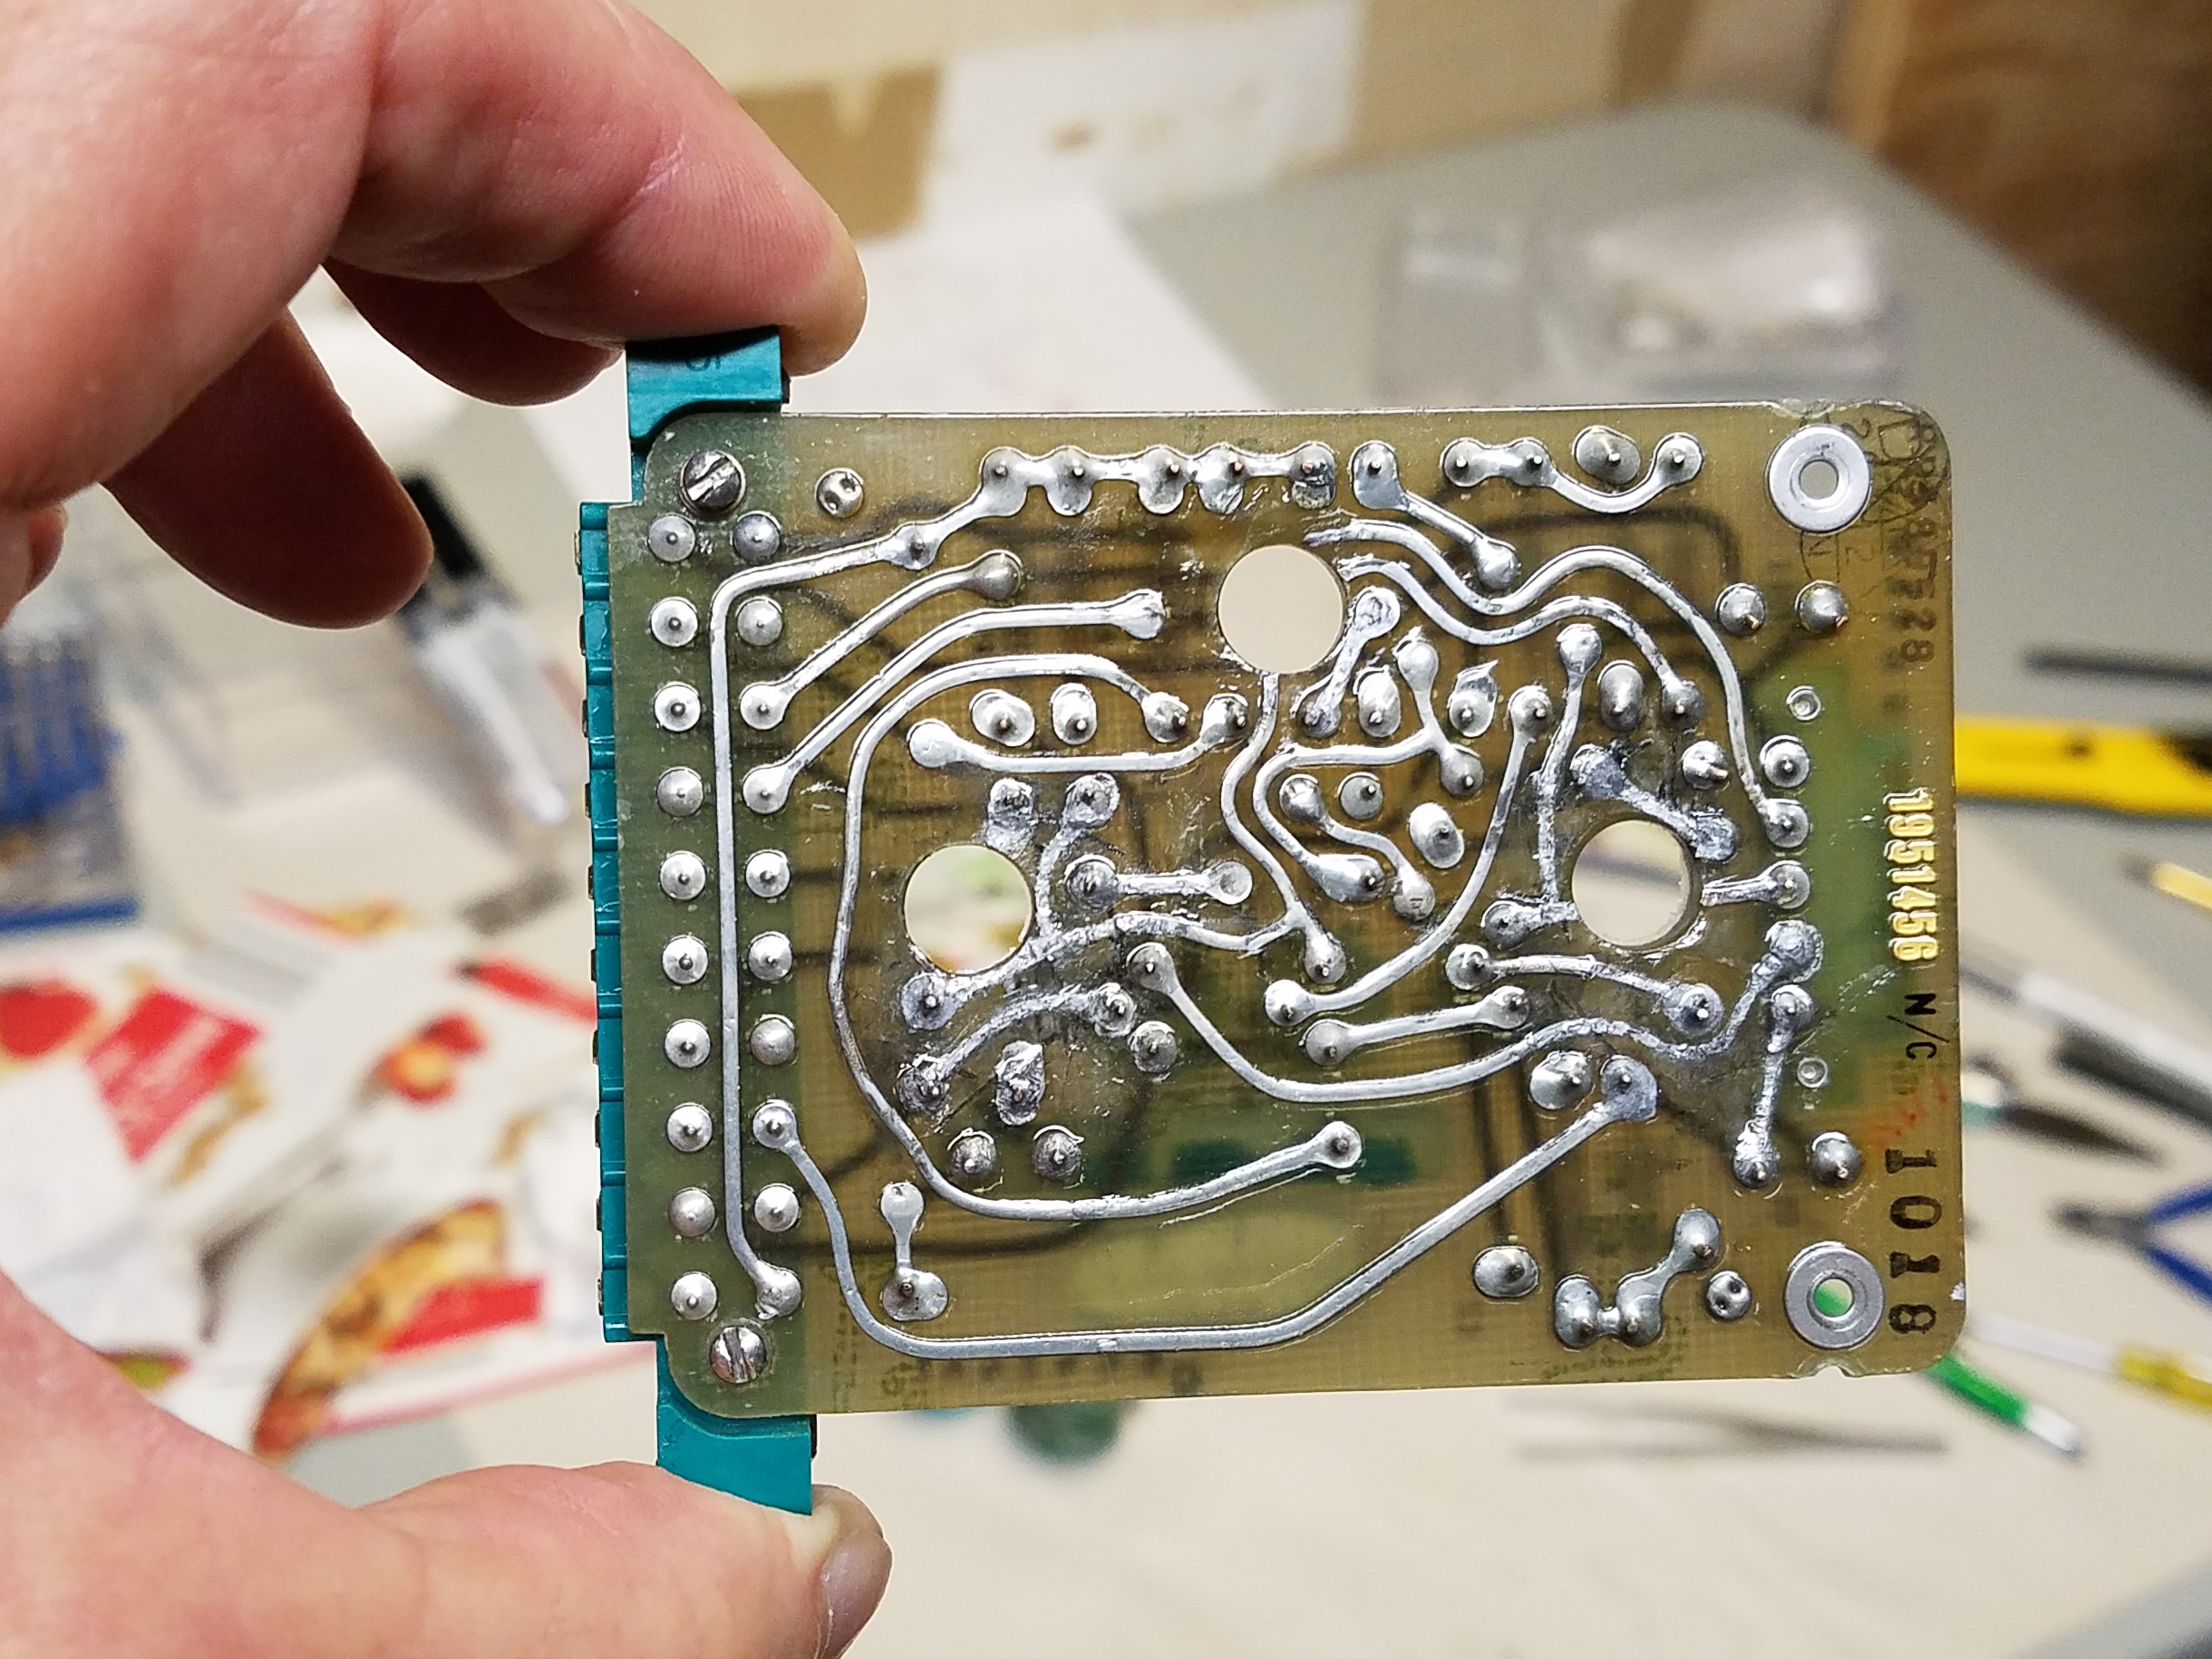
On the back side, gray epoxy had been smeared all over covering a considerable amount of the board, I guess to help hold in the "handles" And one of the worst things... the precious frame had holes mis-drilled much too large where the clear cover was screwed in. ARG!
I was happy to have this rare piece, but I didn't see anyway to turn it into an accurate Power Pack for my robot. It would just be a novelty. So it went back in the box, and sat on a shelf... for six years.
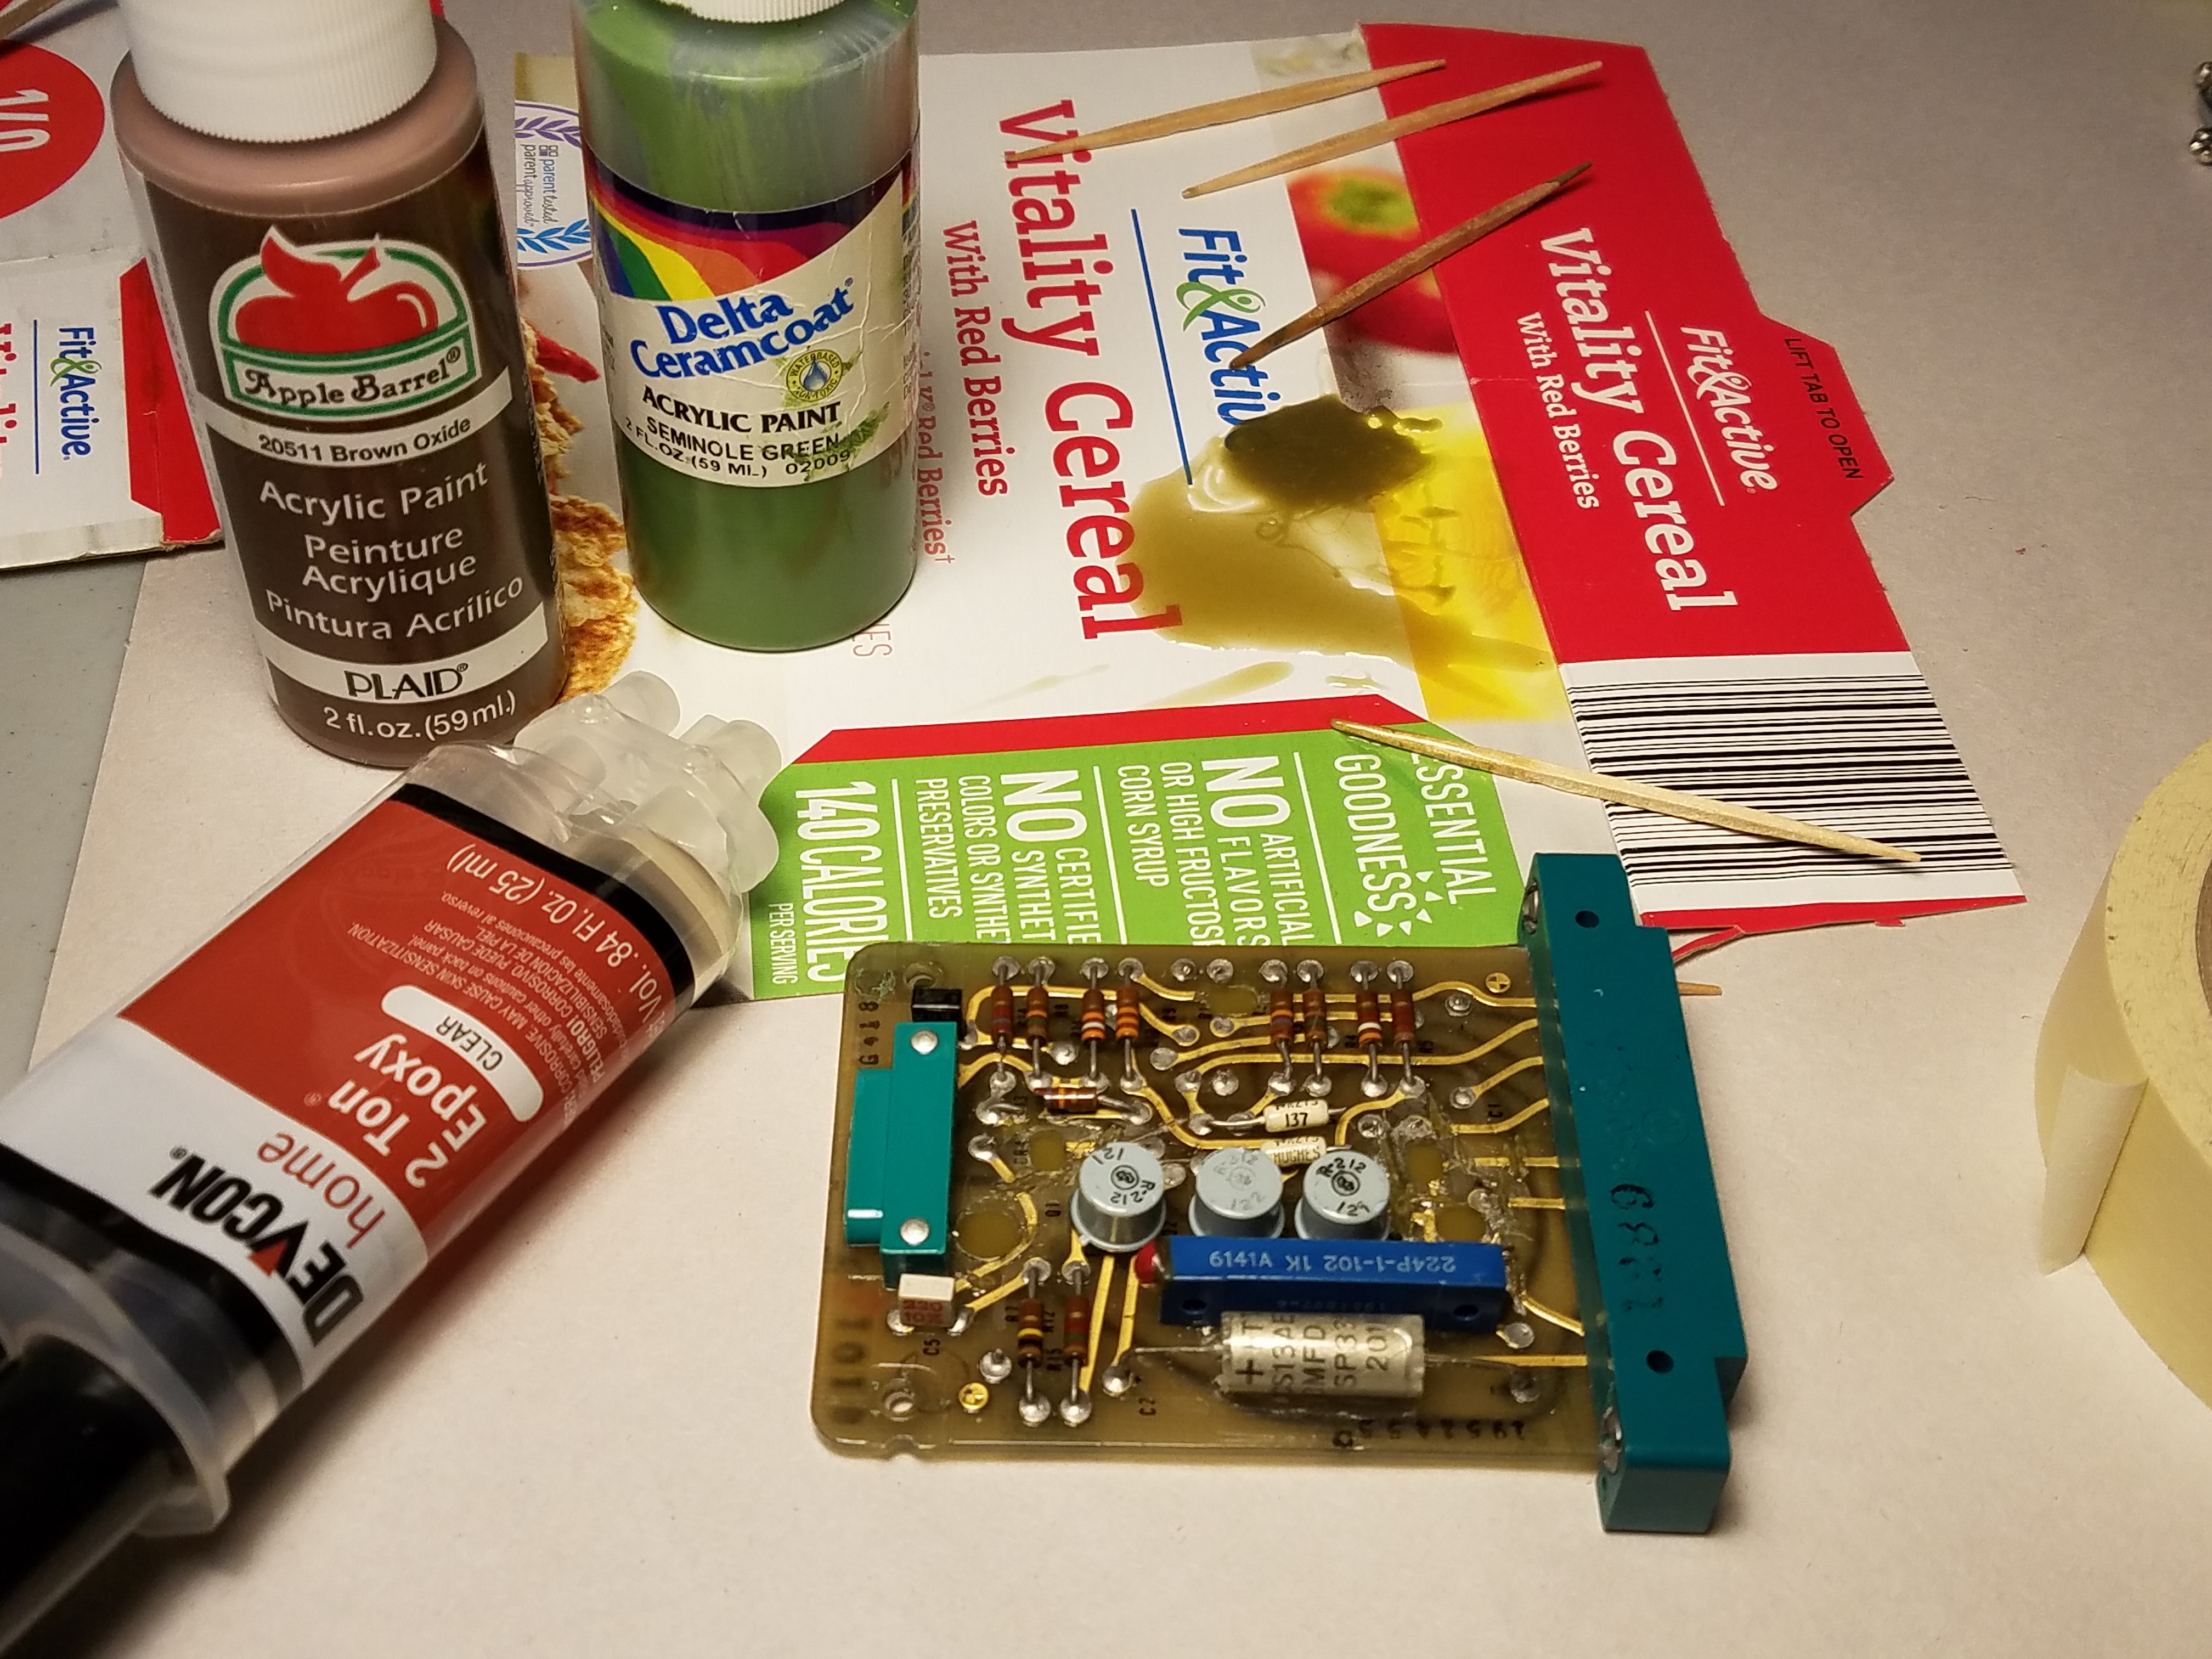
However, during those six years I thought a lot about it. Surely there had to be a way to restore this thing, but perhaps the biggest obstacle was all the holes in the board in wrong places meaning that the material in those spots was just gone. The board is made of a greenish brown translucent PCB material. How do you repair that? One day an idea popped into my head. What if I took some clear epoxy and mixed in a little acrylic paint to try to achieve the same color and translucency? Would the epoxy even cure right mixed with acrylic paint? I did a test, and to my surprise, it worked beautifully! The epoxy cured nice and strong! Who-da thought? So, I stripped down the Power Pack and removed the board. I first needed to try and clean the gray epoxy off the back side of the board which I did with a razorblade, chipping it off a tiny bit at a time. Hours and hours later I had it pretty cleaned off. I also used a Dremel with the little wire brush to do some final cleaning. It wasn't perfect but was significantly better than it was and revealed a lot of previously covered up details. 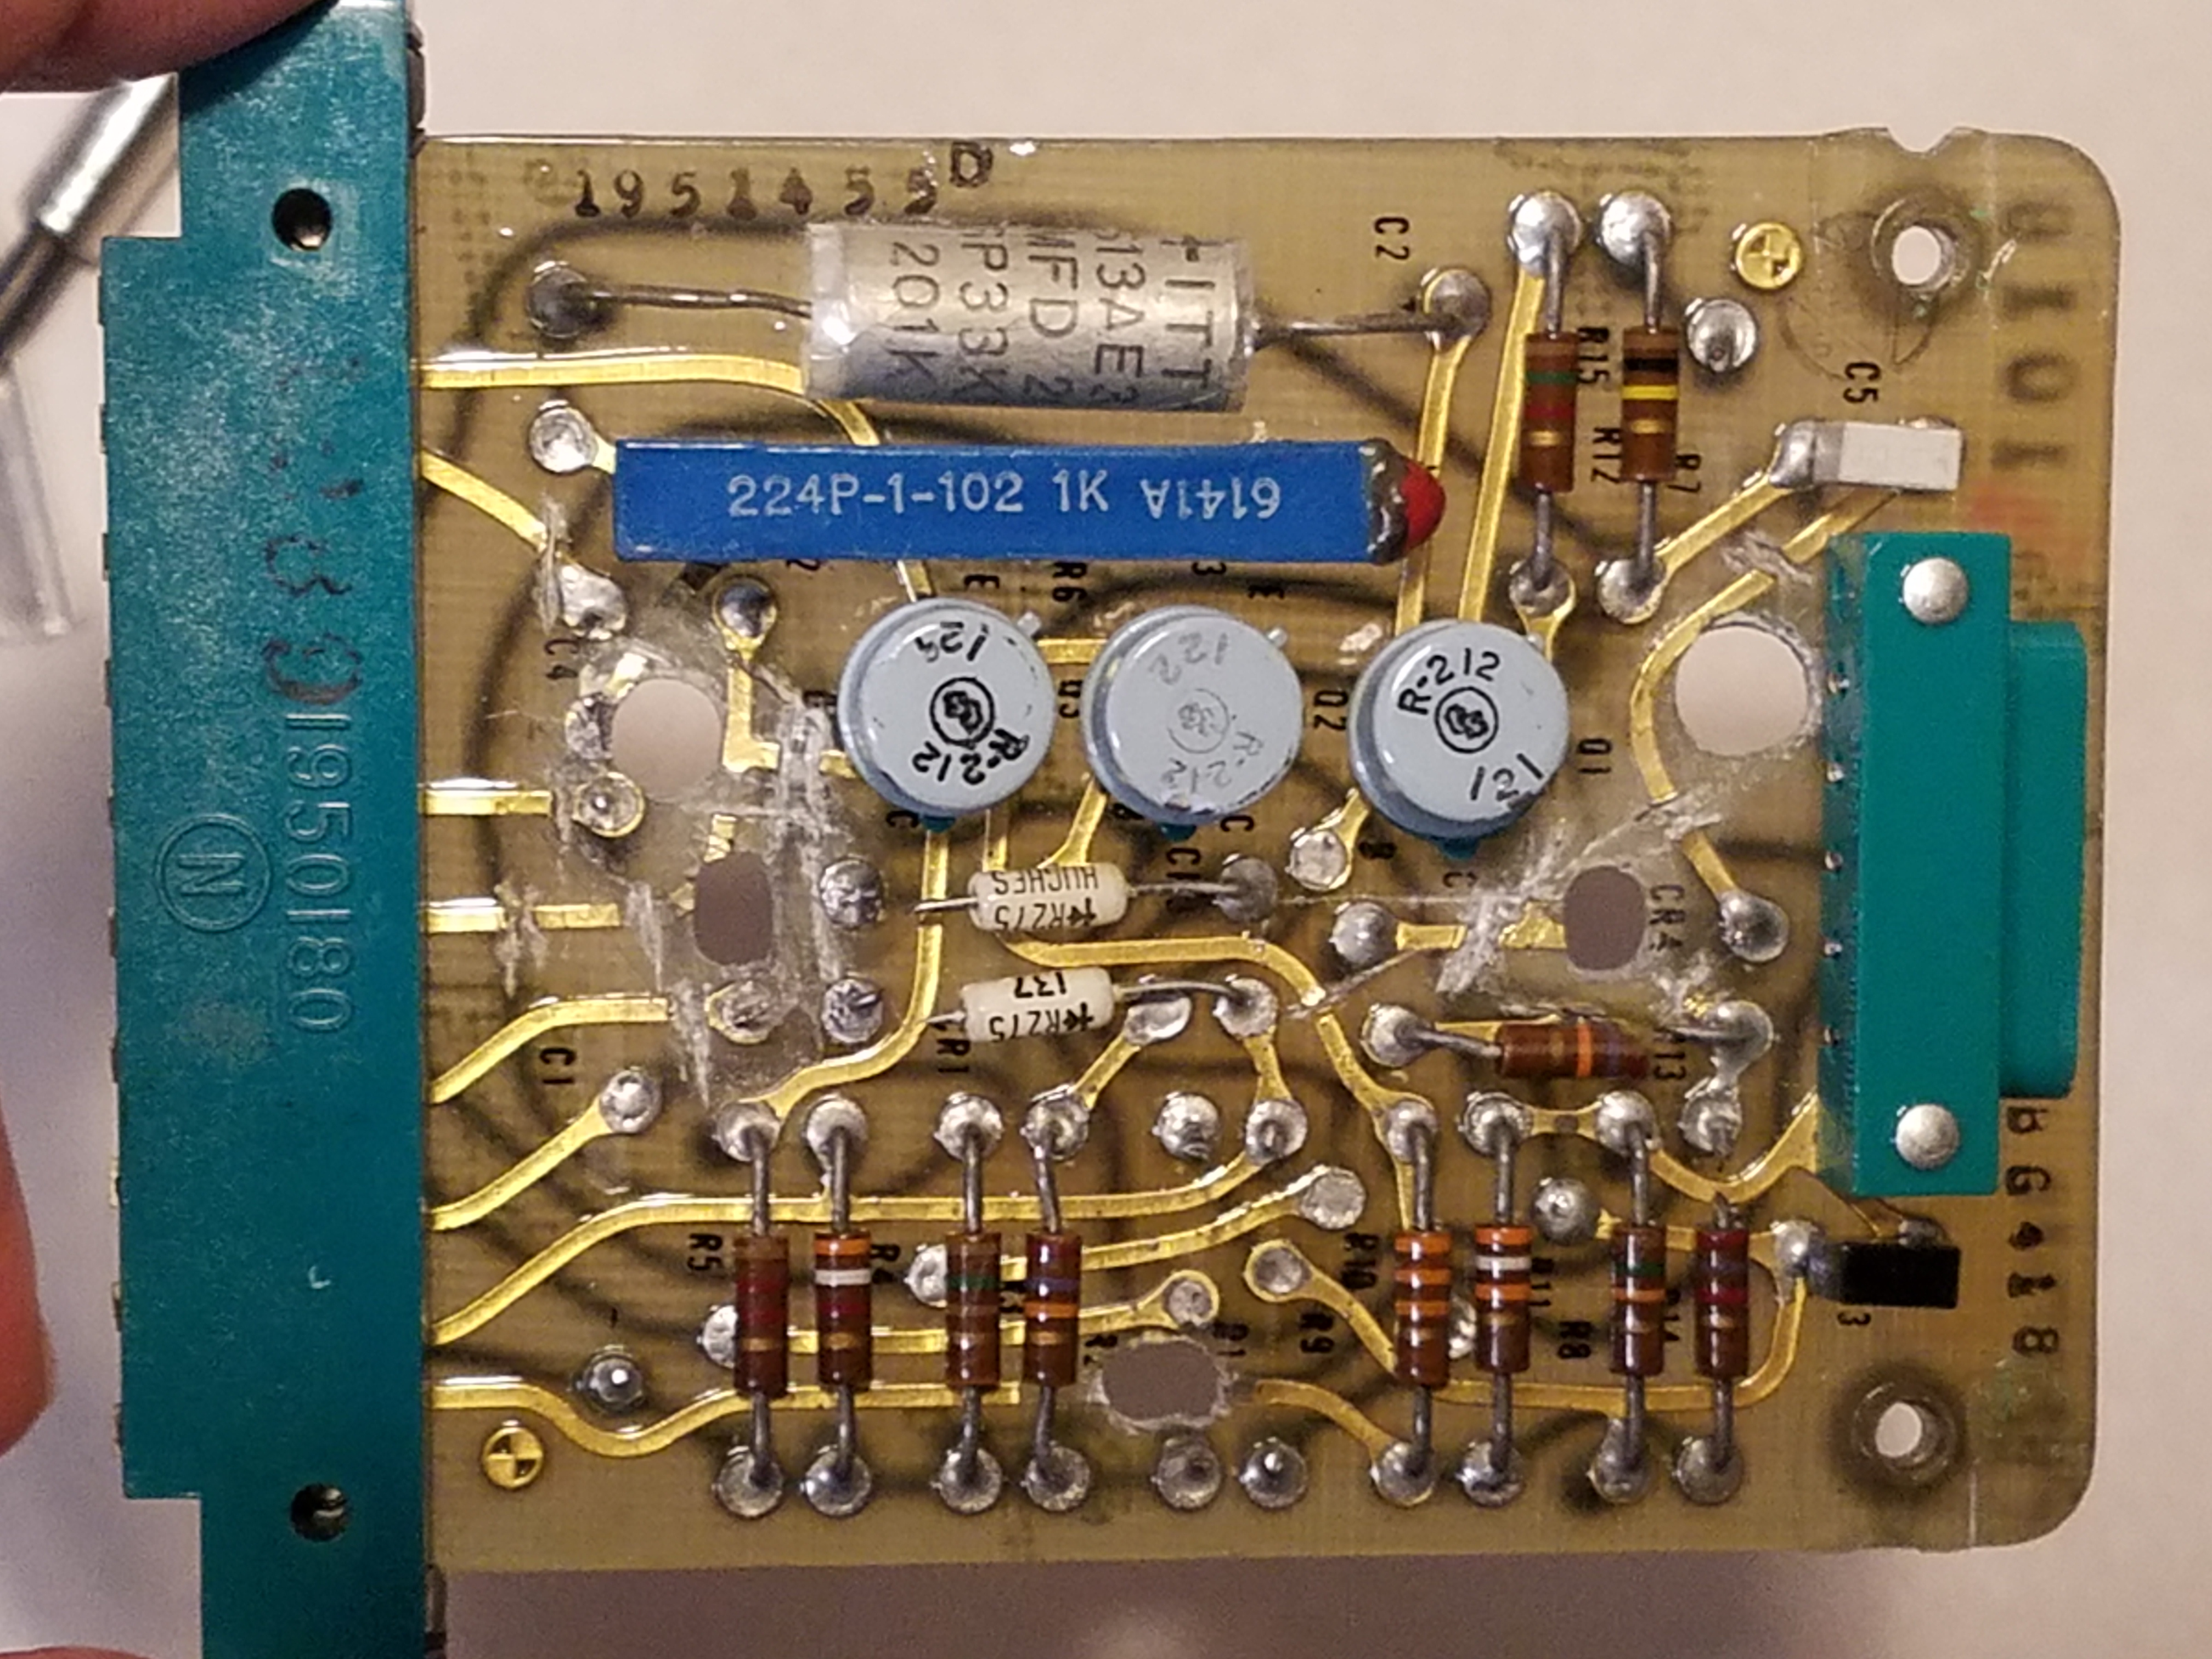
Next, I carefully put masking tape over the holes on the back side. I mixed up another batch of clear epoxy and acrylic paint until I had the perfect color, and carefully filled all the holes and the deep gauges. I was blown away at how well this worked! One major fix completed! But I had a loooong way to go. 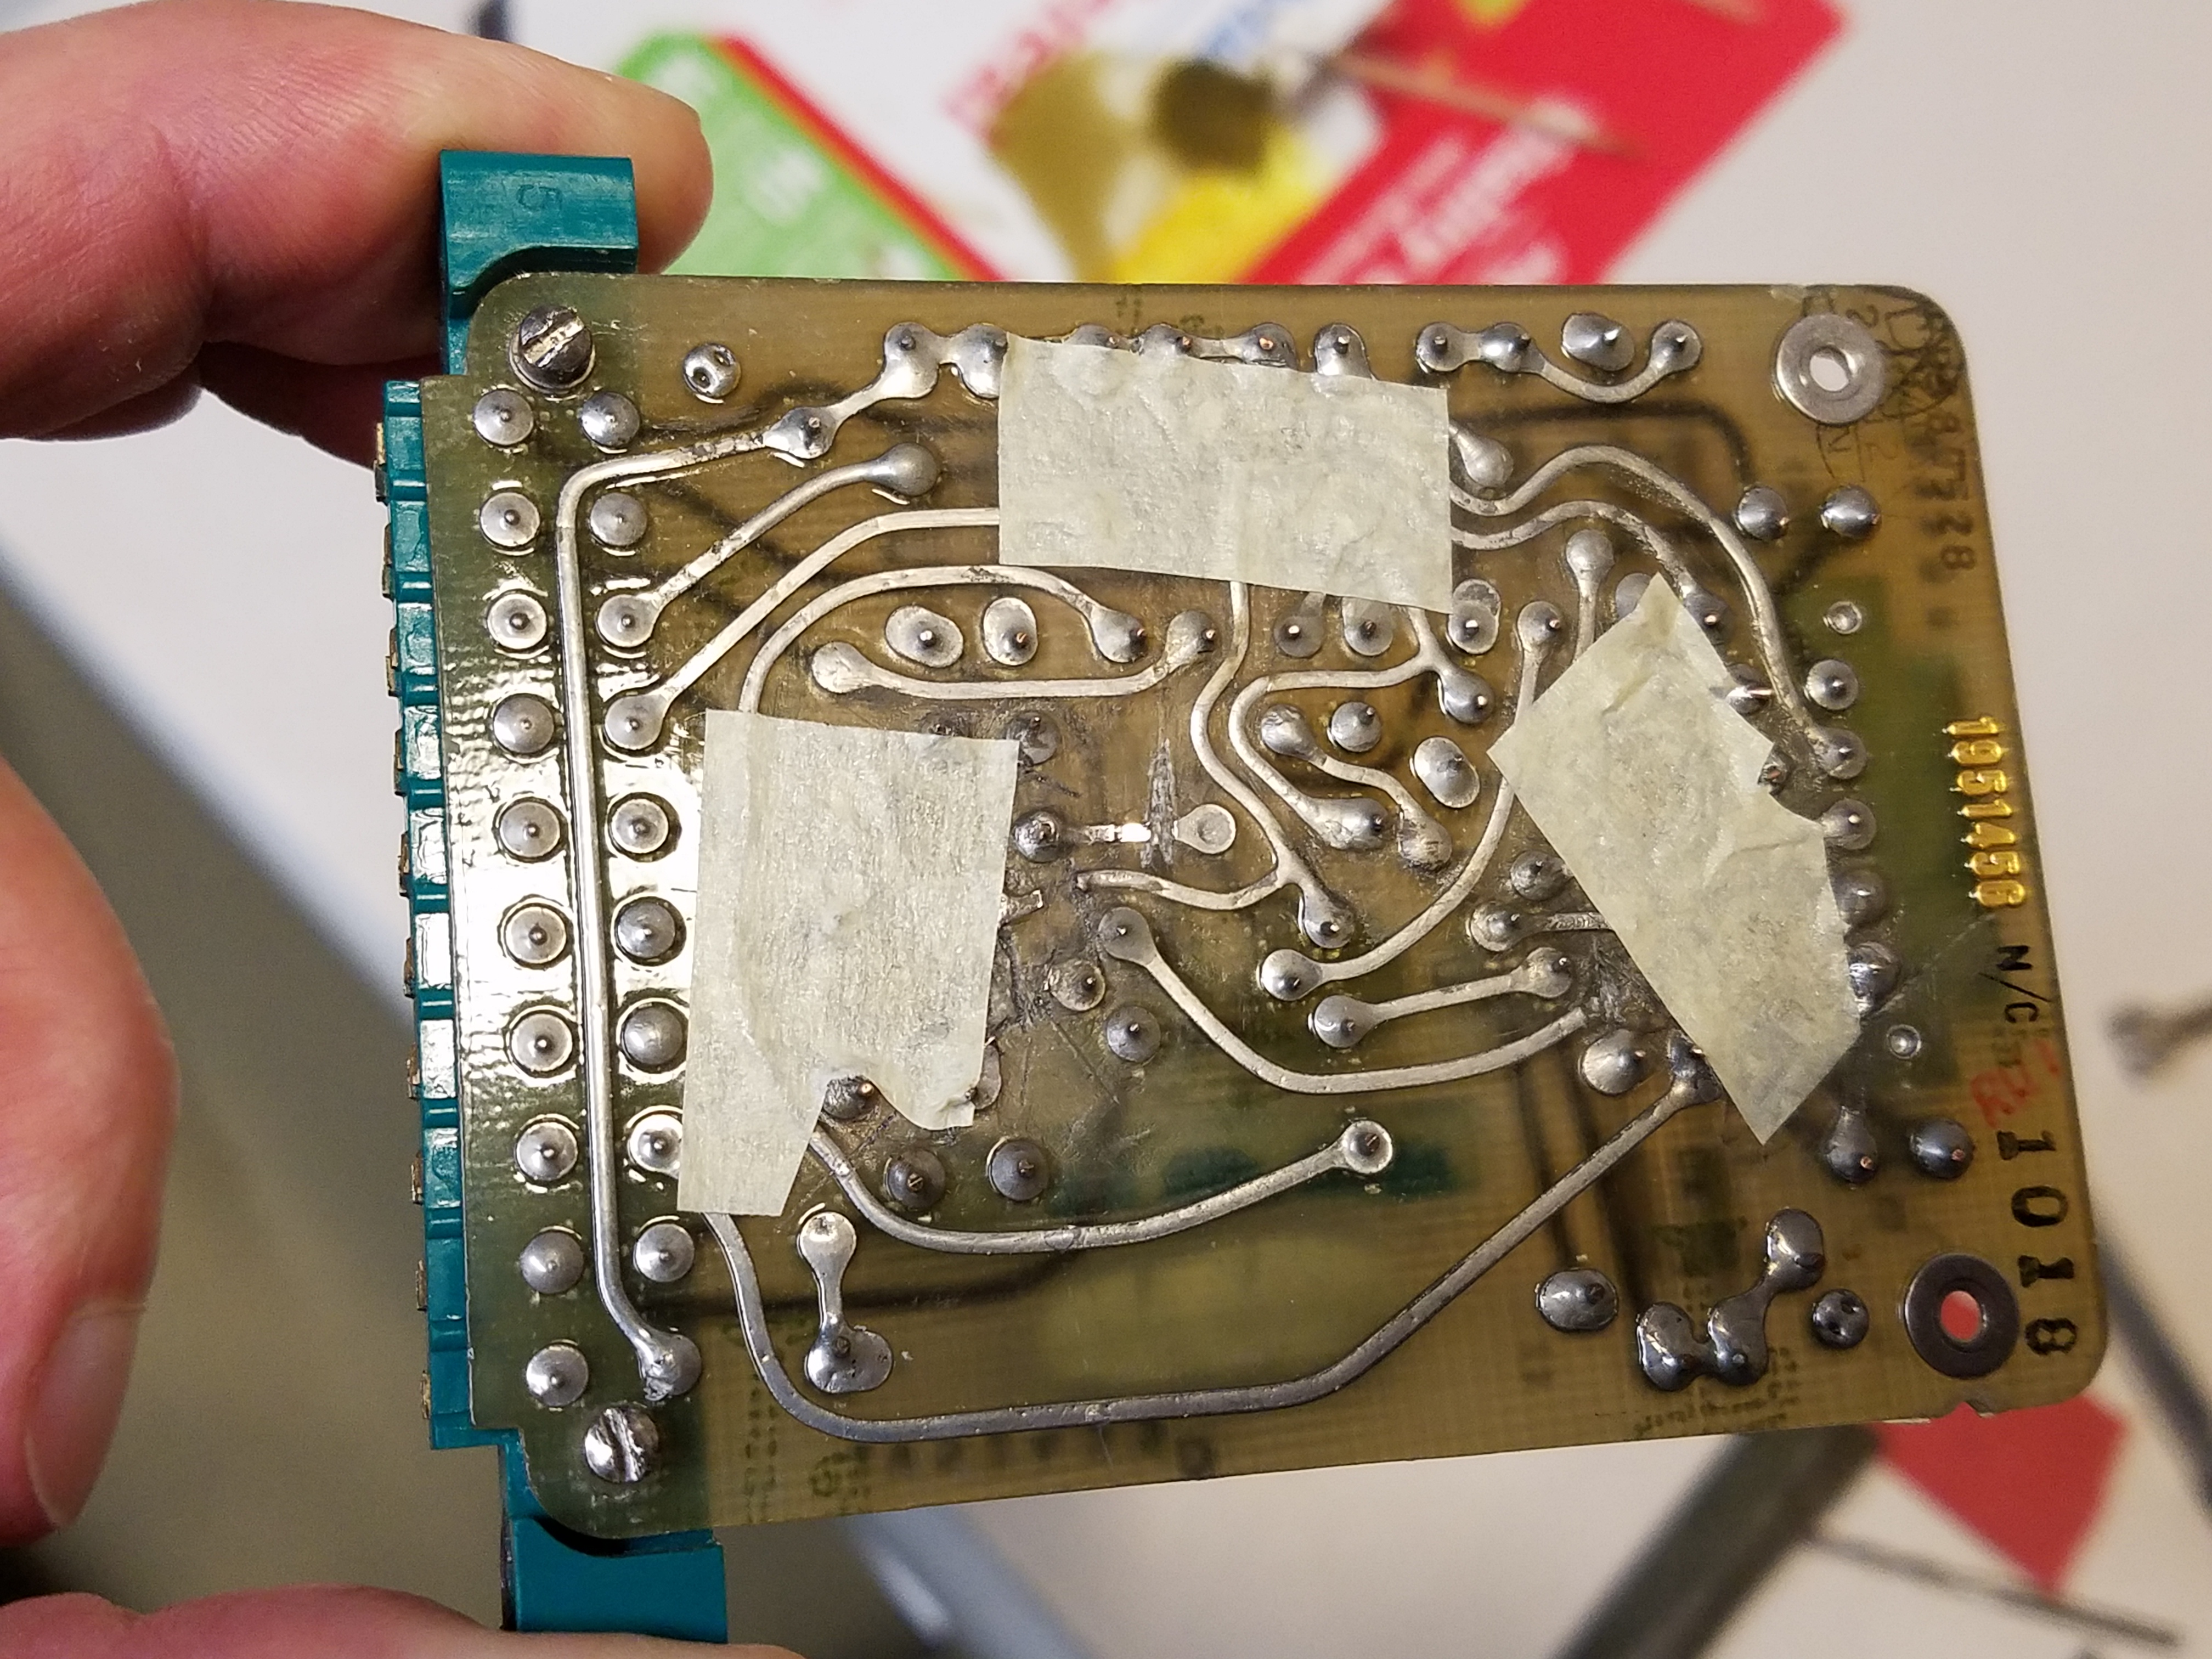
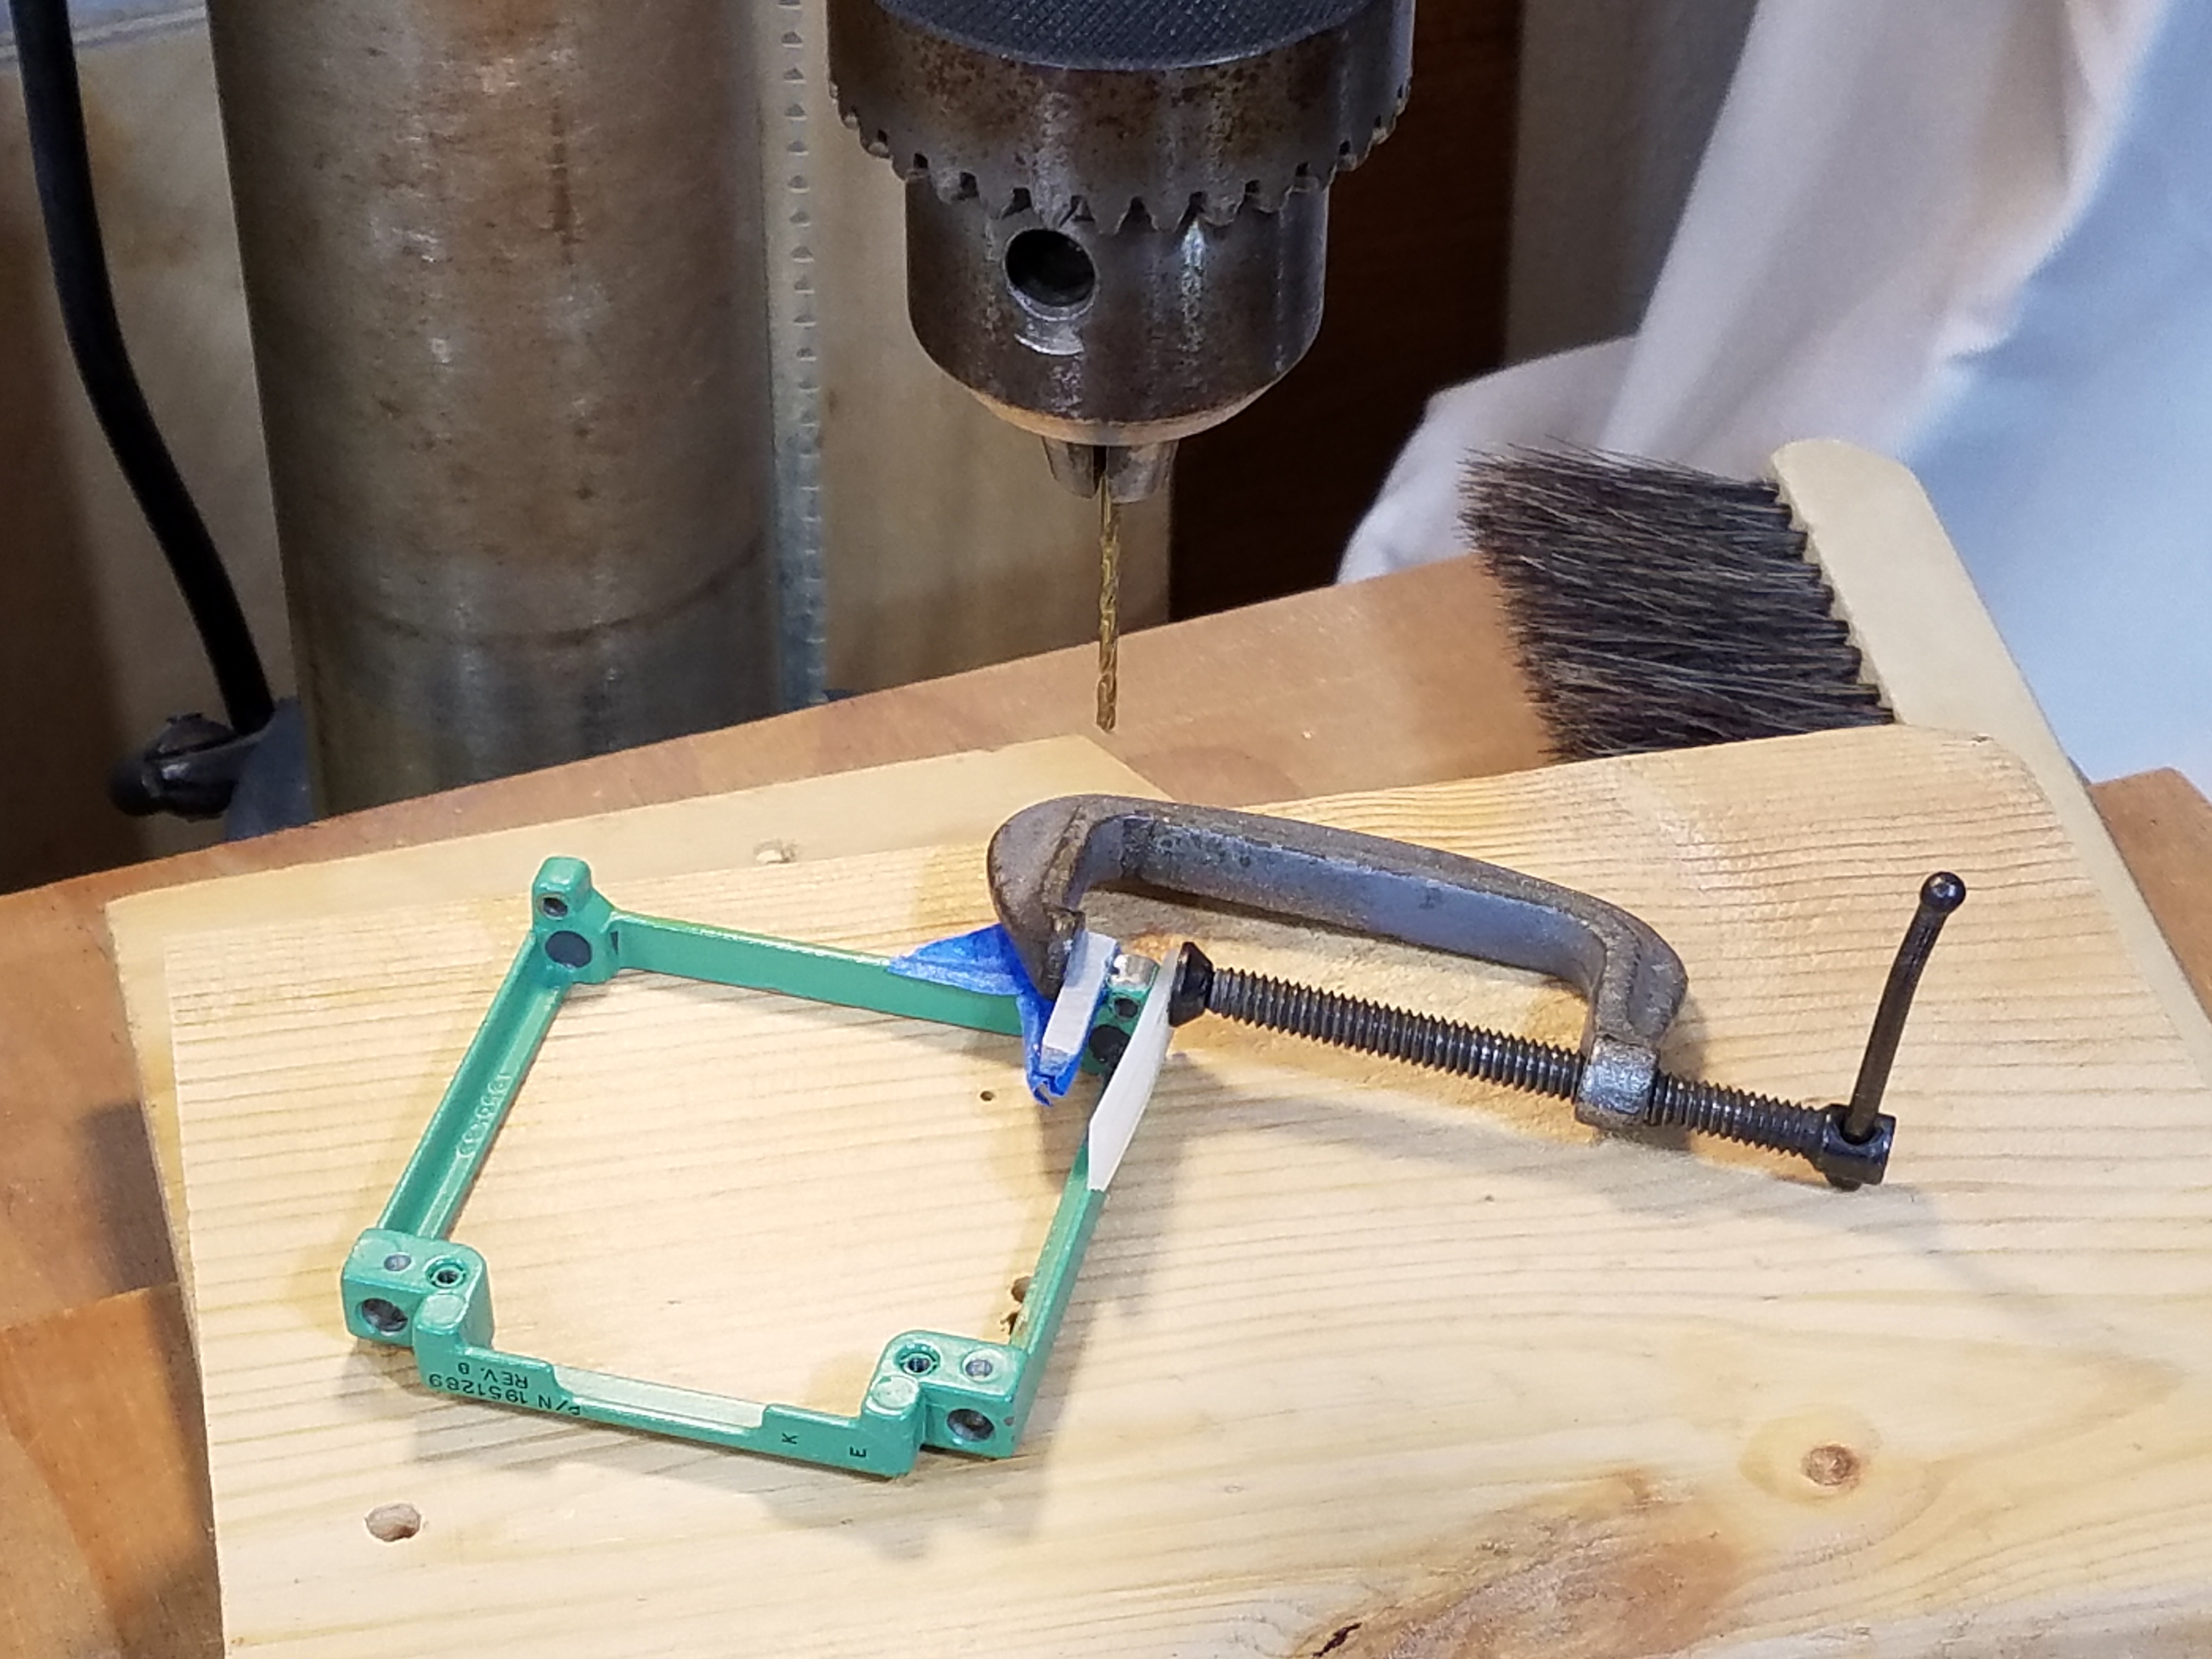
Next, I had to drill new holes, to match my existing Power Pack so I could use this on my robot. I measured very carefully and made a jig from a thick piece of scrap steel. I love making jigs, lol! I carefully clamped it to the board and drilled the holes. Now I knew precisely where the rest of the board needed to be restored. 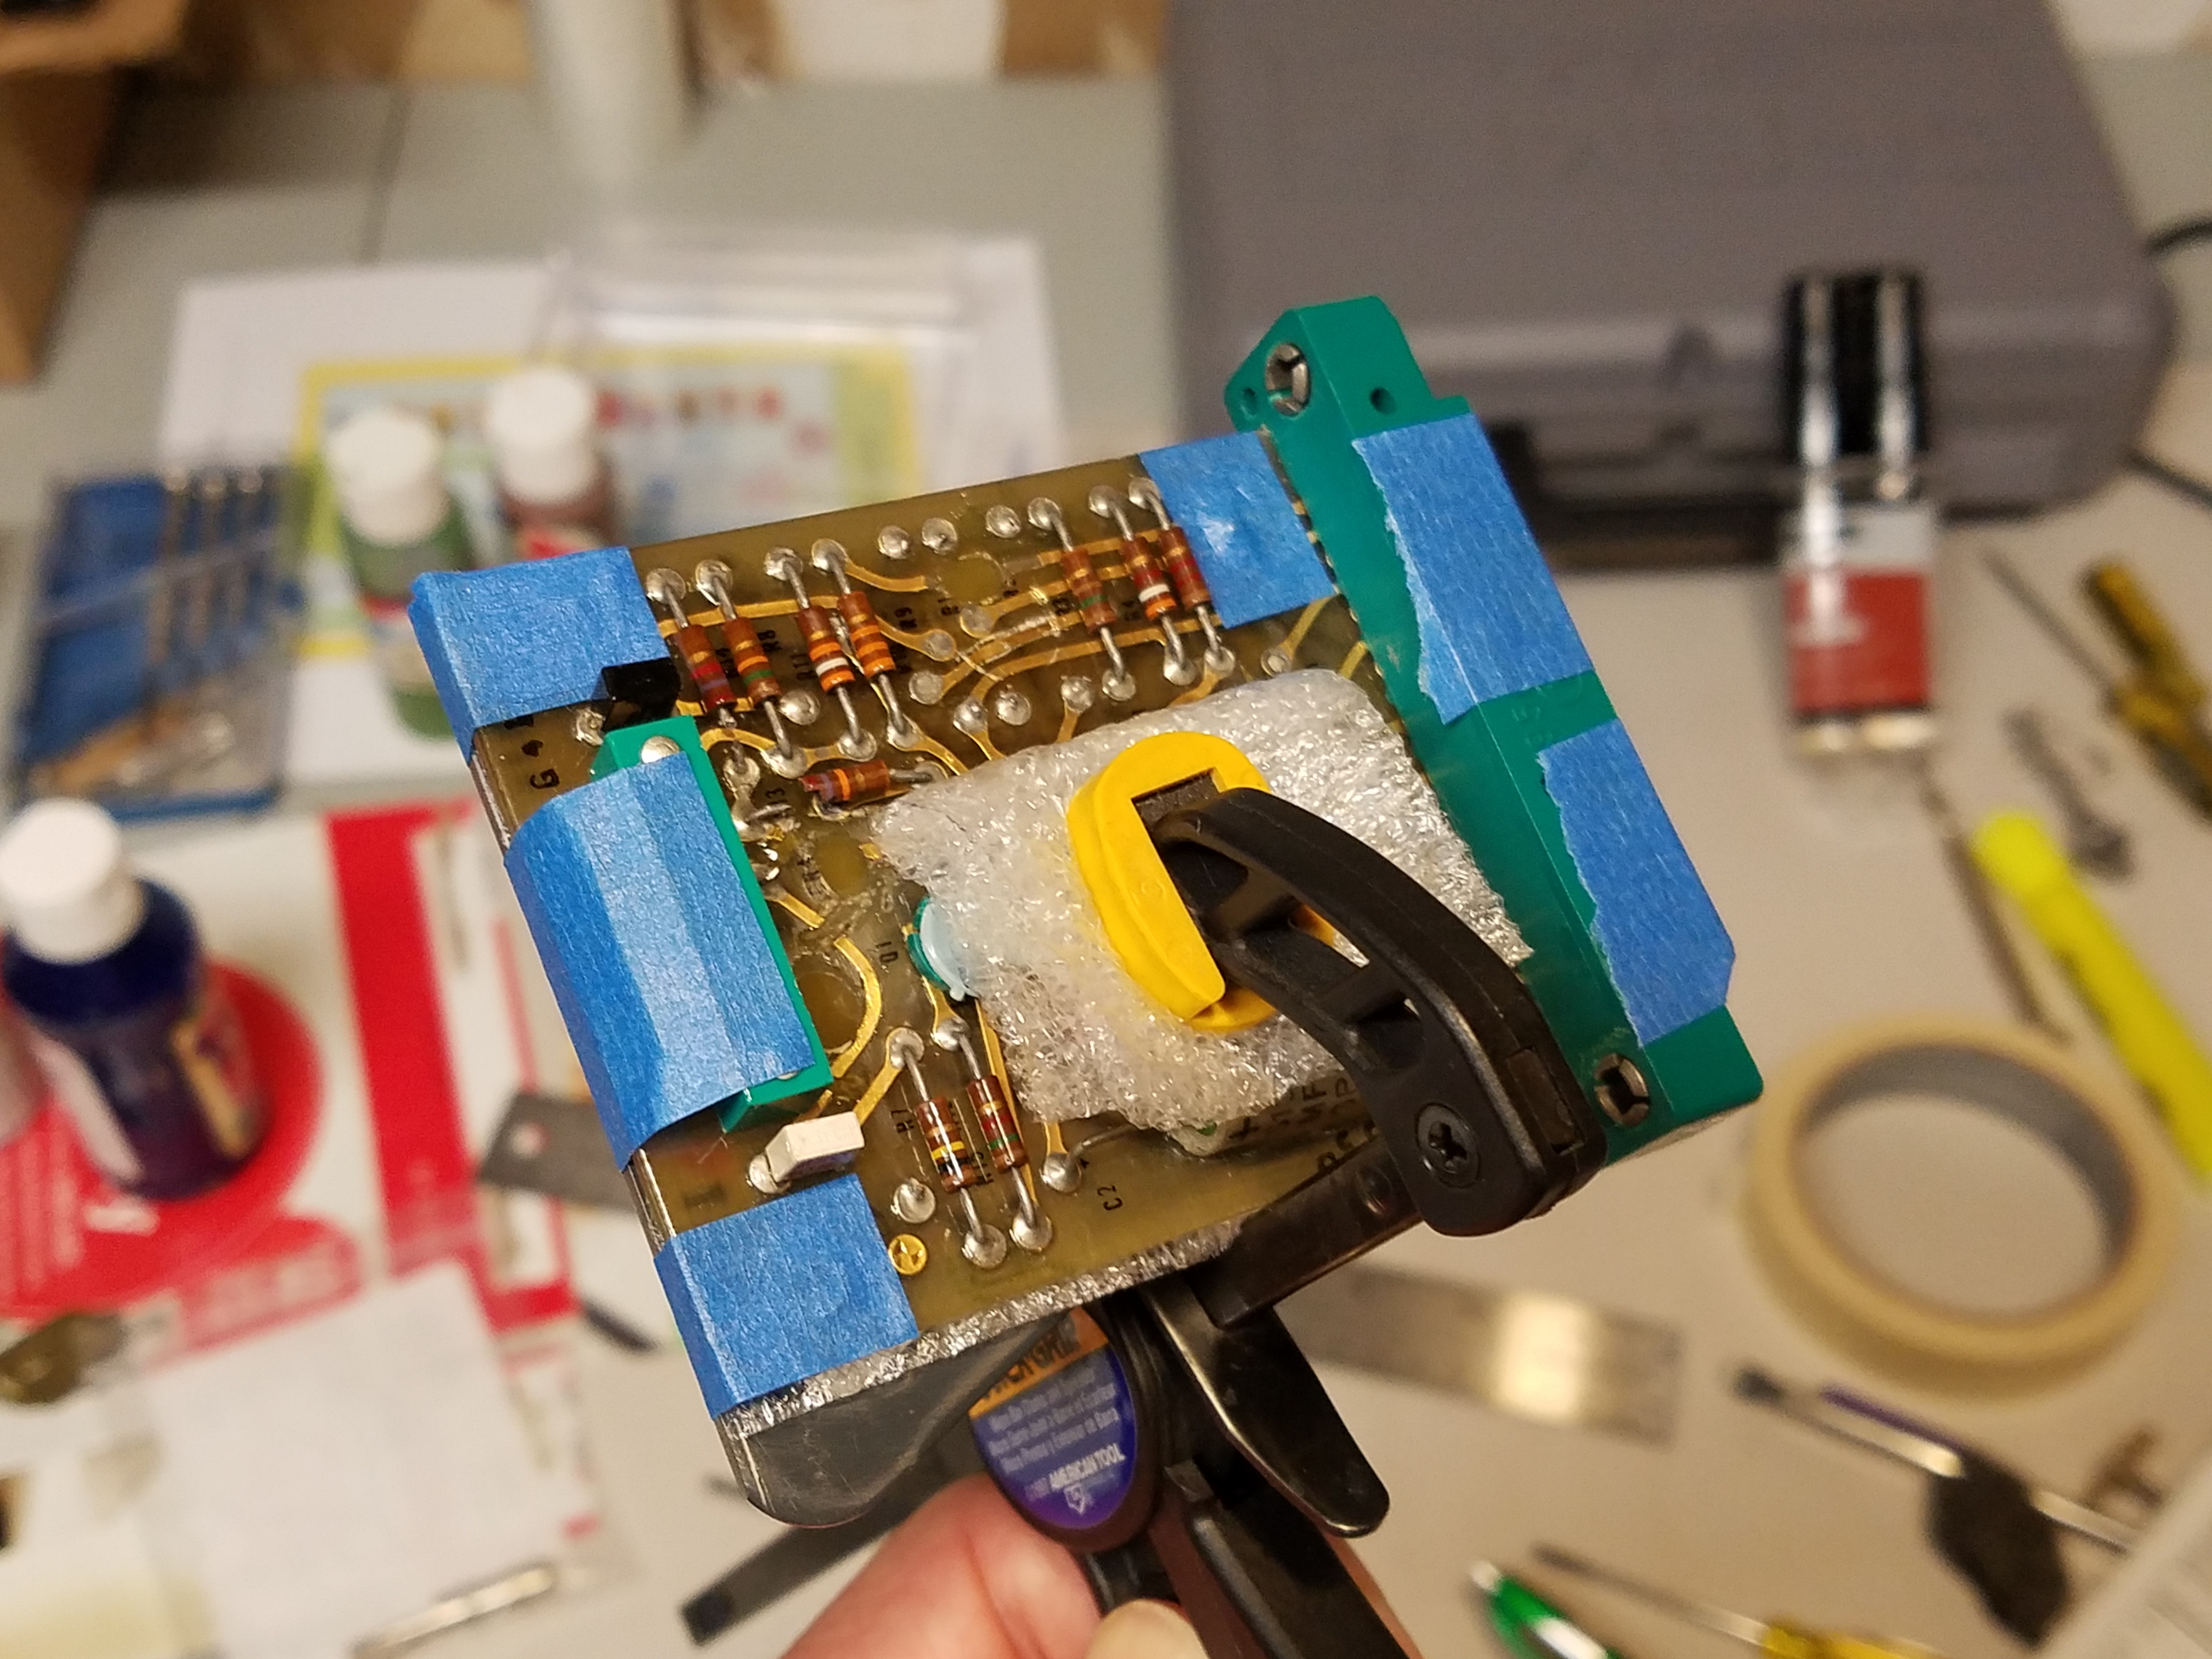
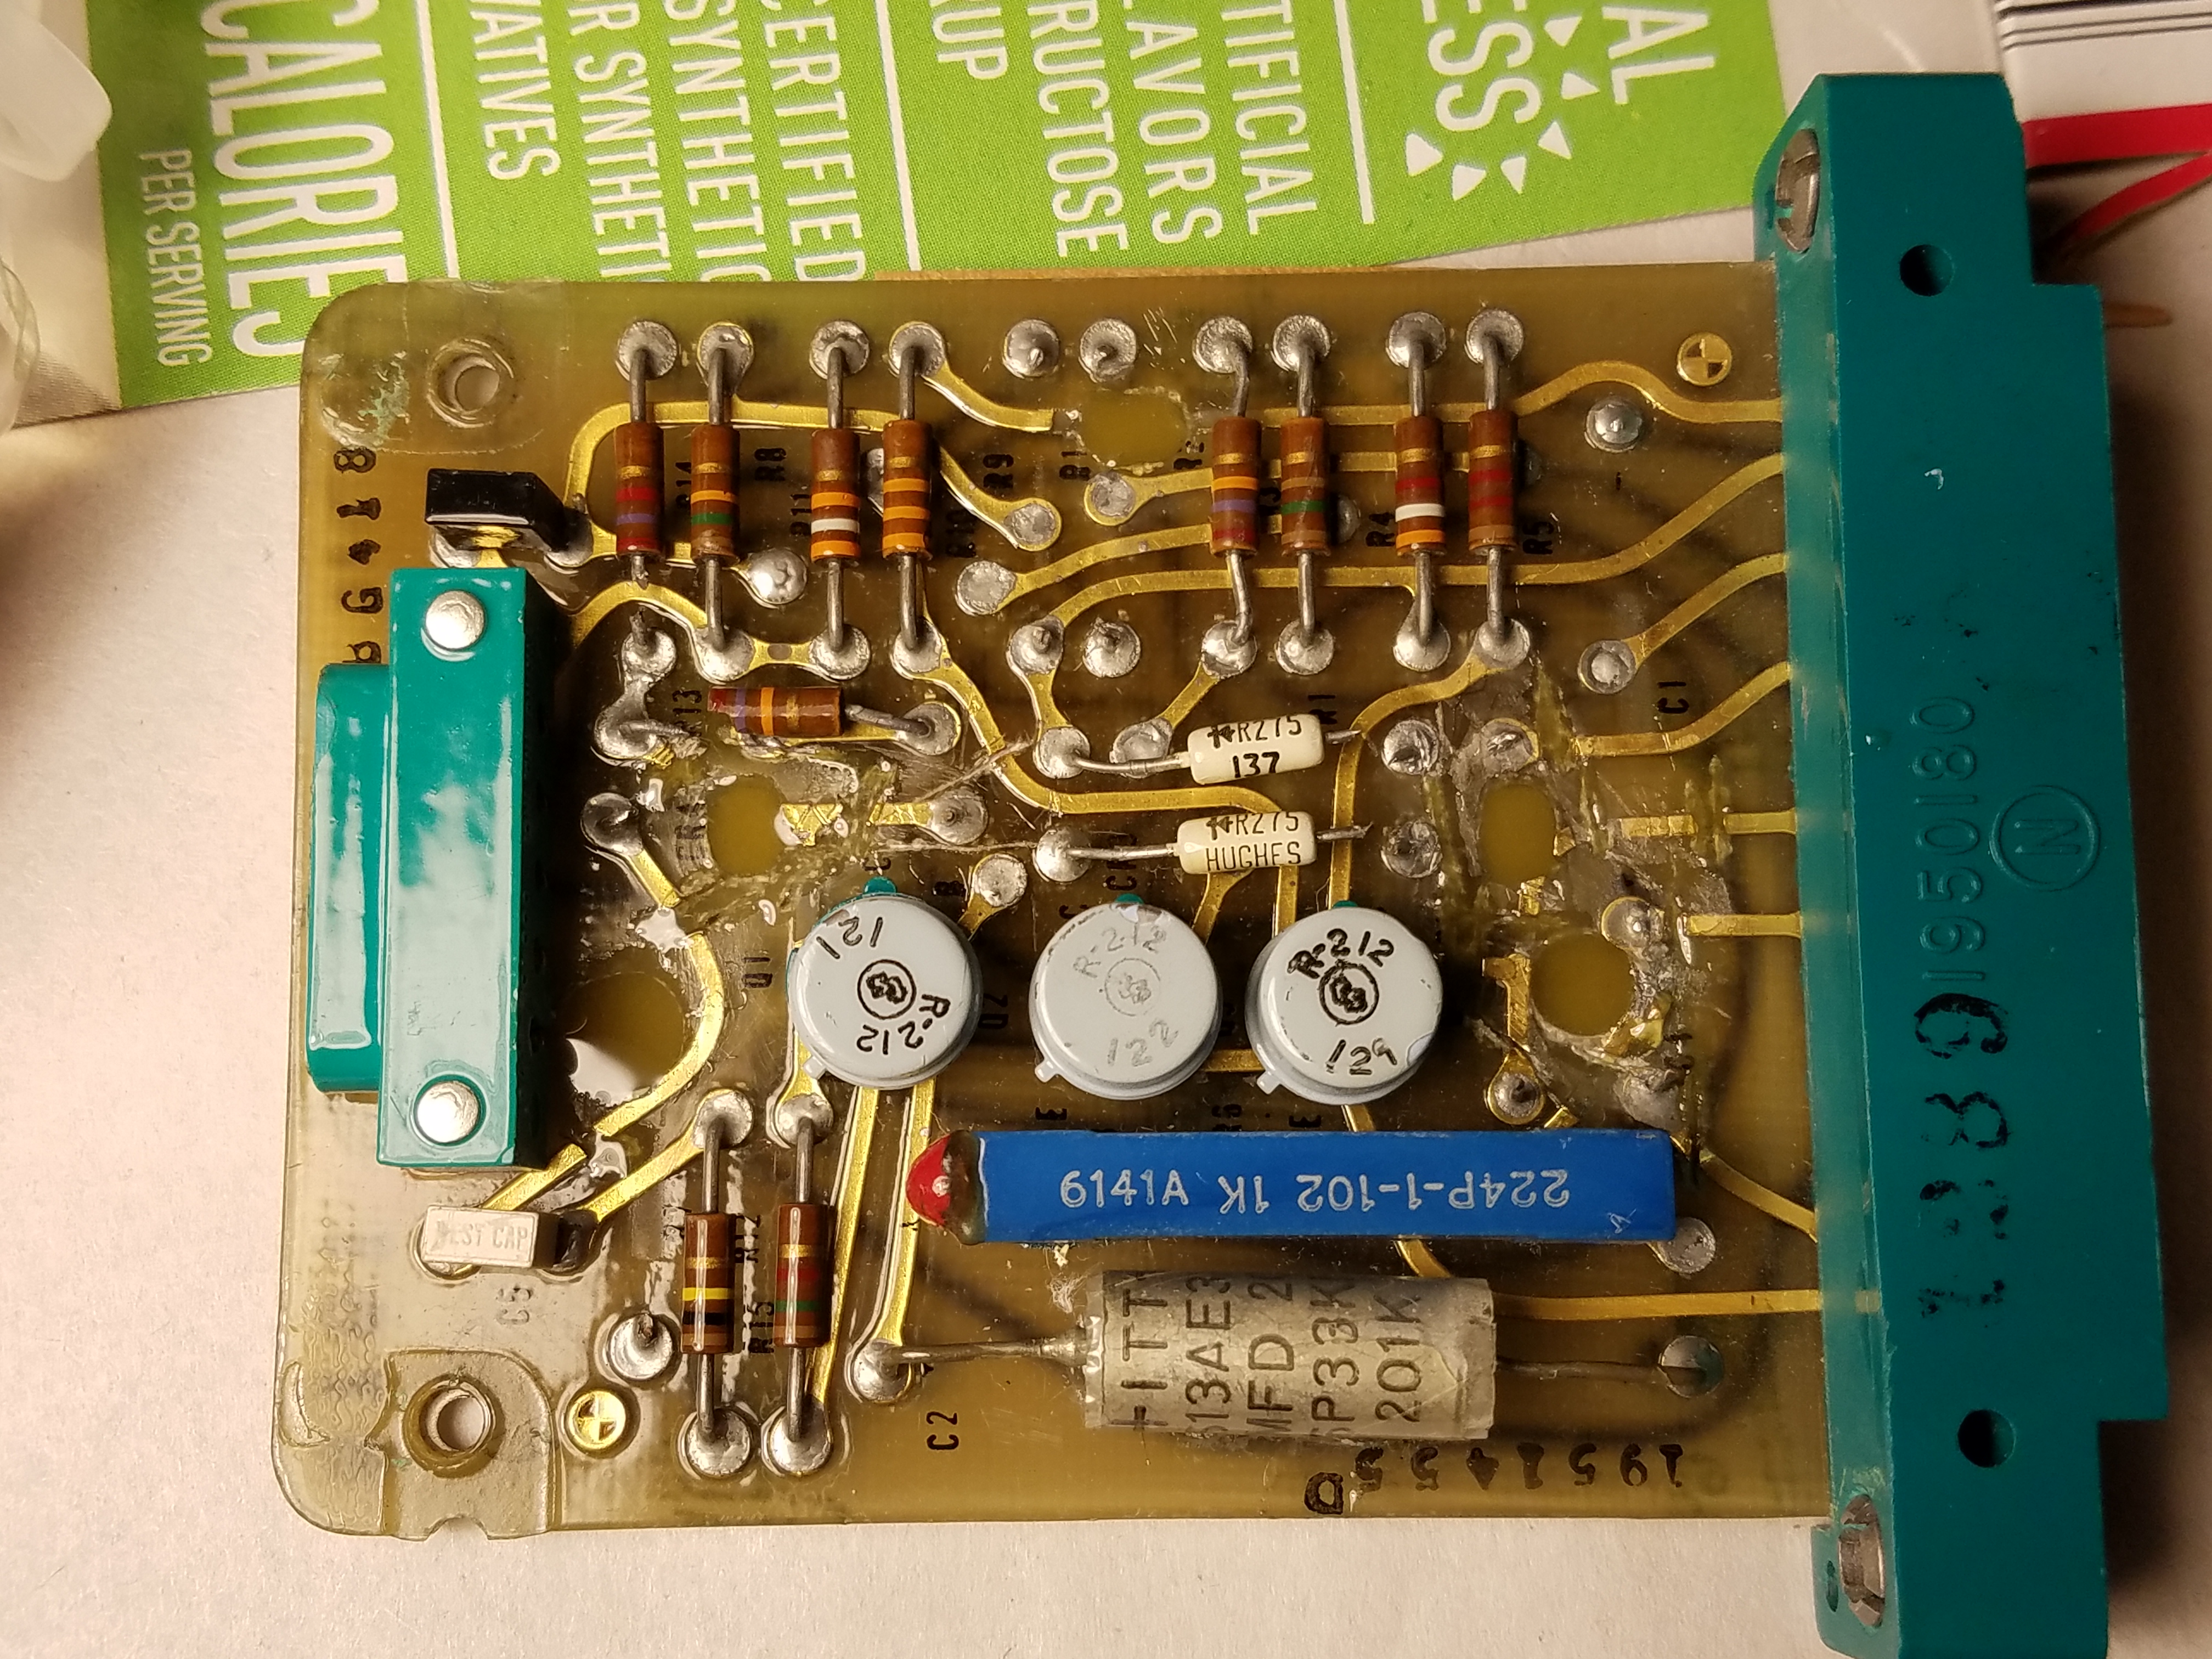
First, I concentrated on fixing the missing and cut traces. On the front I used a gold paint pen which actually worked very well. It is not perfect, but in some places, it is hard to tell it was touched up at all. I did the same to the backside with a silver paint pen. That was much more difficult and after painting, fixing, redoing it several times, I finally had to say it was as good as it will get. I am not altogether happy with how the back of the board came out, but it is much better than it was, and since it is rarely seen, I can live with it, until someday when I may devise a better fix. Now to fix the broken components. Primarily one resistor on the left side that had been broken in half. One stroke of luck is that there were actually two components that were left on the board that needed to be removed to be accurate and accommodate more accurate plug placements. There was one resistor that needed to be cutoff (to the right of the upper plug), and by some lucky miracle, the resistor I needed to remove was the exact same value as the broken one. Cool! I had originally thought I would unsolder the resistor and solder in the replacement, but I was really worried that heating up this board and desoldering and soldering anything could be a disaster. It would be very hard to solder it back so that you could not tell. Besides, there was a thick coating of a clear gloss lacquer (or something) over the entire board and all the components (this is a little know detail) which would have really messed with soldering. So, I decided to just epoxy the resistor in place and cut the traces precisely so that you cannot tell. It worked better than I expected! 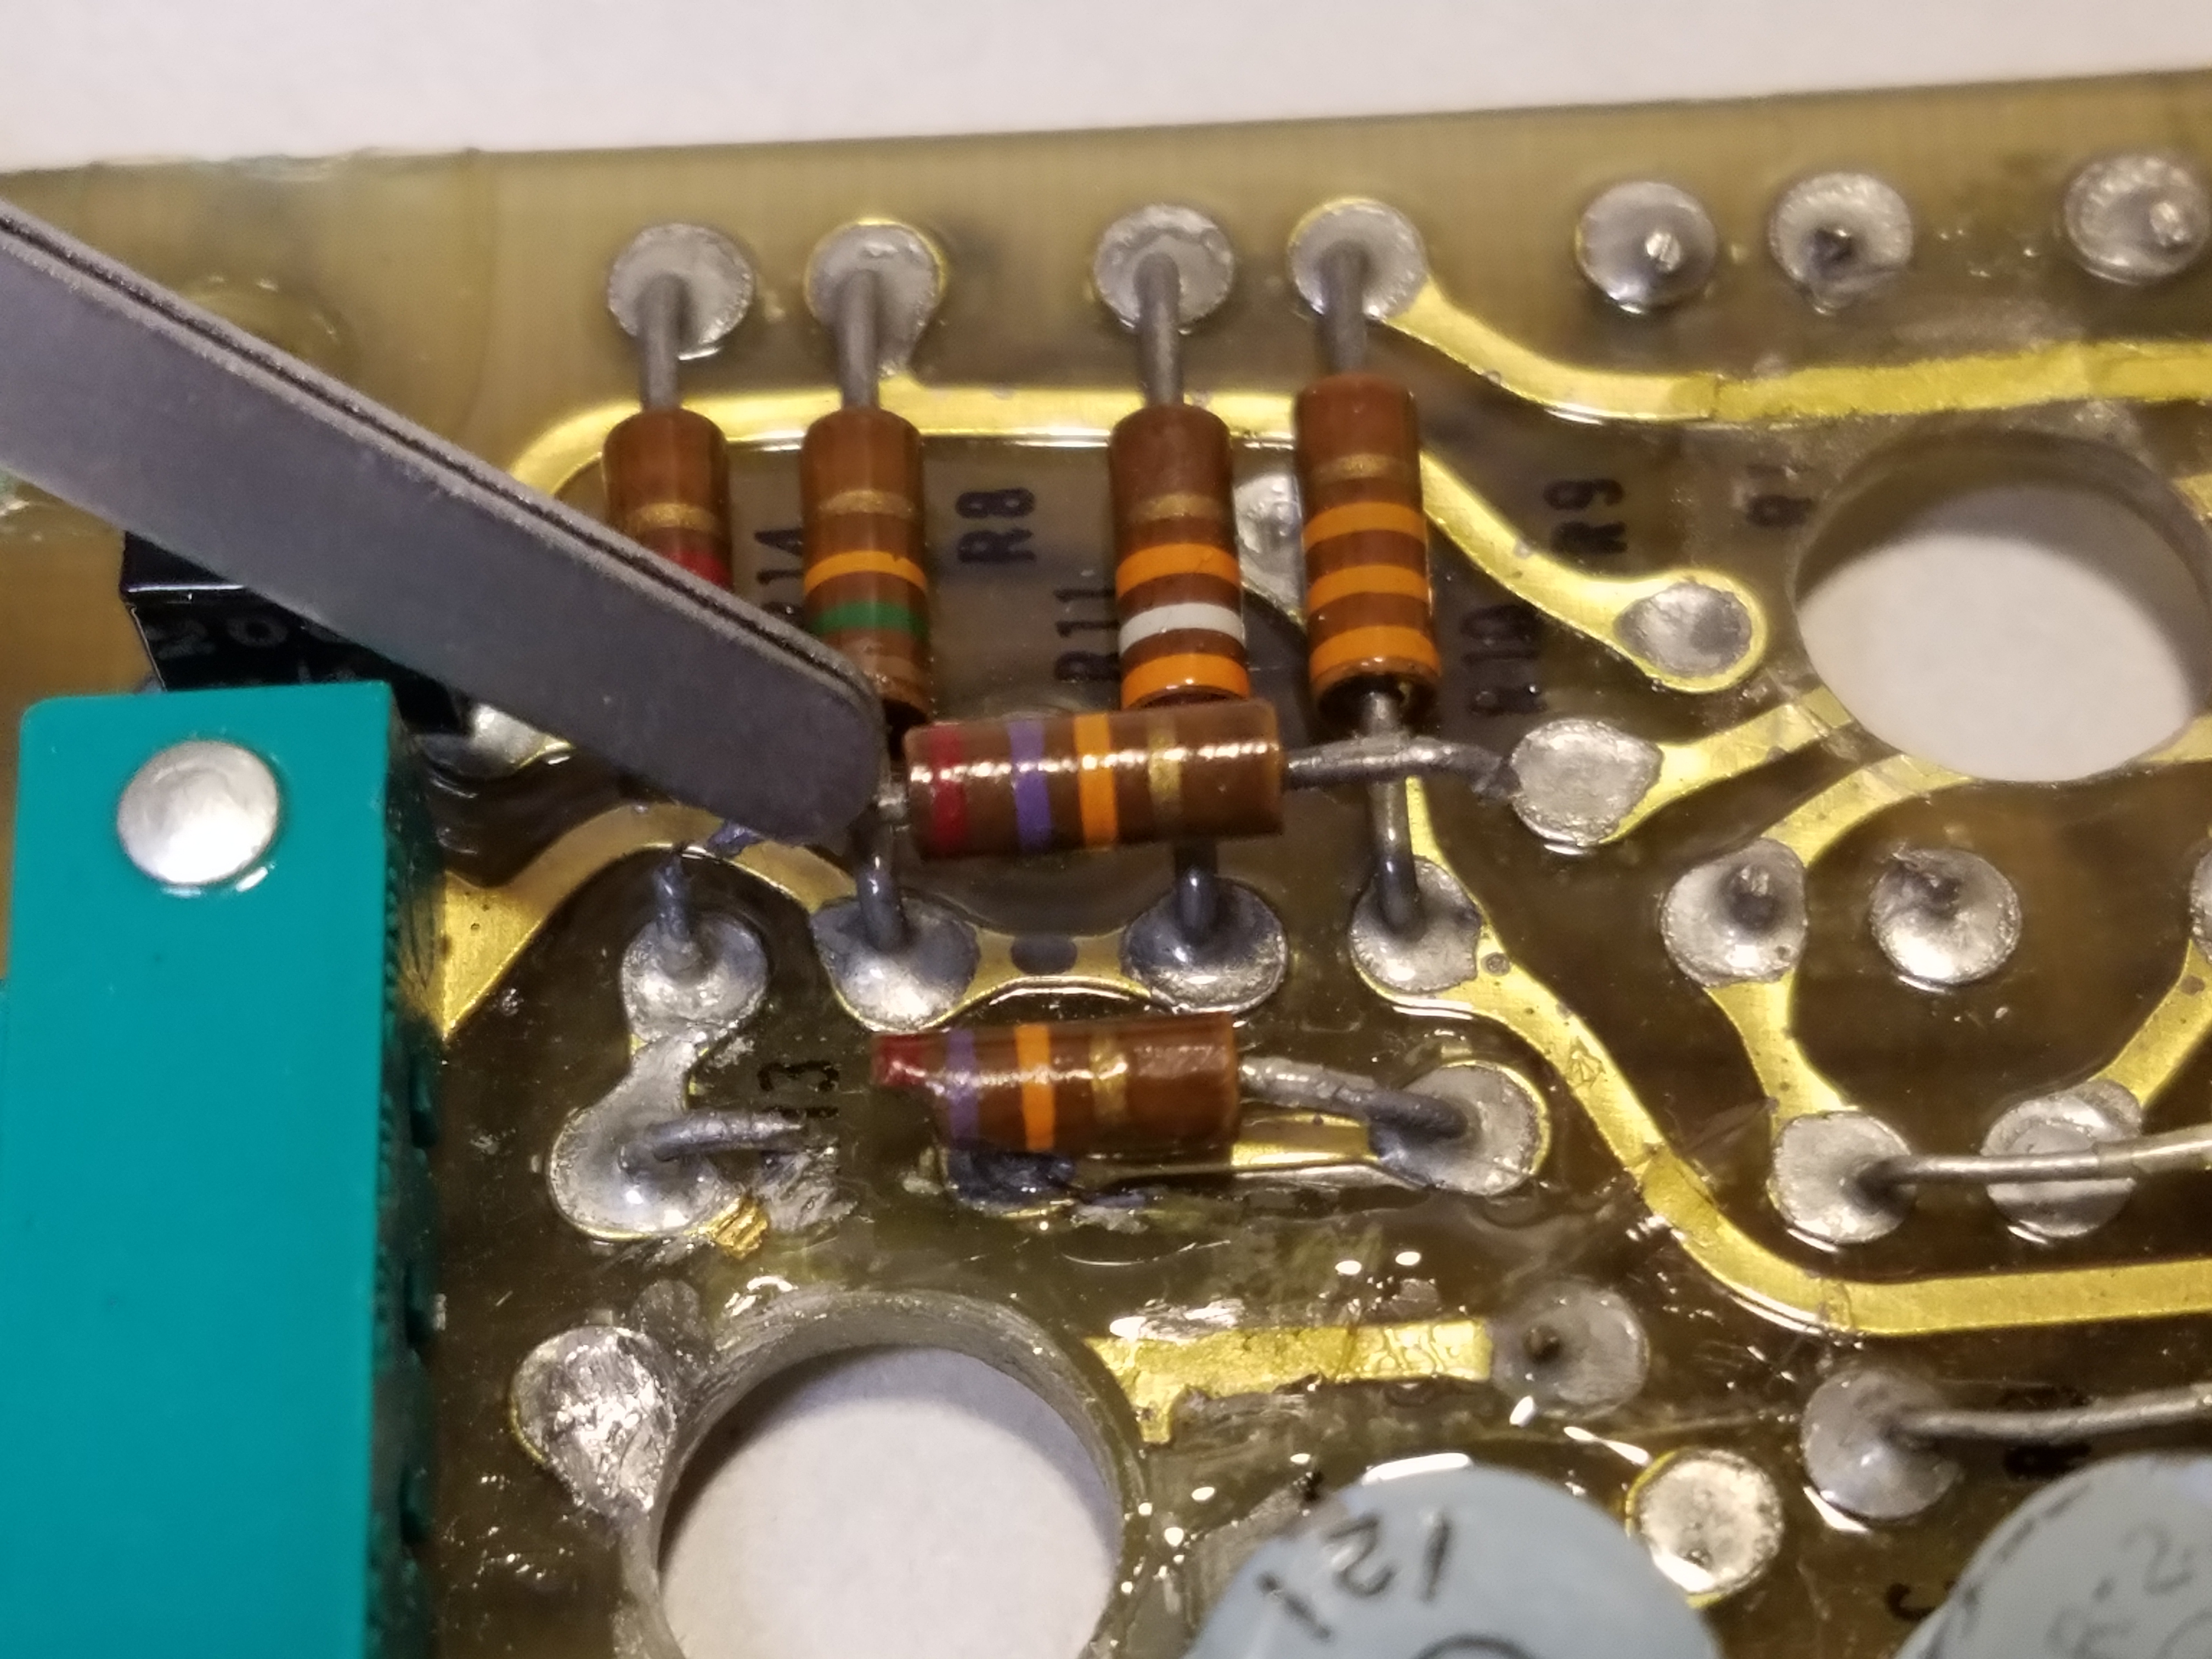
I also had to recreate a few solder points of cut components that were located on the epoxy filled in repair spots, both on the front and back. To mimic solder, I used epoxy mixed with silver acrylic paint which worked incredibly well. It looks exactly like solder. Its almost impossible to tell those spots from the real solder. The last step of the board restoration process was spraying gloss clear lacquer on the board, which I did carefully. I masked off areas that didn't need it so the spray would only go over repaired spots. At this point I considered the board restoration done! Now on to the frame... 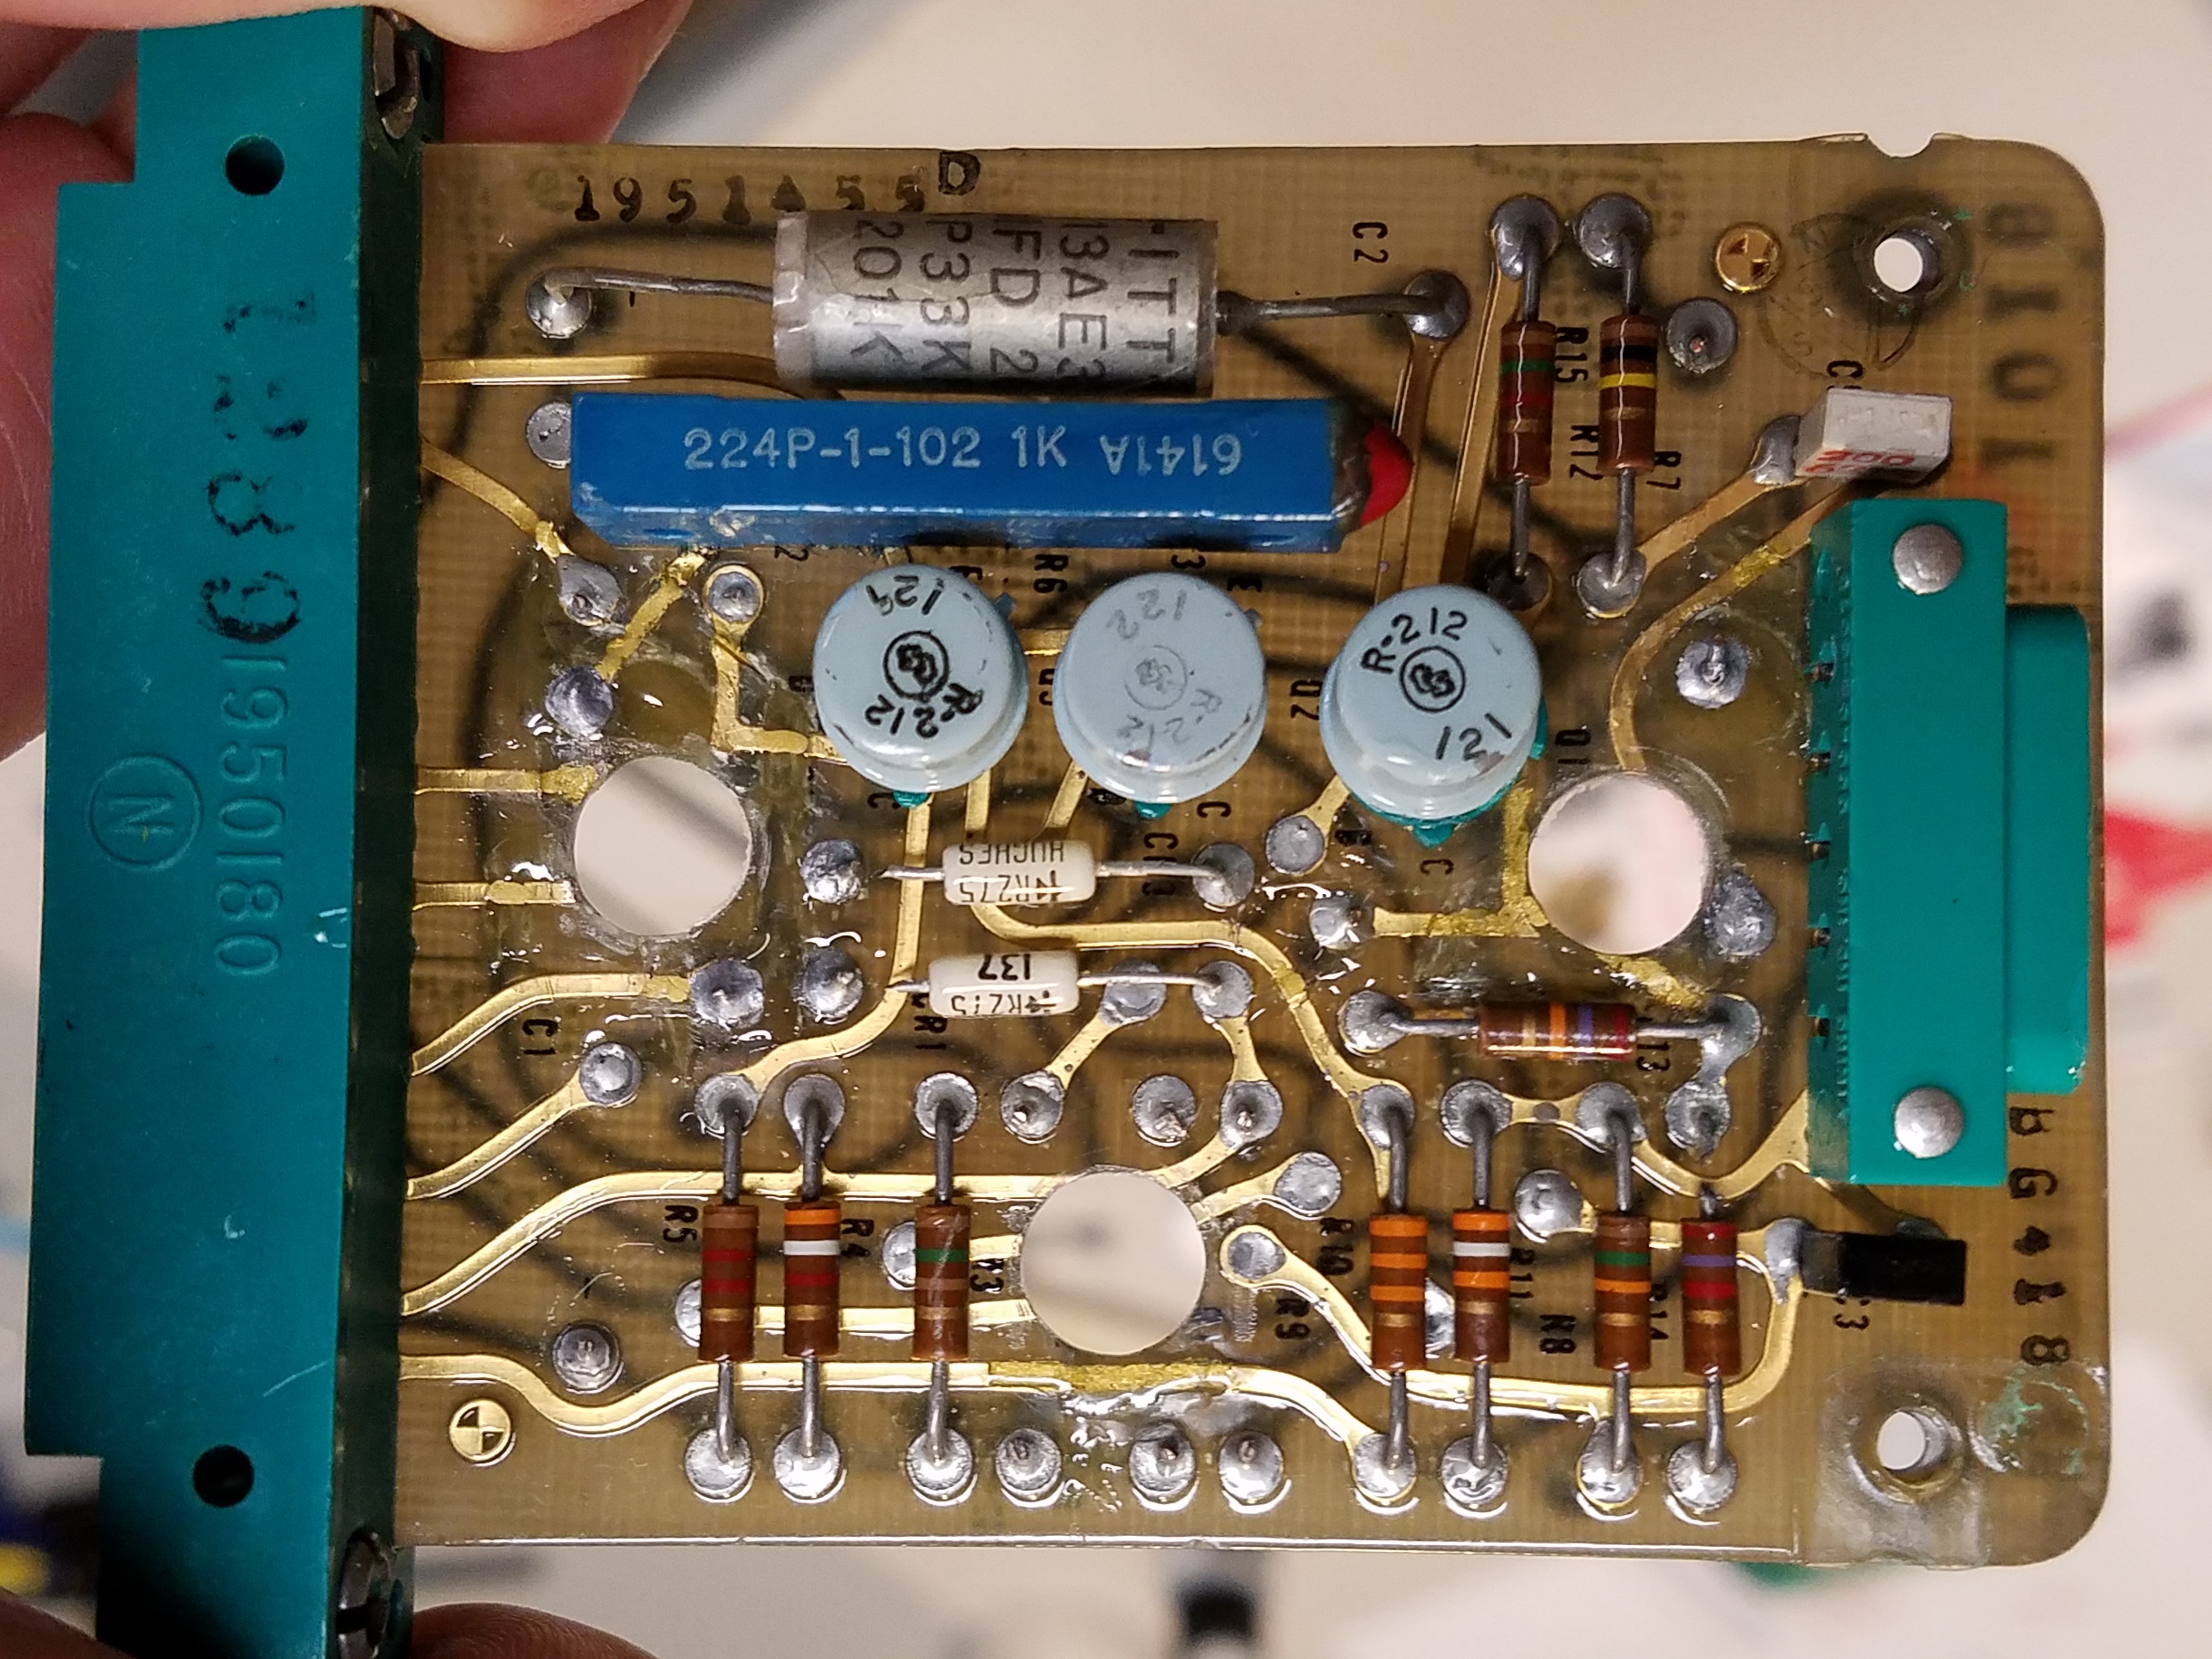
I thought this might be easier than the board, but that was wishful thinking. There were several major obstacles to overcome. I needed to fill the oversized and mis drilled holes in the frame then paint to match the original frame color perfectly. I searched and searched for an exact match of the Power Pack greenish-blue, but just could not find anything close enough. I also realized that spray paint would be too heavy and hard to blend and keep only to the repaired areas. And the very most important requirement for painting the frame... I could NOT under any circumstances paint over the precious markings, serial number, part number, etc! Doing that would ruin the integrity of the piece. My only option was to airbrush and custom mix a color, but I had never done that before. Time to learn a new skill! But before I could paint, I had to first drill accurate sized holes for the clear acrylic cover and fill in the oversized holes. Careful study of the original Power Pack showed that the cover screws were 2-56 round head slotted screws with very small brass nuts on the back side. I have found the best place to get small quantities of very specific specialized or vintage hardware is on ebay. Holes had to be drilled all the way through the frame because the current holes only went half way through. I soon found out why… The two holes near the large end connector were the problem. Right where these holes need to be drilled, there is a hardened steel threaded insert for screw in rods not used on the B9 Power Pack. I tried to drill through the inserts, but this was a major disaster! The drill bit would wonder into the much softer aluminum. I tried and tried… I broke many drill bits, but worse, I had ended up wollering out the holes even more! OMG, I was making it worse! Now I know what happened when the previous owner tried to do this, and why these holes were oversized. I had sympathy! I finally realized the only way these holes could ever be drilled is to removed the hardened steel insert, and the original prop makers must surely have done that. But how? The only thing I could think of was to drill them out. Easier said than done... These things were so hard they just chewed up my drill bits. I had to start with a bit just barely larger than the inside of the insert, and slowly step up until there was almost nothing left and it could finally just fell out. (Note: I also have a NOS Librascope frame, and recently figured out an EASY way to get those inserts out, in about 30 seconds... If I had only known then what I know now!) 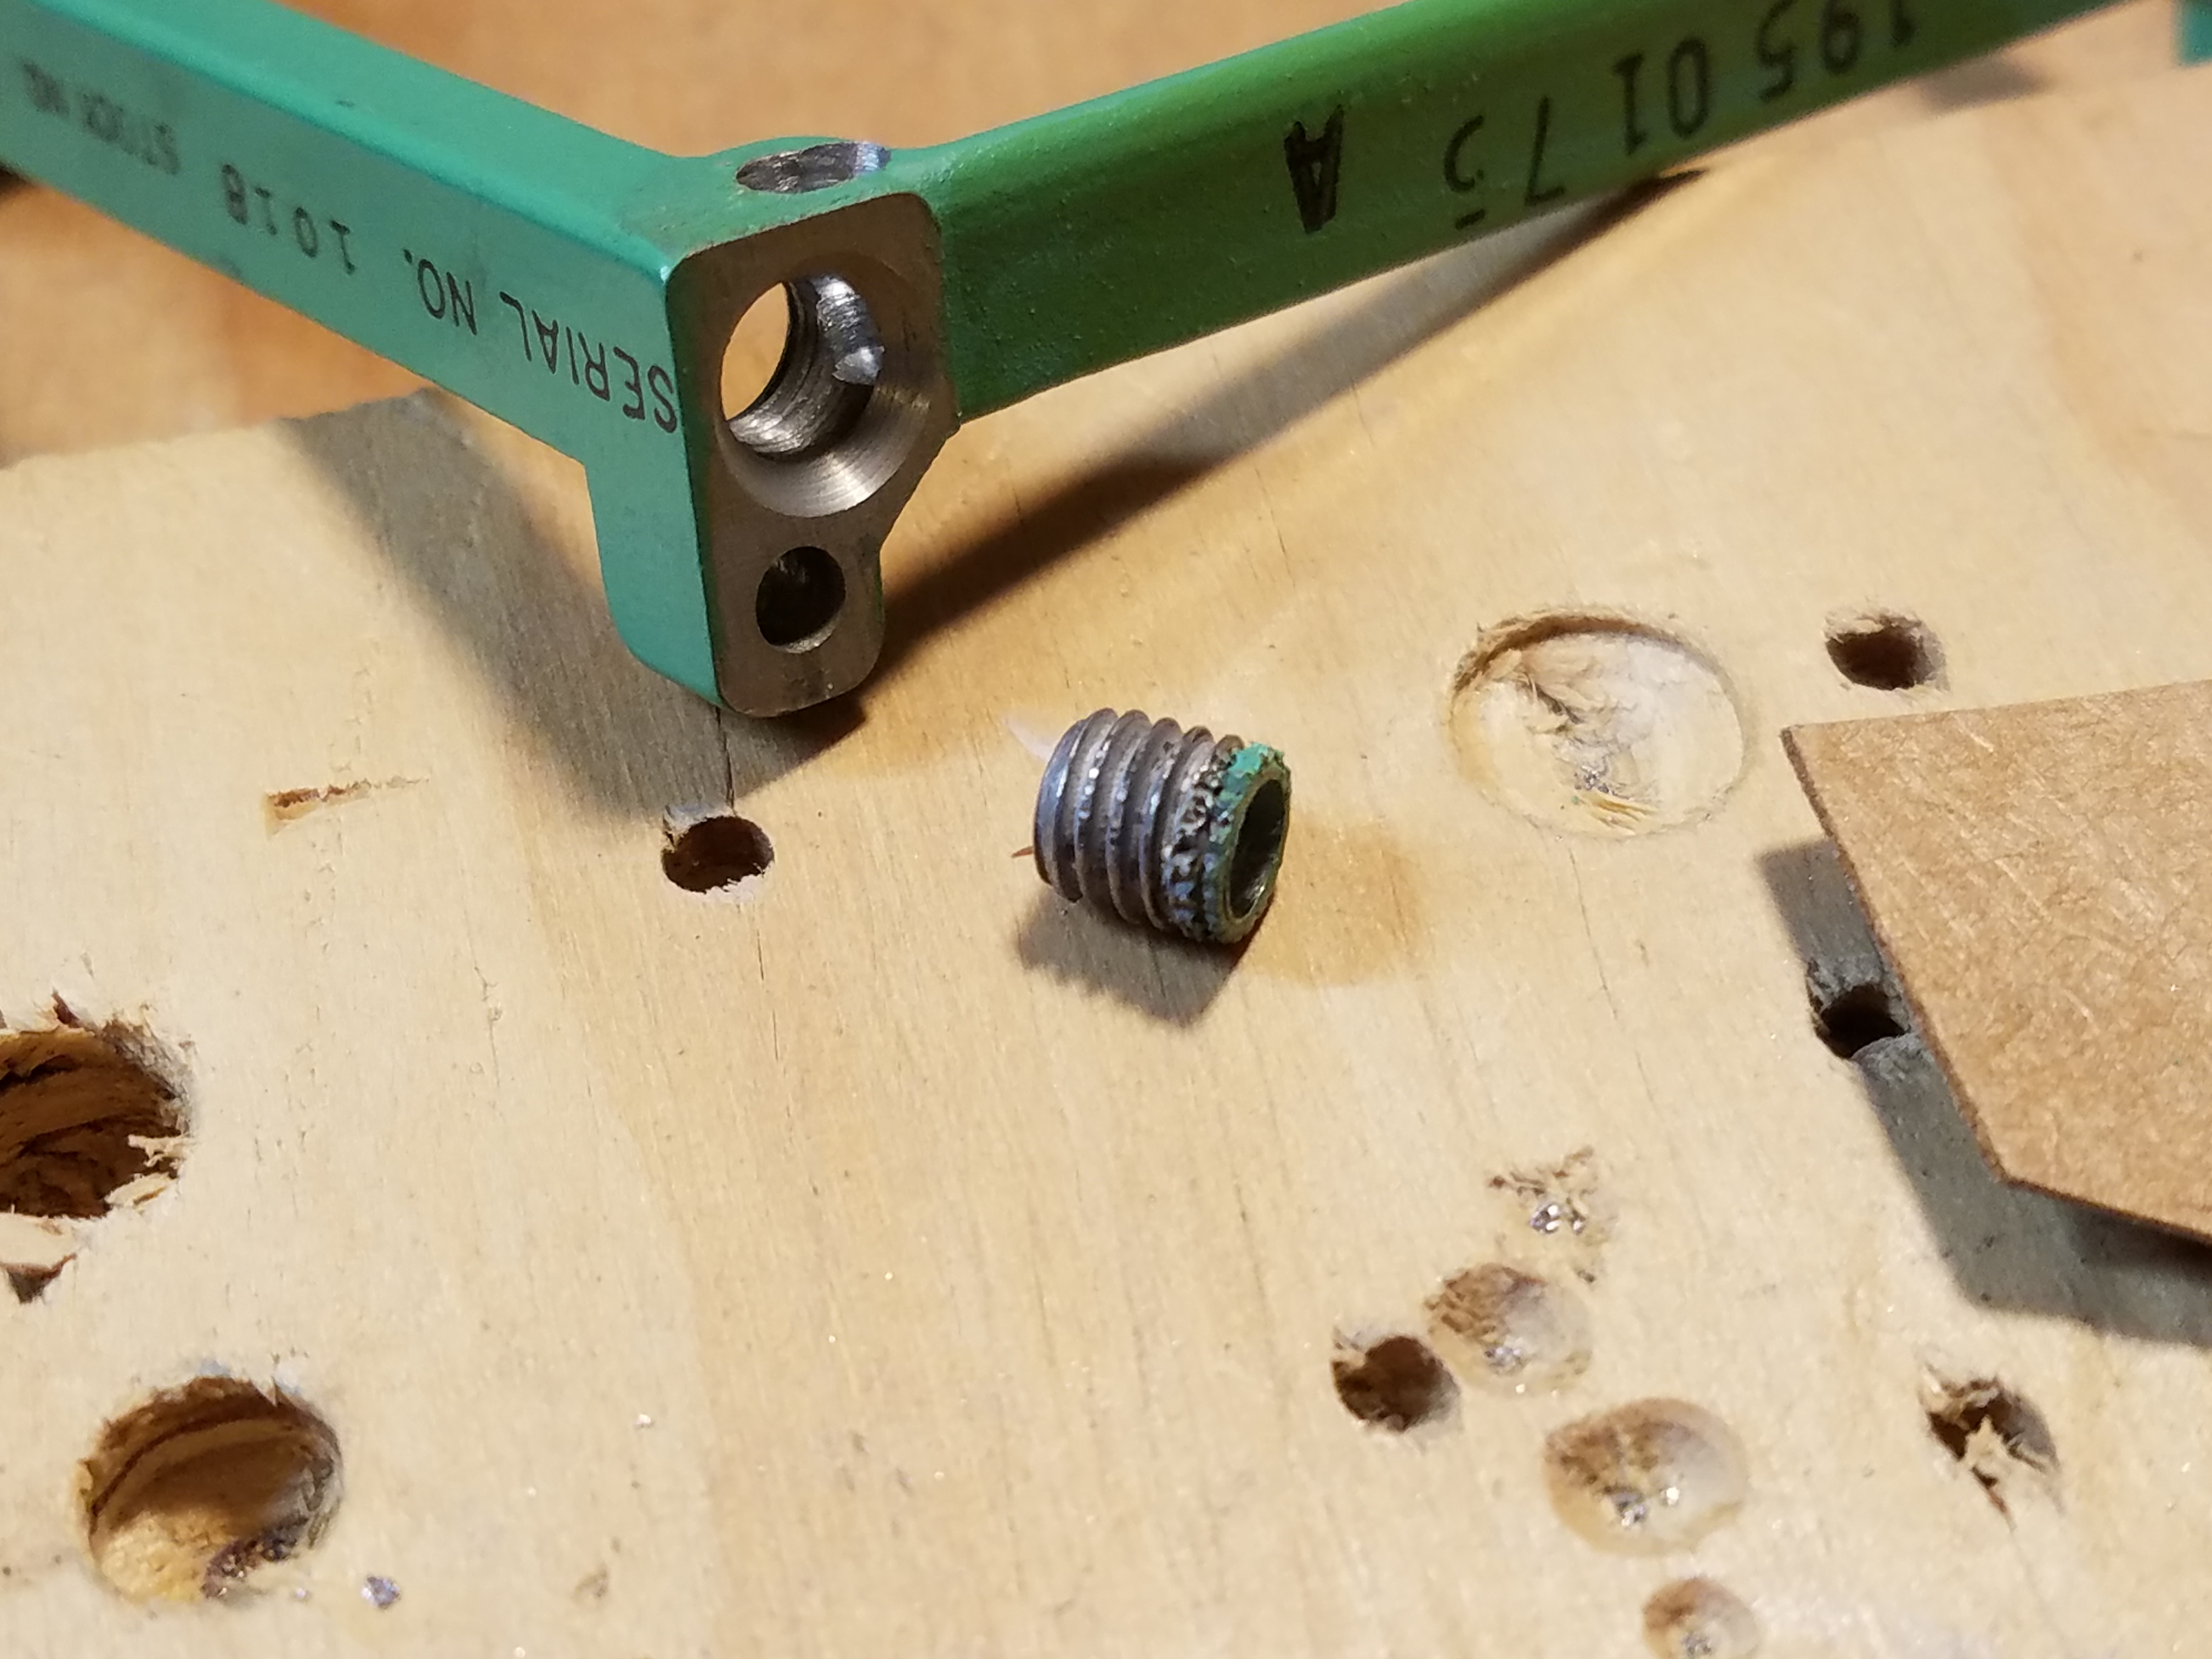
The whole process of removing the insert worked but was really a disaster. I had to clamp the frame so tightly and heat from drilling this hardened steel marred and rubbed off the paint in several spots. And to my horror, my drill bits on a few occasions went too far and scored the inside of the frame. I almost wanted to cry. I had removed the inserts but I had ruined this precious rare Librascope frame!! I was disgusted. My dream of restoring this thing was dashed. I set it down on the back of my work bench and couldn't bare to work on it anymore. And I really wasn't sure how to fix this mess, so there it sat... for two more years... Again, during those two years I thought a lot about it and how to fix it. I had some ideas, and Wonderfest 2022 was coming up so I was determined to get this thing finished up before that show. Nothing like a convention to motivate you to finish a B9 project! Last I left the frame, the inserts were removed and I needed to fill in the oversized wollered out holes before redrilling the final (smaller) holes. For this I would used JB Weld mixed with aluminum powder. JB Weld has just the right viscosity to fill the holes, its super strong, it would get in all the voids, but not too watery so it leaks out. I very carefully covered all openings with blue masking tape, and put this filler concoction in from the end, the end that gets covered by the connector. It worked perfectly! Really, really well. Now to finally drill those blasted holes for the acrylic cover... In all my thought about this over the long break, I realized drilling the two problem holes from the back side was the best plan. But this was still tricky. You see, to be accurate the holes had to come out the backside right where the "leg" of the frame sticks down. The hole has to actually bisect the side of this leg. To make drilling it this way possible, I cut a small piece of aluminum, and carefully clamped it to the side of the leg. The drill bit would naturally want to bisect the two pieces, exactly what I wanted. This worked great! The holes were now drilled through my repaired spots, and the correct size. Wahoo! A major victory! But now I was faced with painting, and trying to make it look like it had never been touched up. 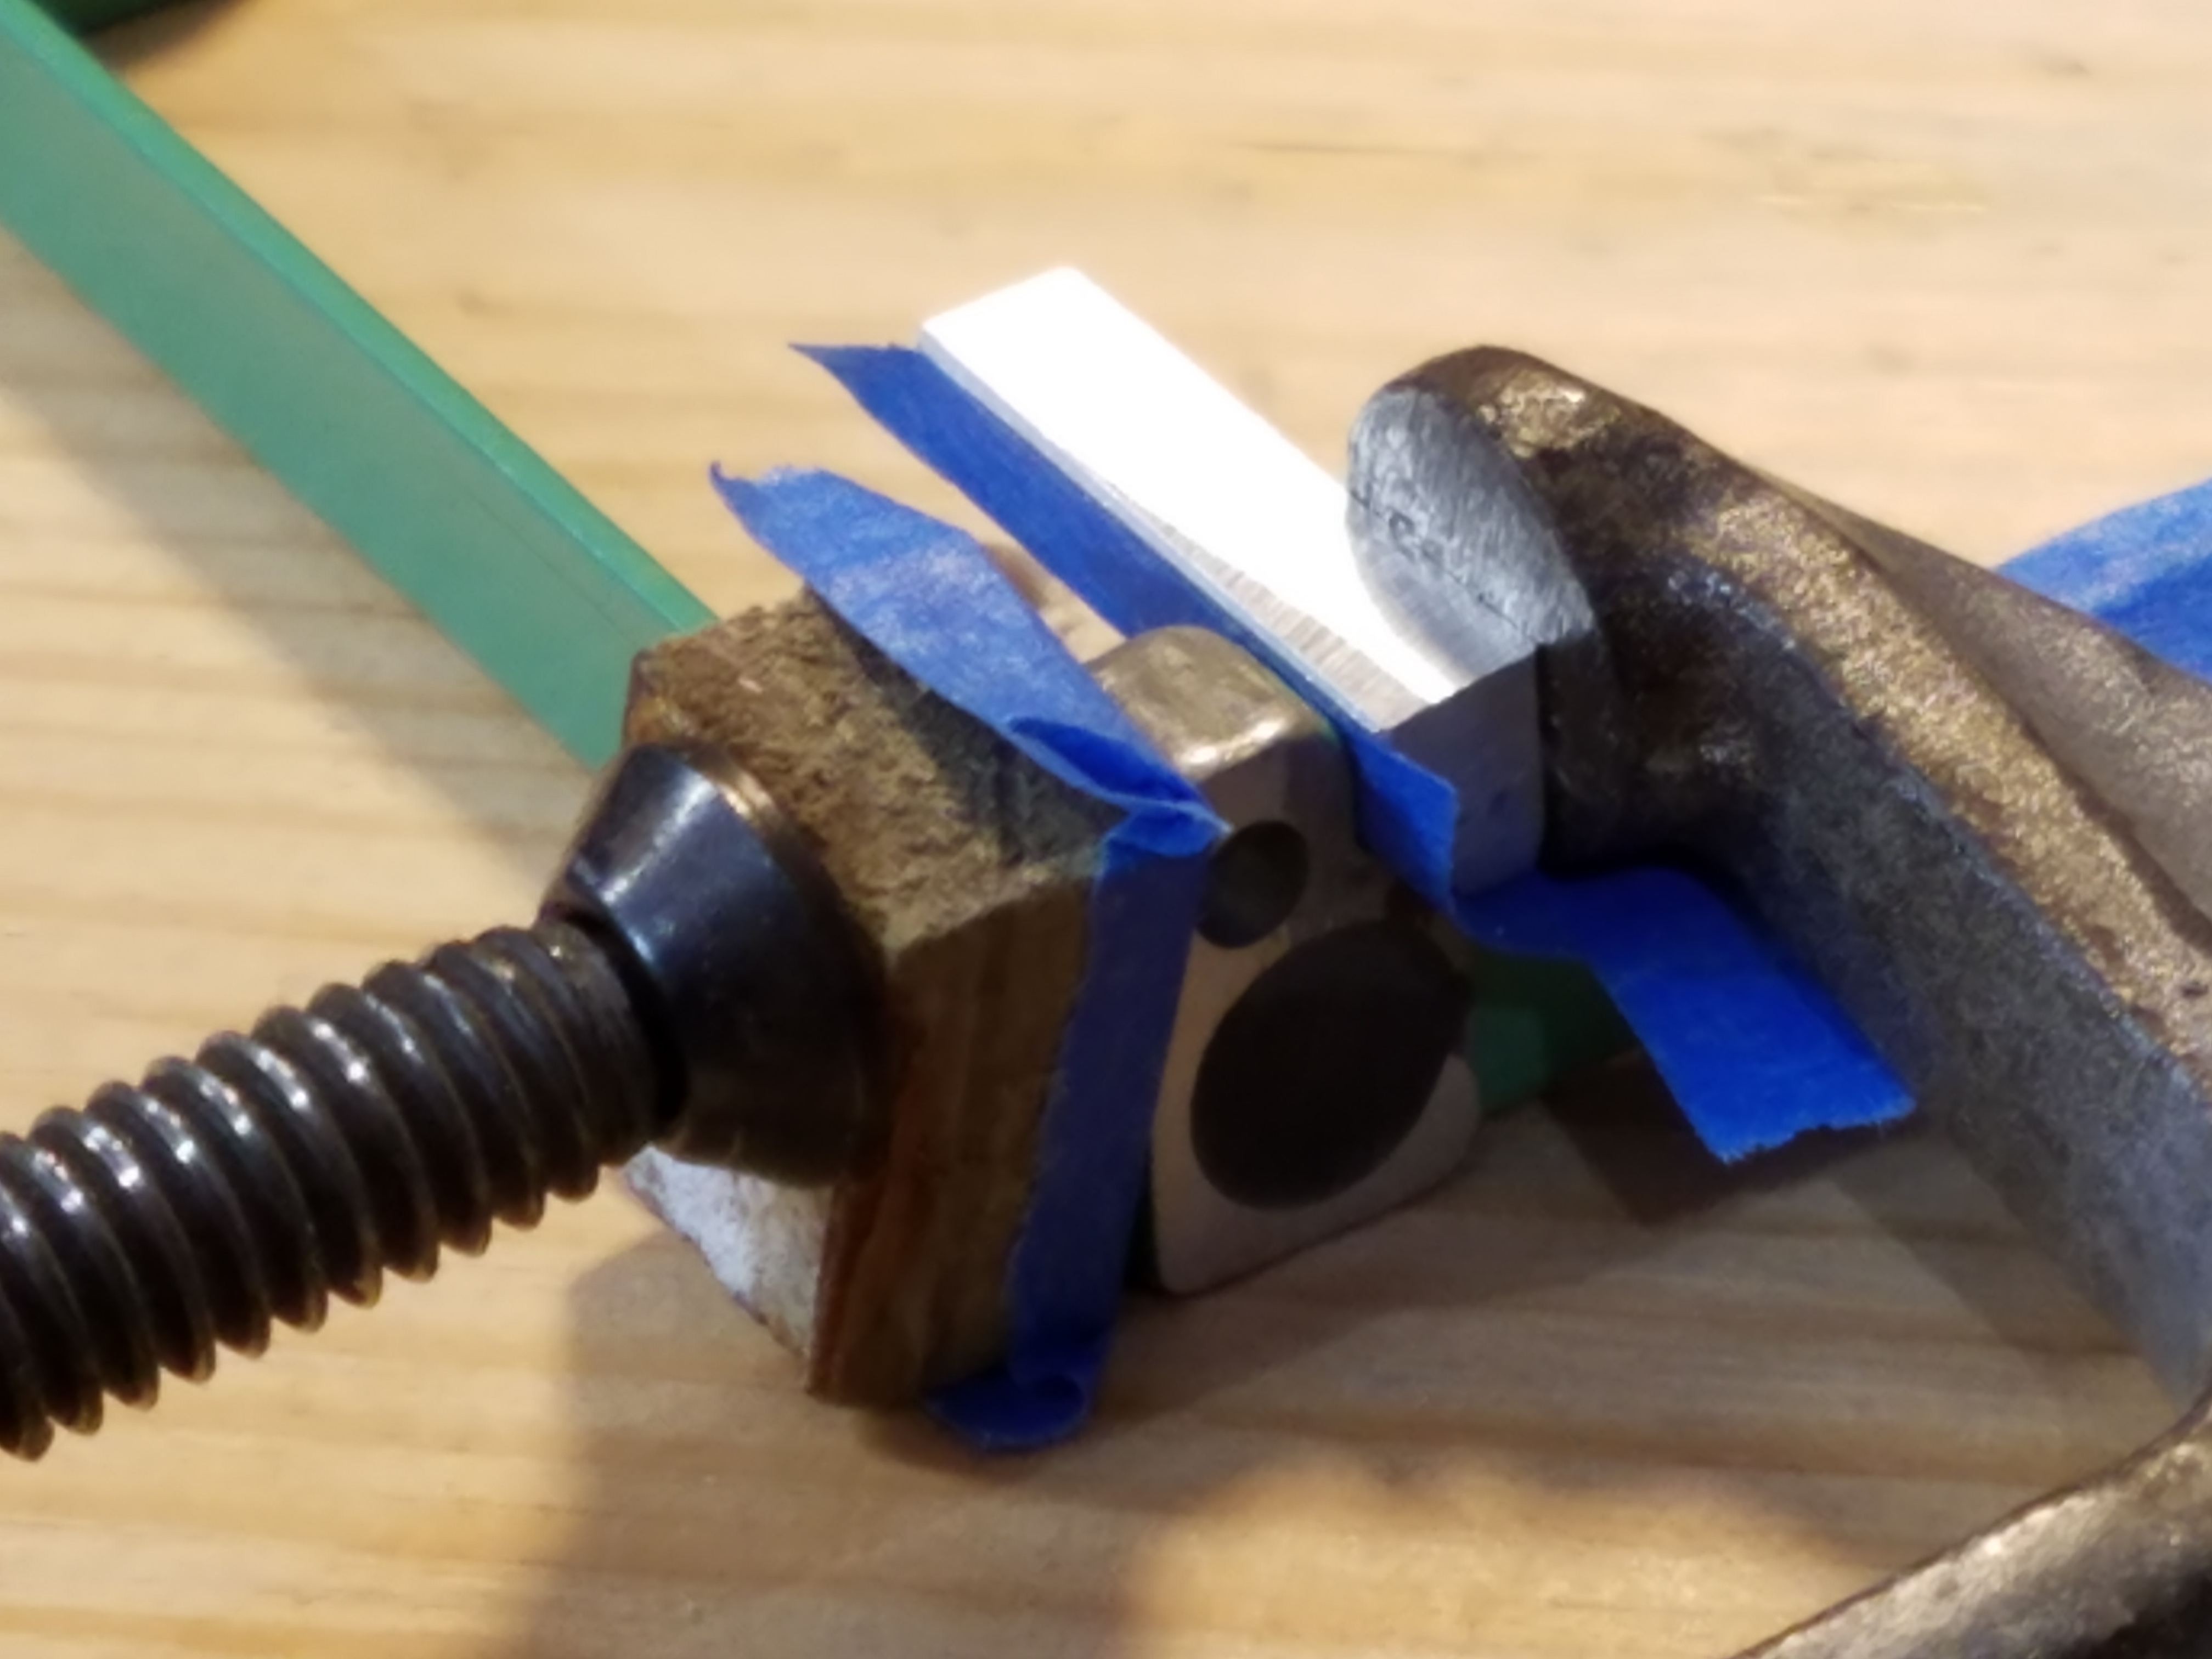
I added a bit of glazing putty to my scrapes and repaired areas and very carefully wet sanded those spots trying to contain the damage to the good original paint. Luckily there was not any damage to the sides with all the text labeling. I got all the spots perfectly smooth, and ready for paint. Air brush time... Gulp! I grabbed the new airbrush I received as a Christmas present several years before. I watched a bunch of YouTube videos and felt ready to tackle it. I also found that you can airbrush with acrylic paint, thinned with Isopropyl Alcohol. Why did I want to use acrylic paint? Because it is very readily available at craft stores like Michaels, and they have about a billion colors to choose from. But even so, I could not find one perfect match to the Power Pack frame. I choose some close colors I thought would mix well to match the original greenish-blue. I was surprised at how easy it was to get the correct color, but easy was probably really just luck. But at this point in the project, I think I deserved a little luck! I did a little practicing with the airbrush until I felt I had the technique down enough to do the Power Pack touchups. I masked some of the good areas of the frame, particularly the text labels on the sides. I painted... the nice advantage of airbrush painting is it goes on very thin, so it is not hard to blend it. The results were amazing! I had nailed the color. But one more problem... Arg! The original paint had a satin finish, and my paint was very matte. So, I bought some satin clear coat (in a can), and carefully touched up the painted areas. It worked great. By some miracle this all worked, and the frame looked pristine, and untouched, which was my goal. Wahoo! The frame was finally done!! 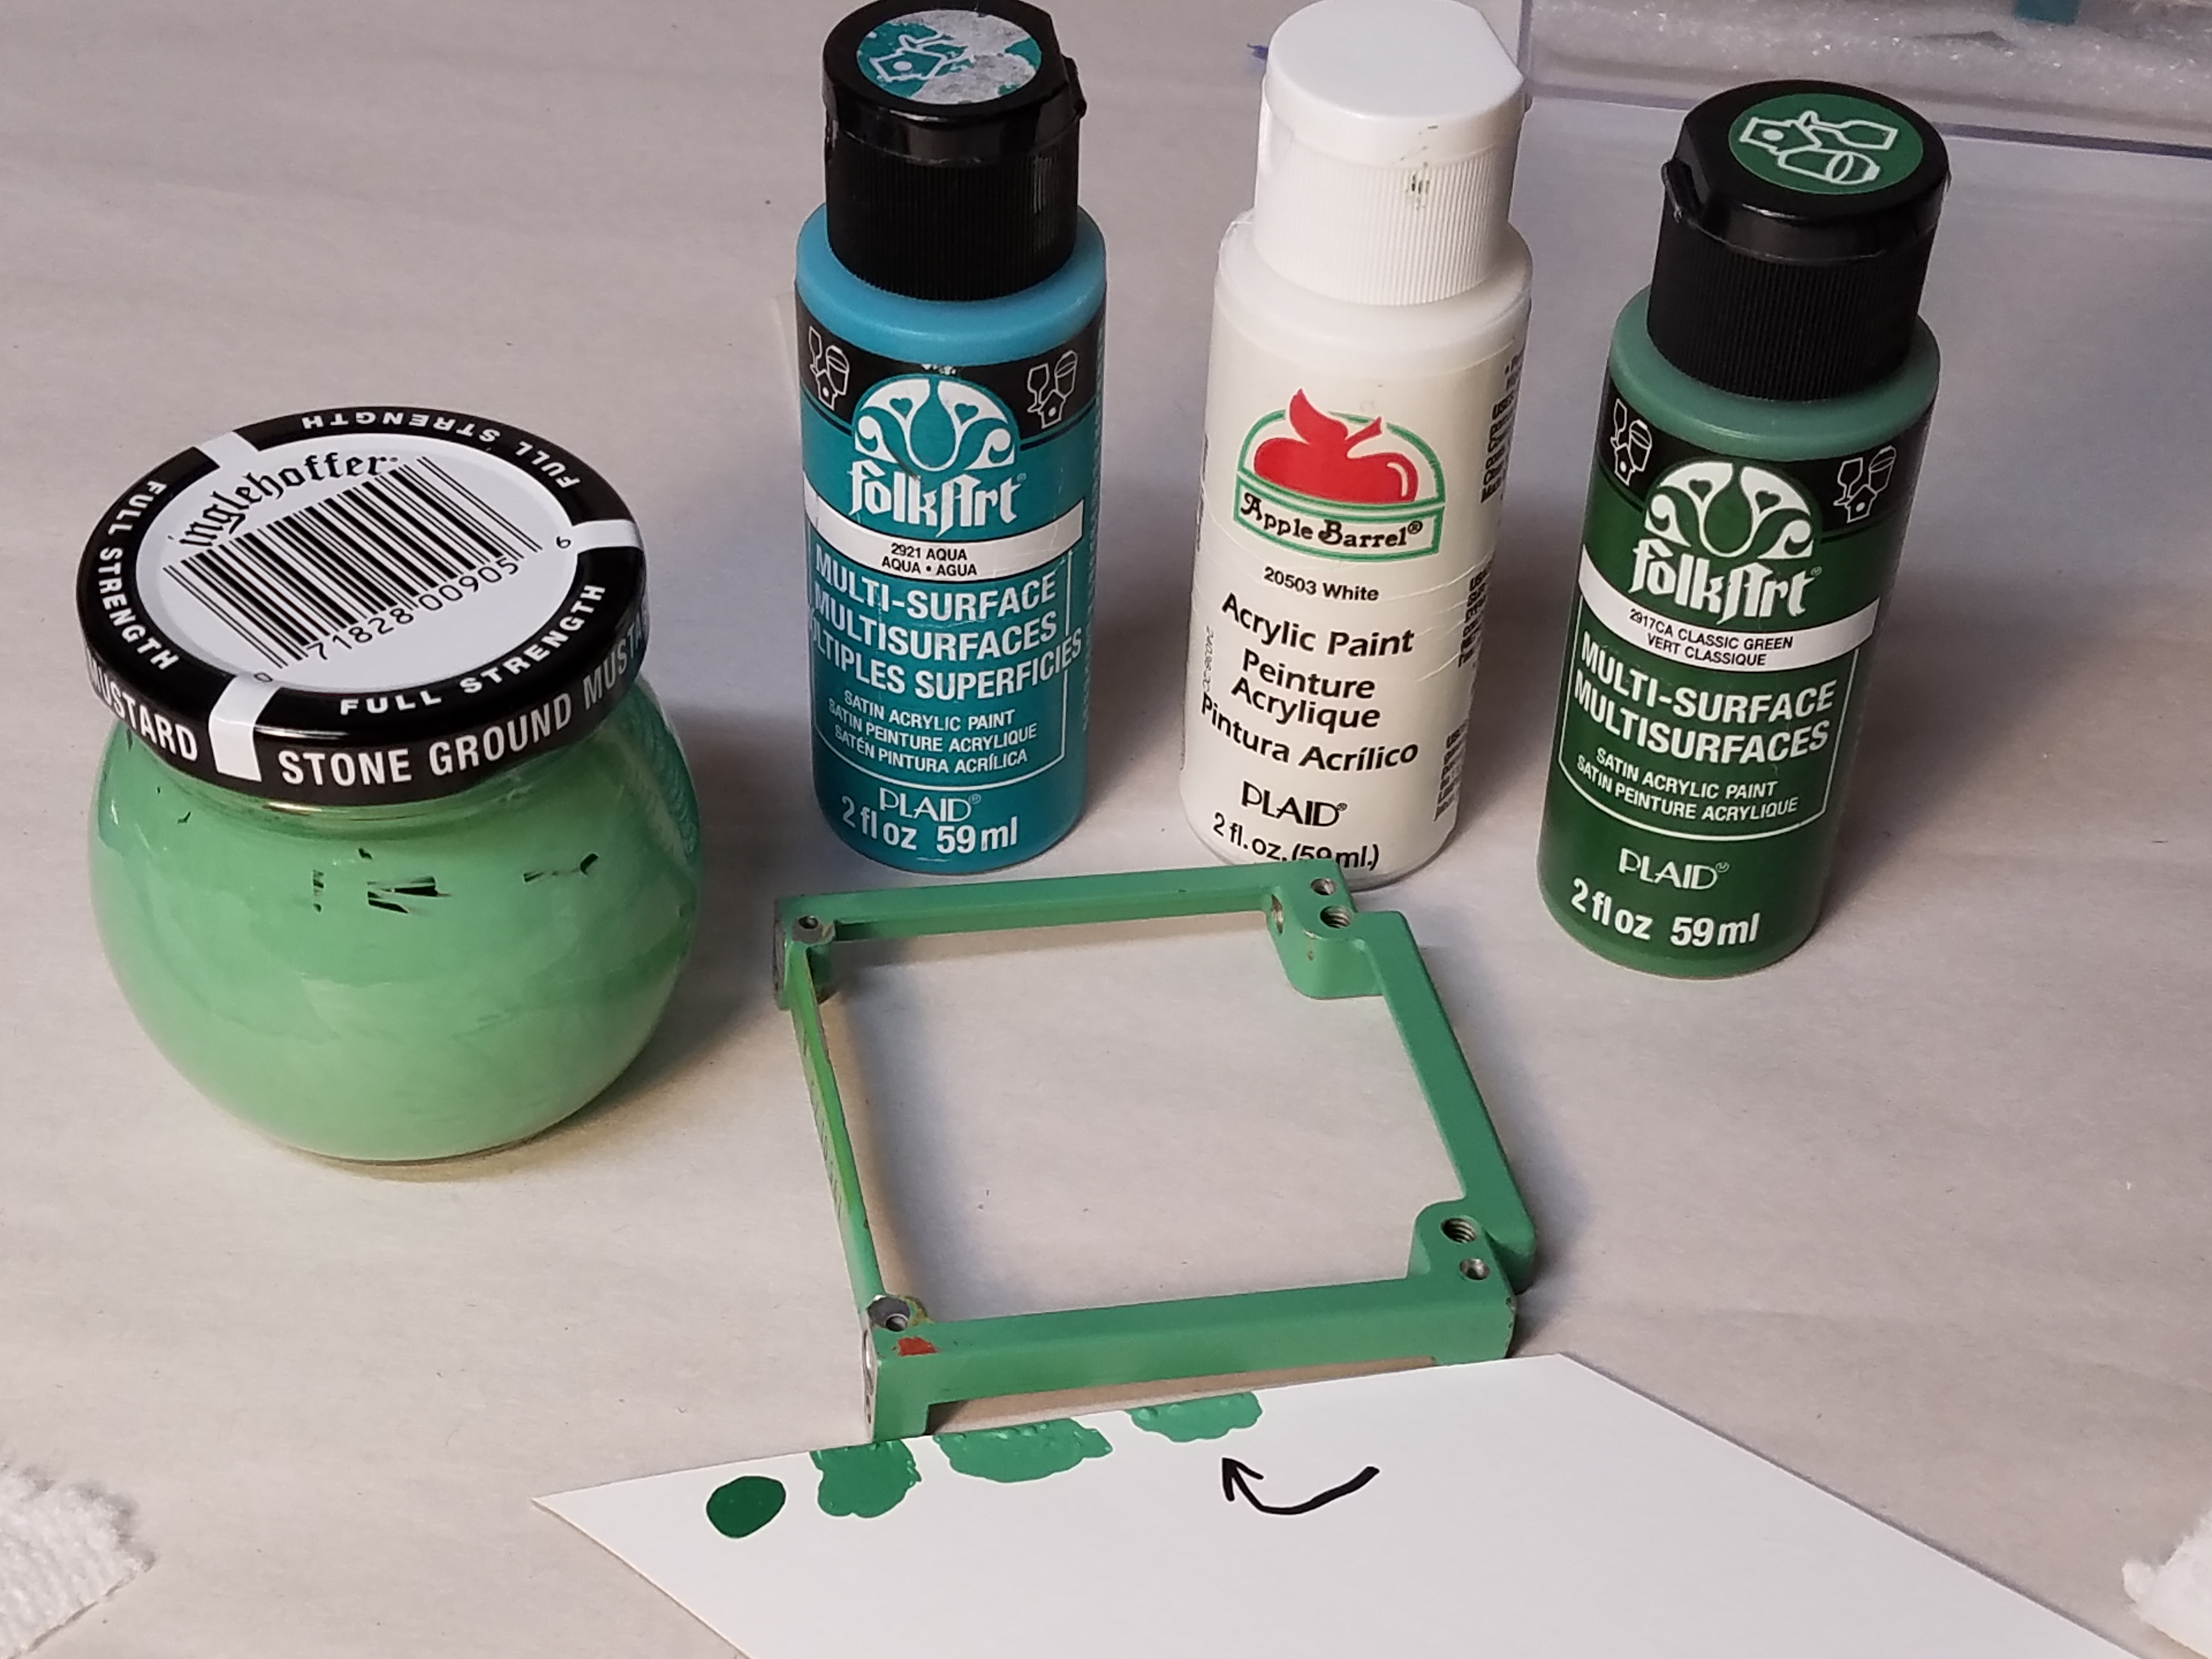
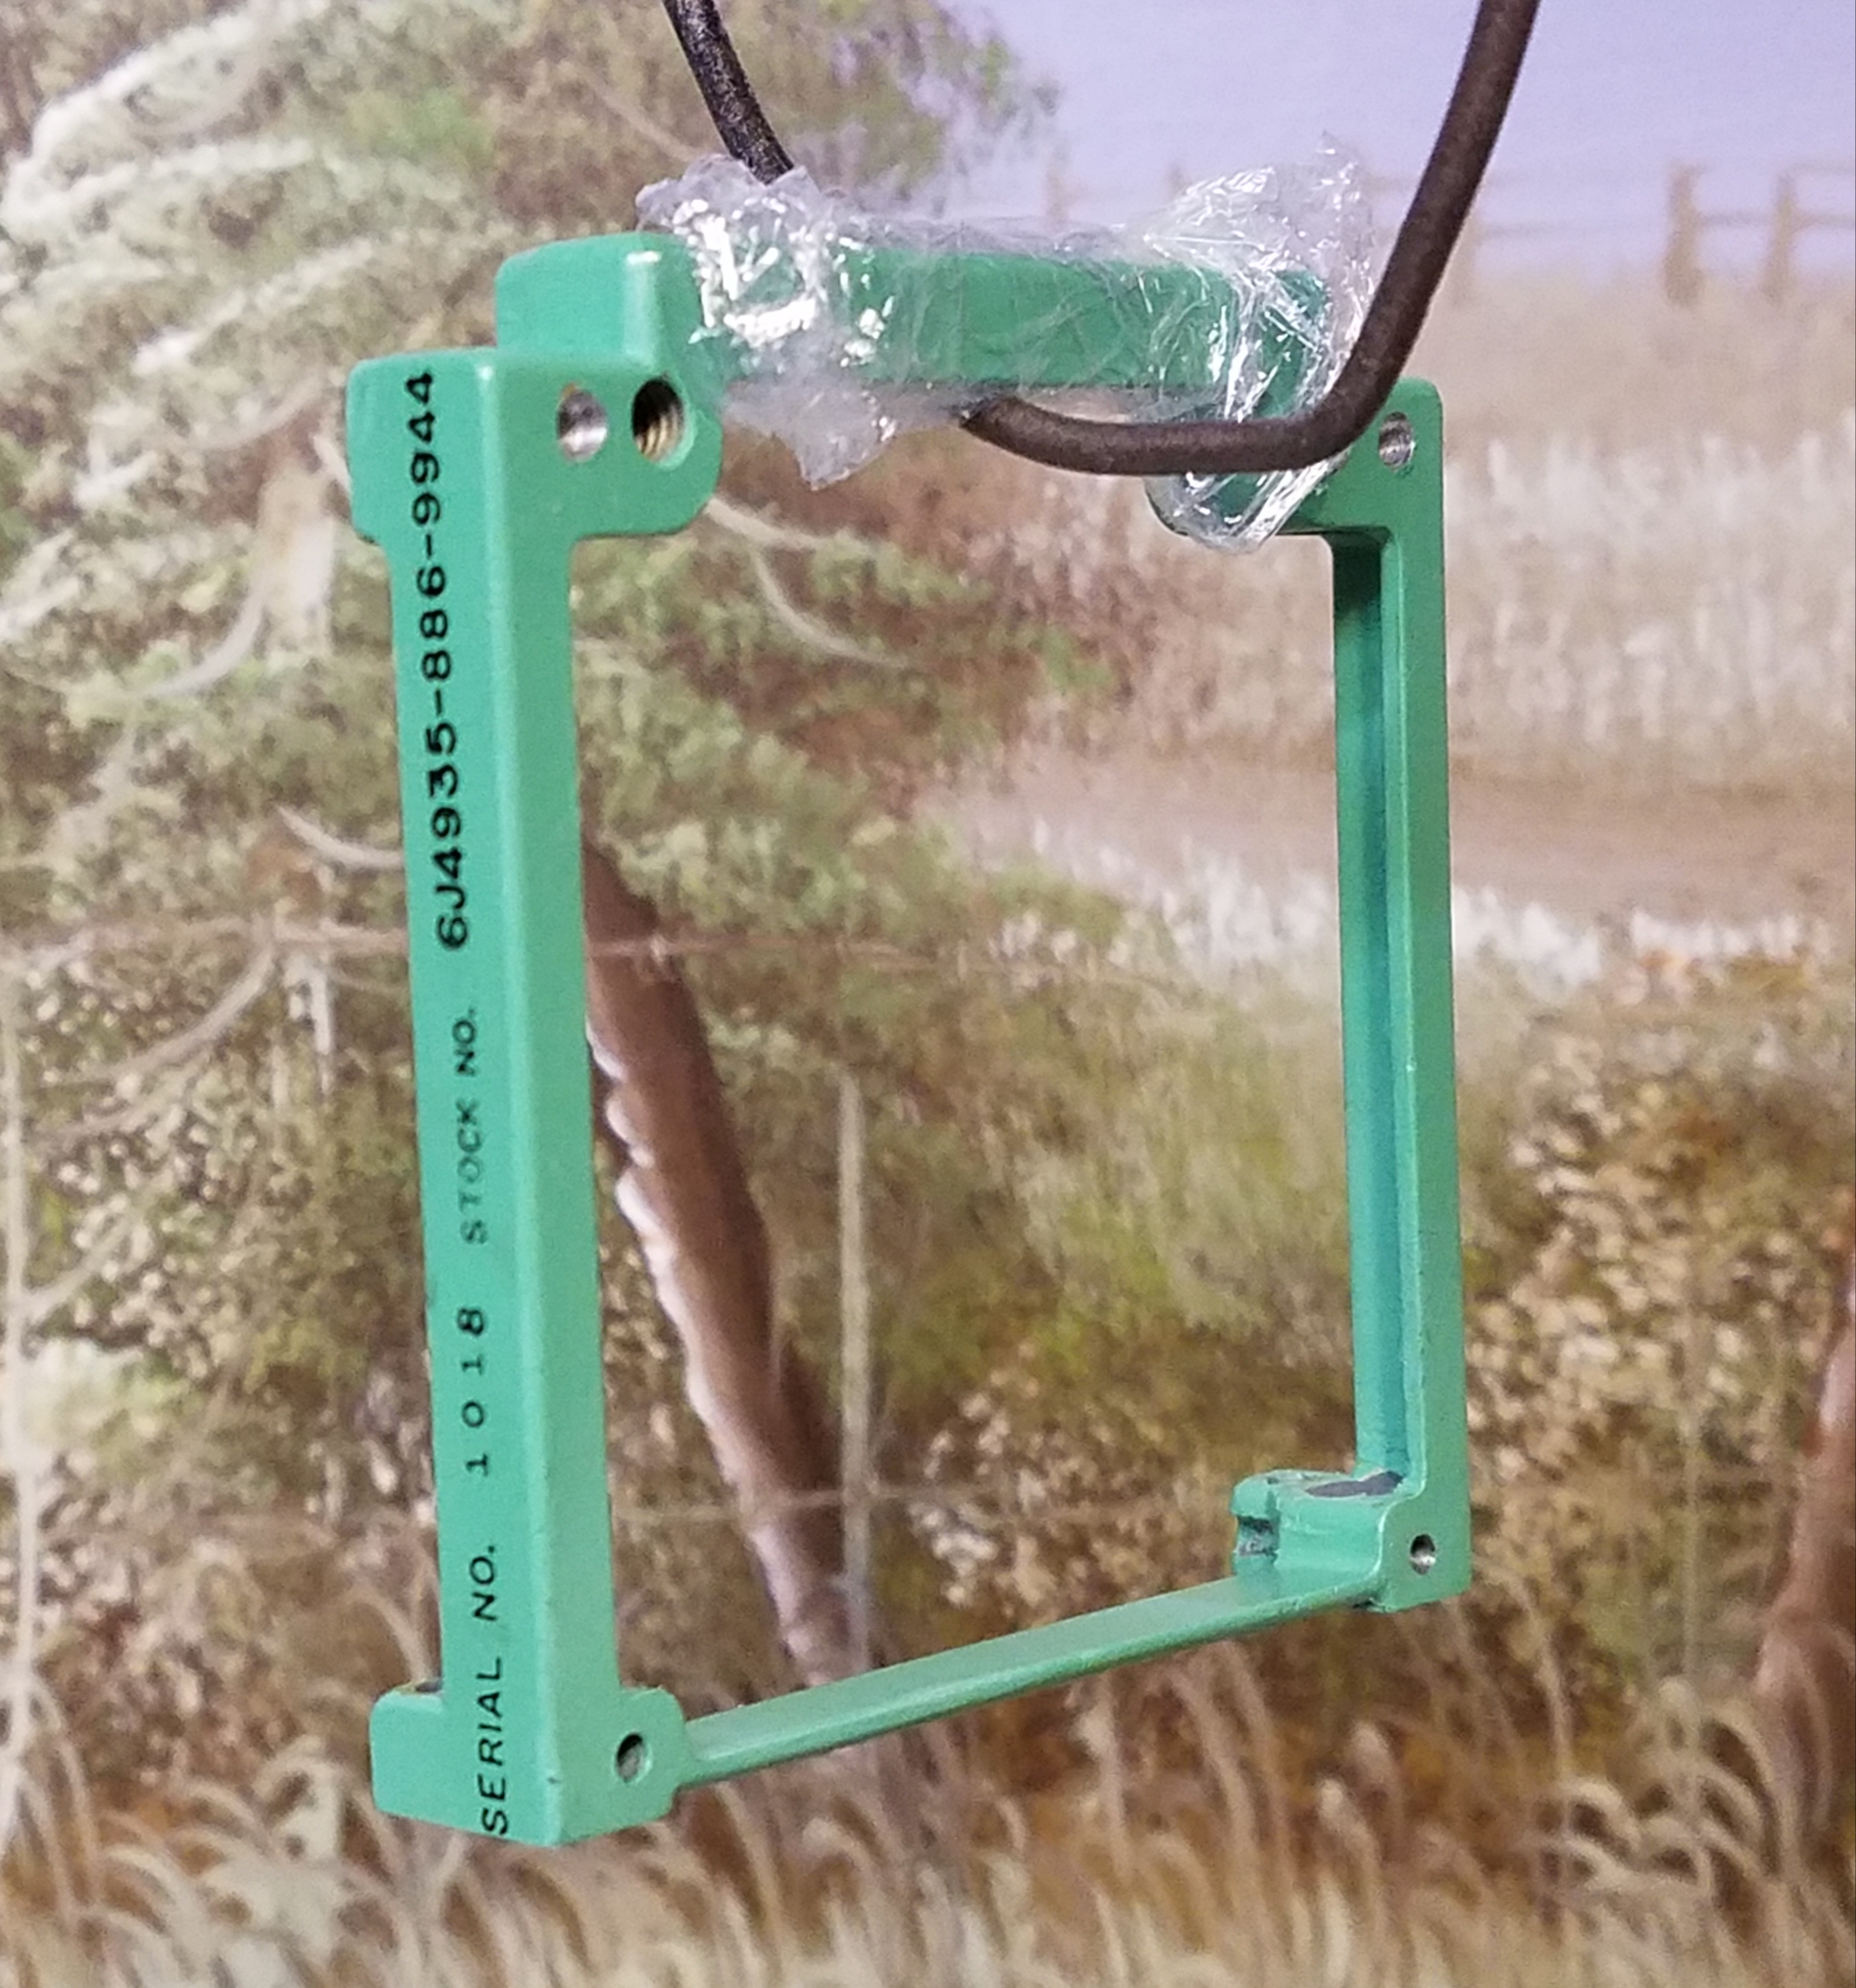
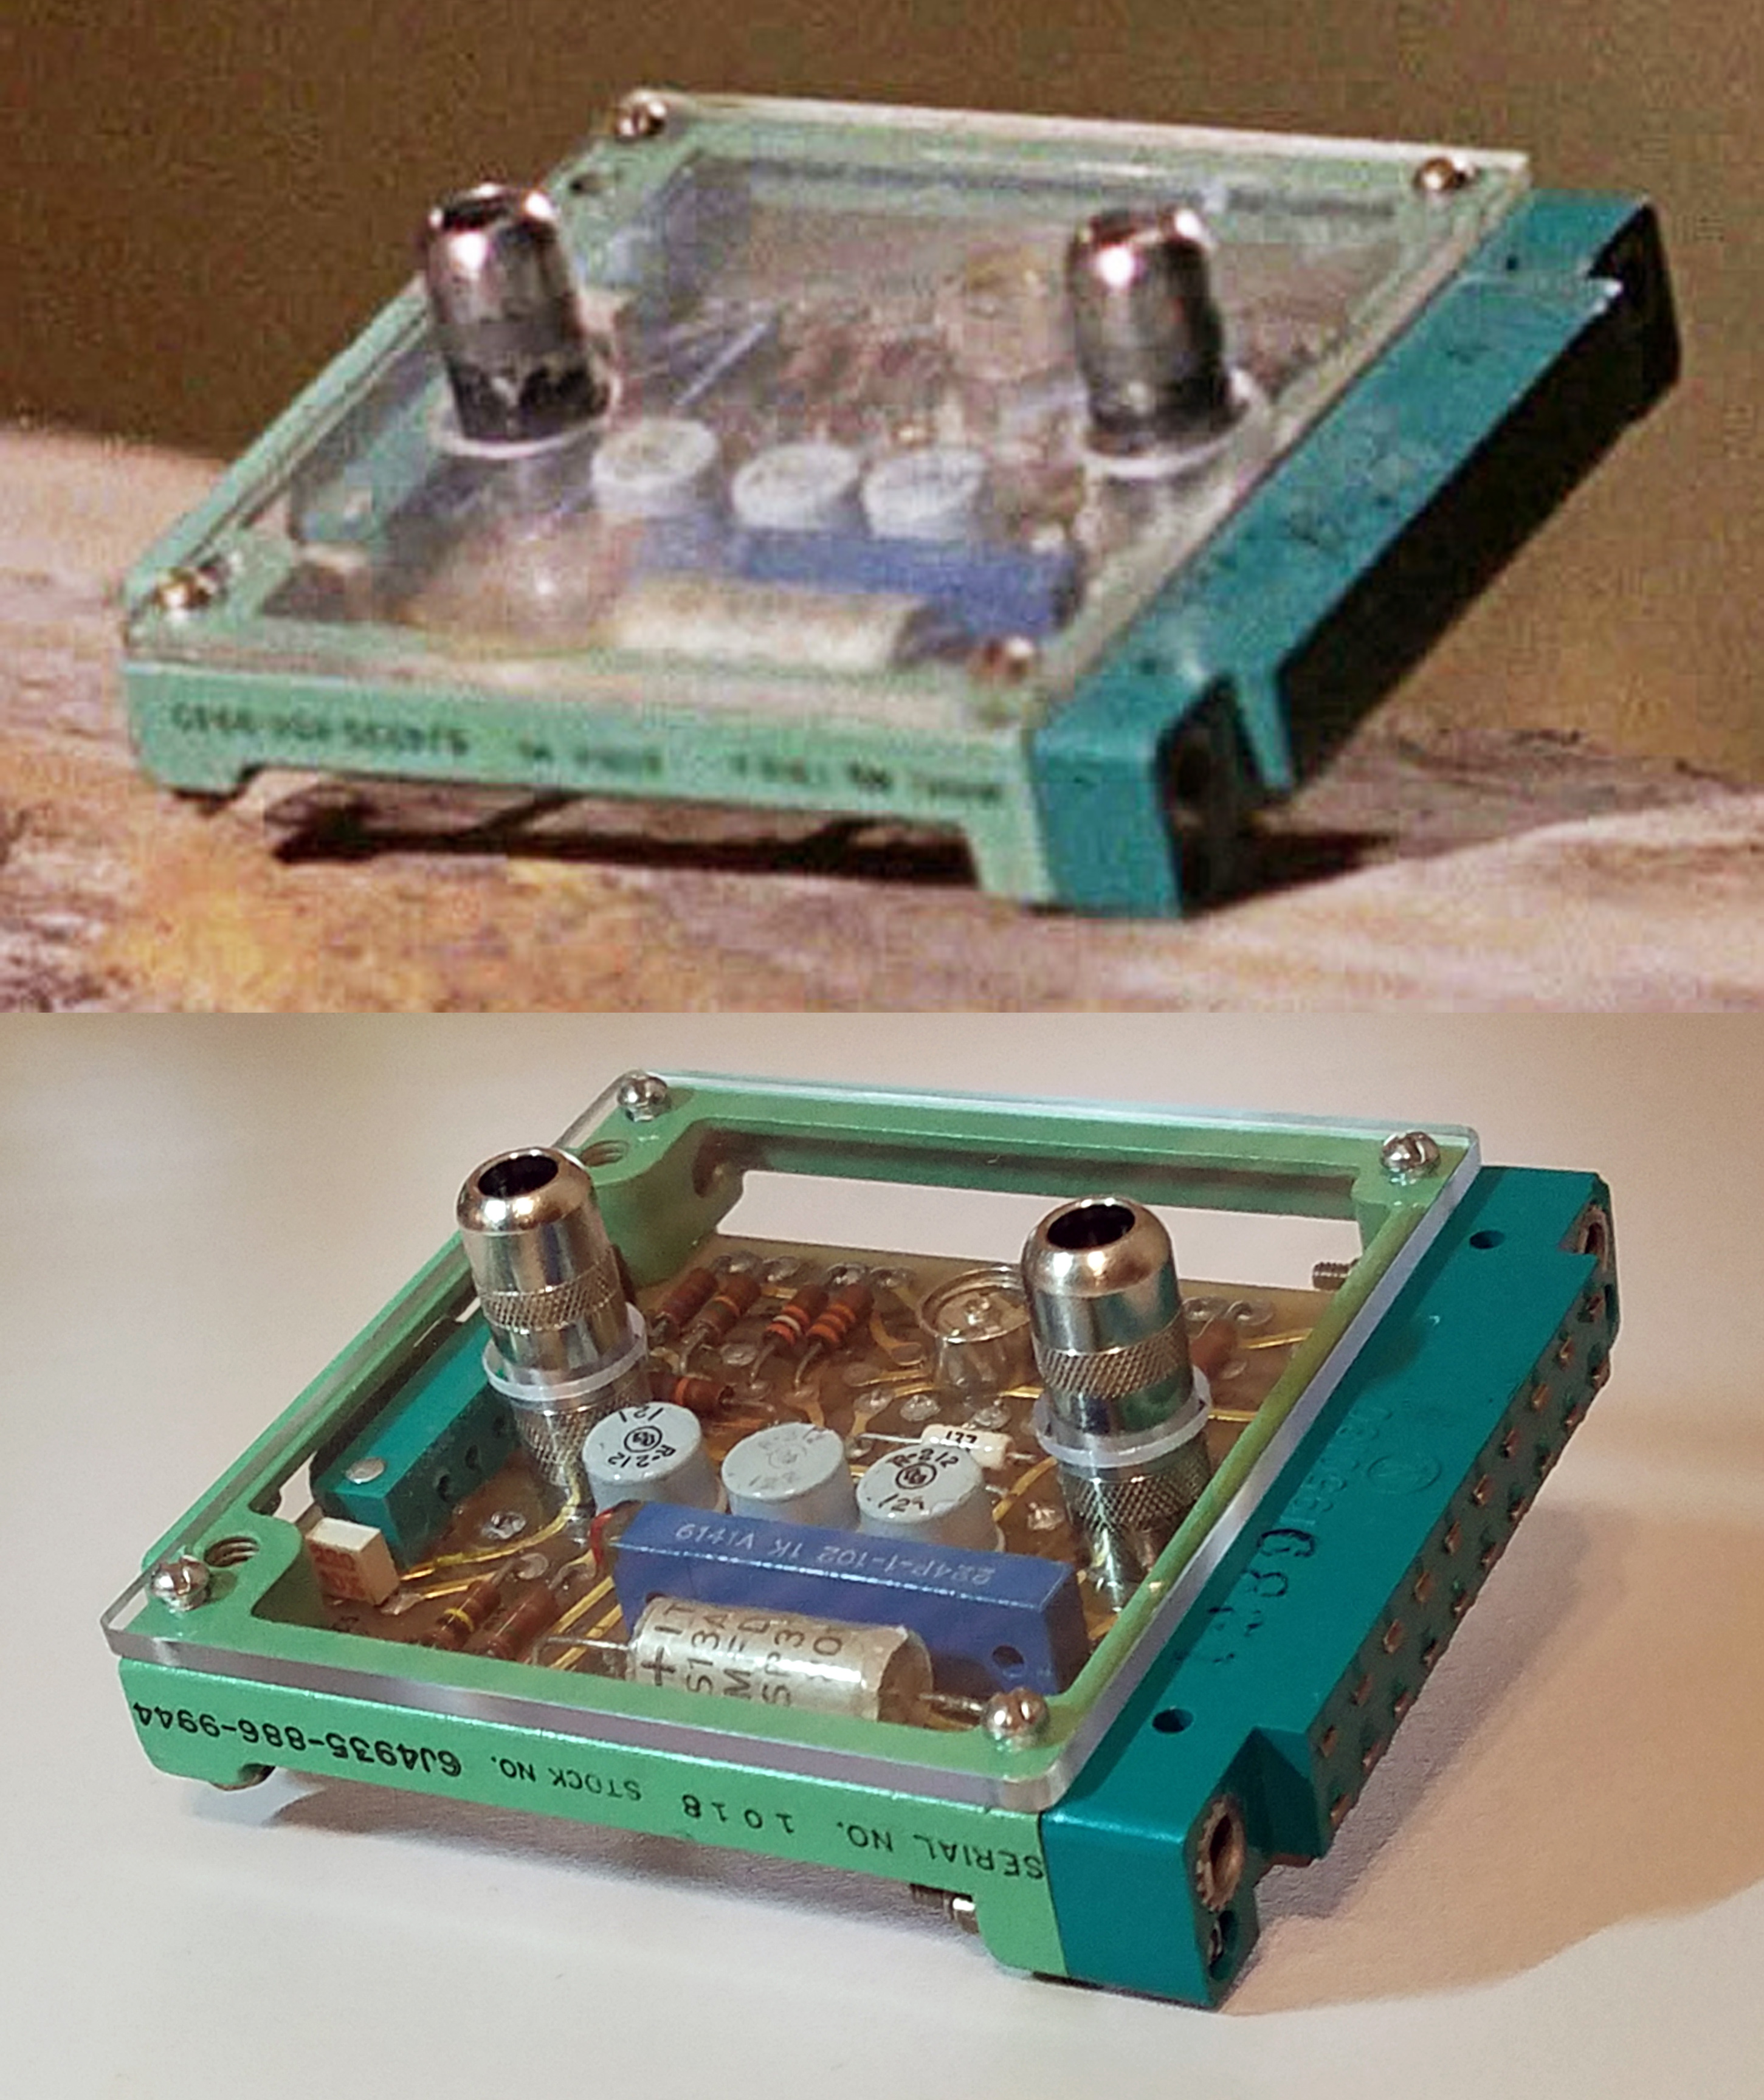
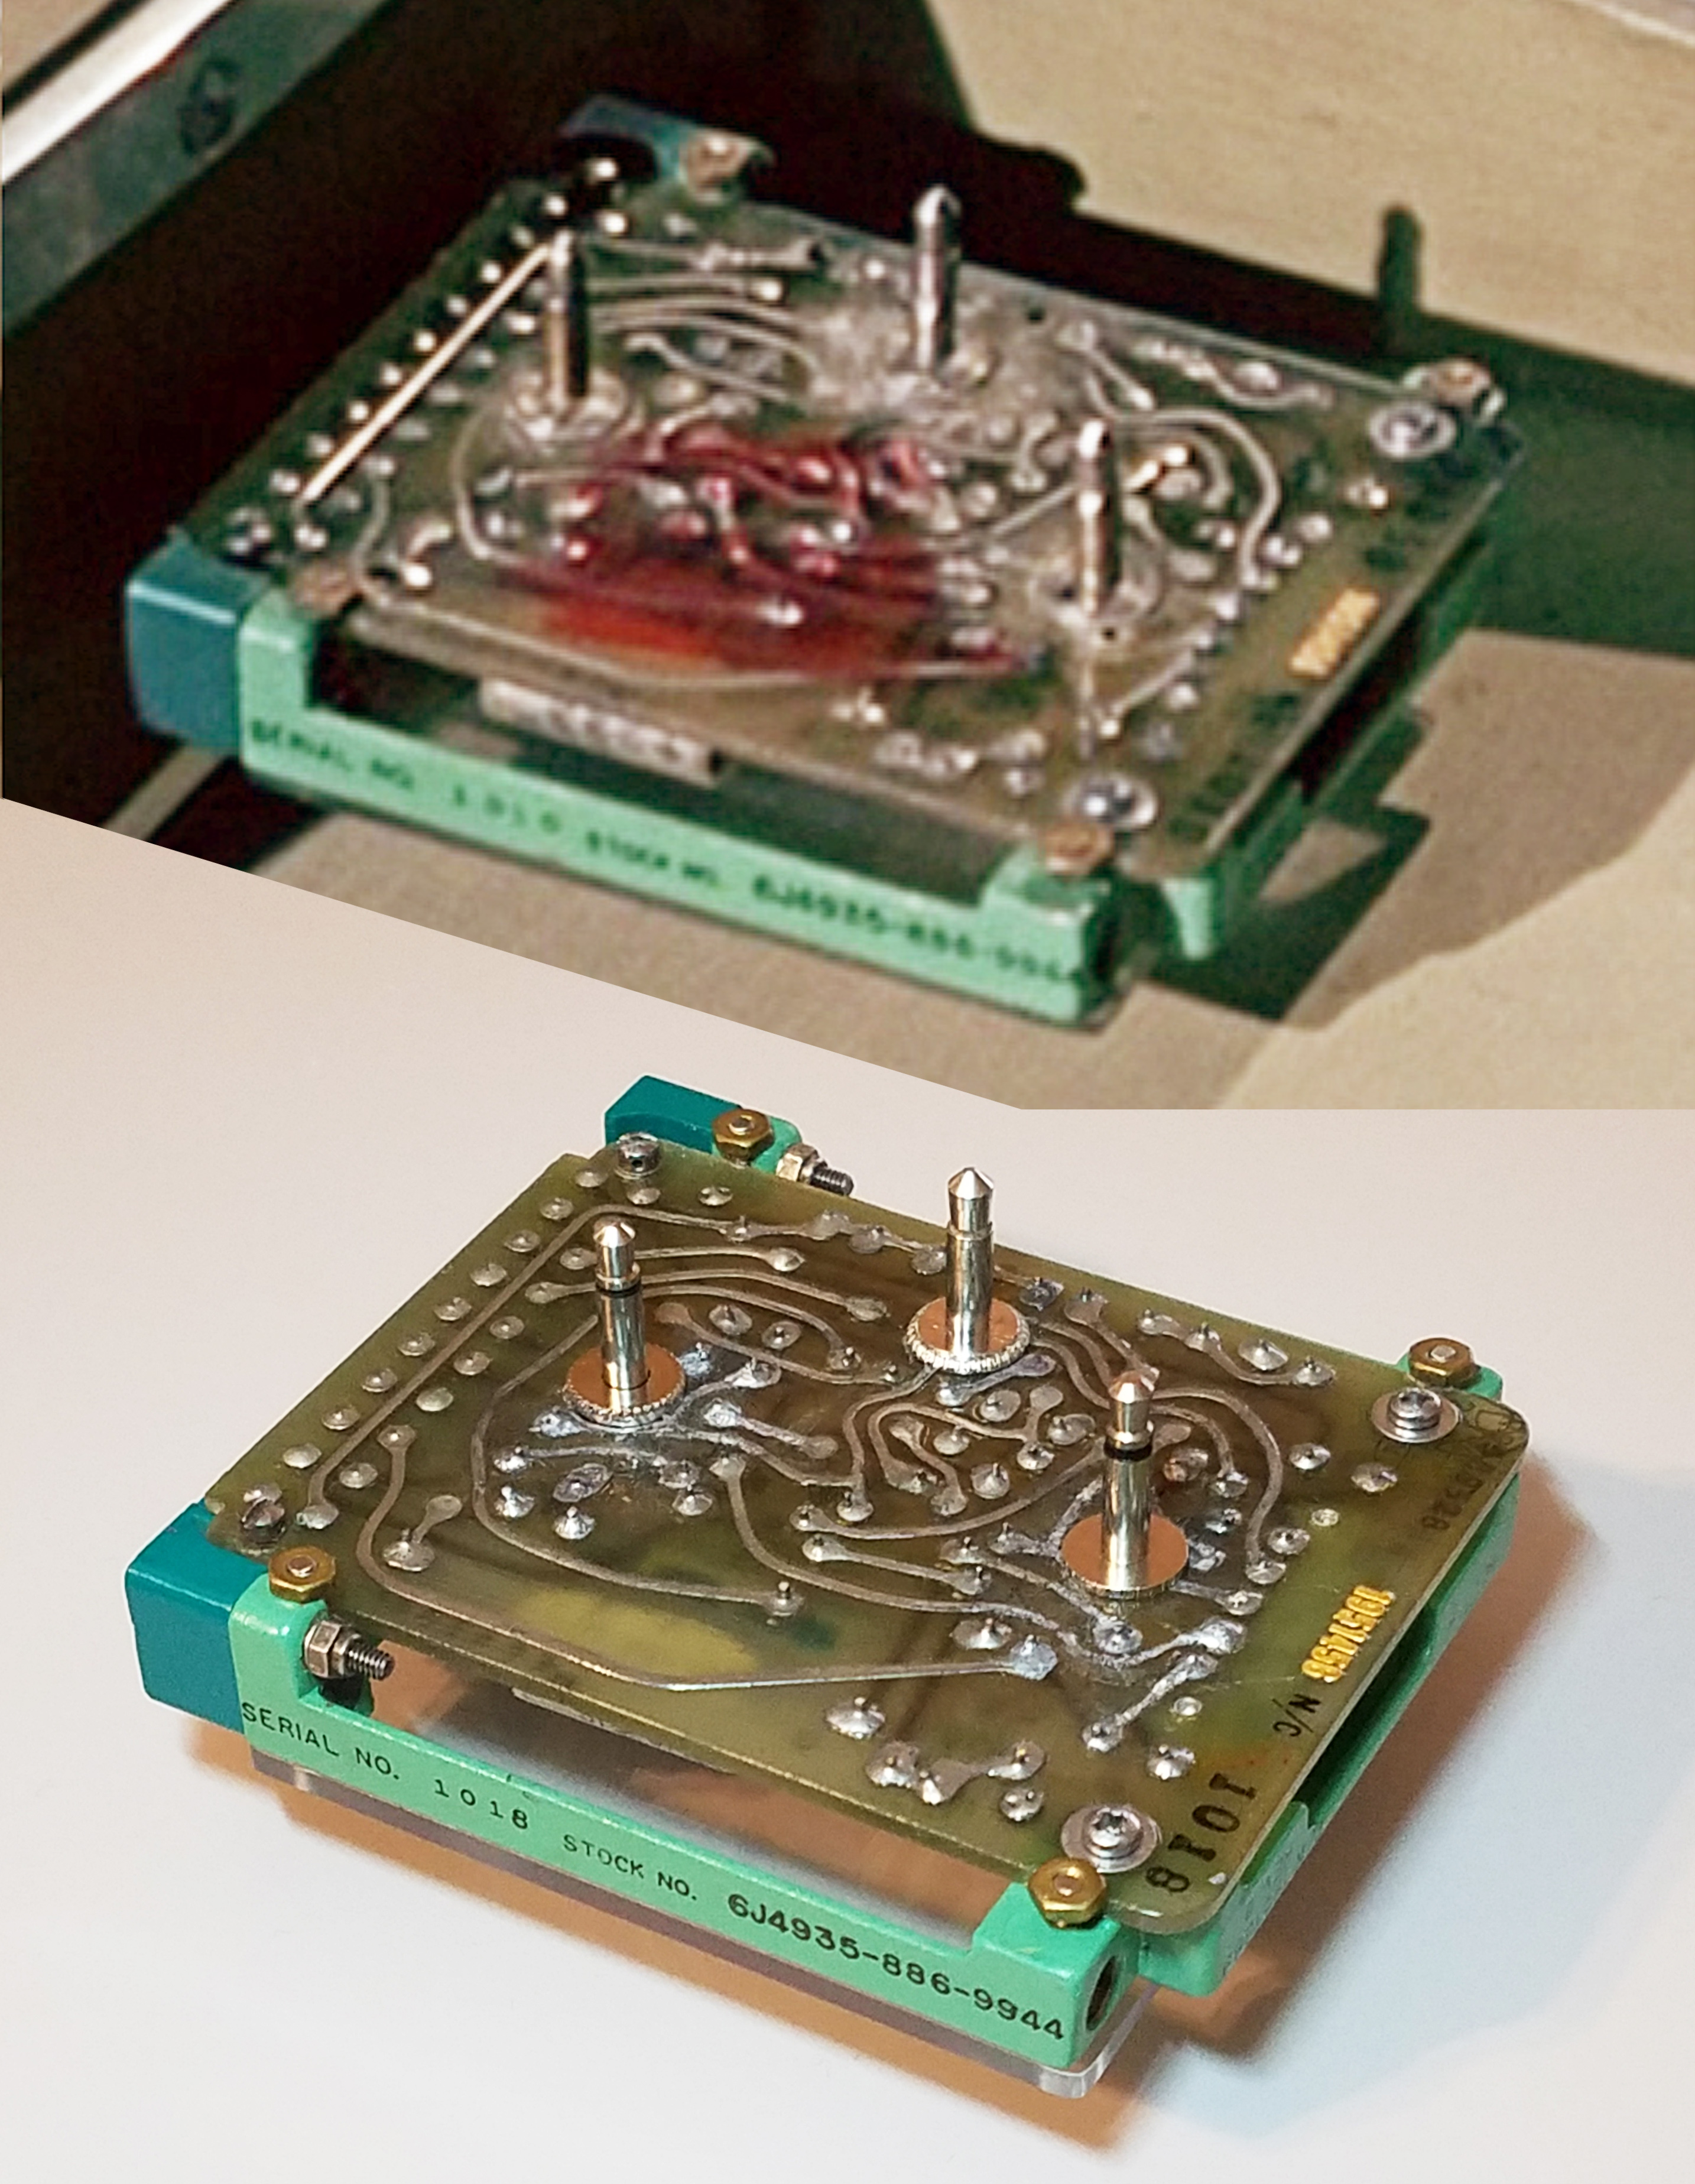
One last step. Make an accurate clear acrylic cover. Careful study of original screen grabs shows, the cover was not 1/16" or 1/8" thick, but right in between, 3/32". That is not as common and a bit harder to find, but it is out there. I bought some 3/32" acrylic from ebay, and it was crap. Impossible to cut and machine. So, I regrouped and bought some 3/32" Polycarbonite. This was not as easy to work with as Cast Acrylic, but manageable and I was able to cut and create a very nice, accurate clear cover. When I assembled everything together, I couldn't be happier! Particularly, with all the obstacles and setbacks along the way. This was an 8 year long journey. At many points this was a nightmare, but when you finally overcome, these are also the most satisfying. And for this reason, I am really proud of this piece. It looks extremely accurate to the original Hero Power Pack, and you have to really look hard to see any of the repairs. That was my goal at the beginning. 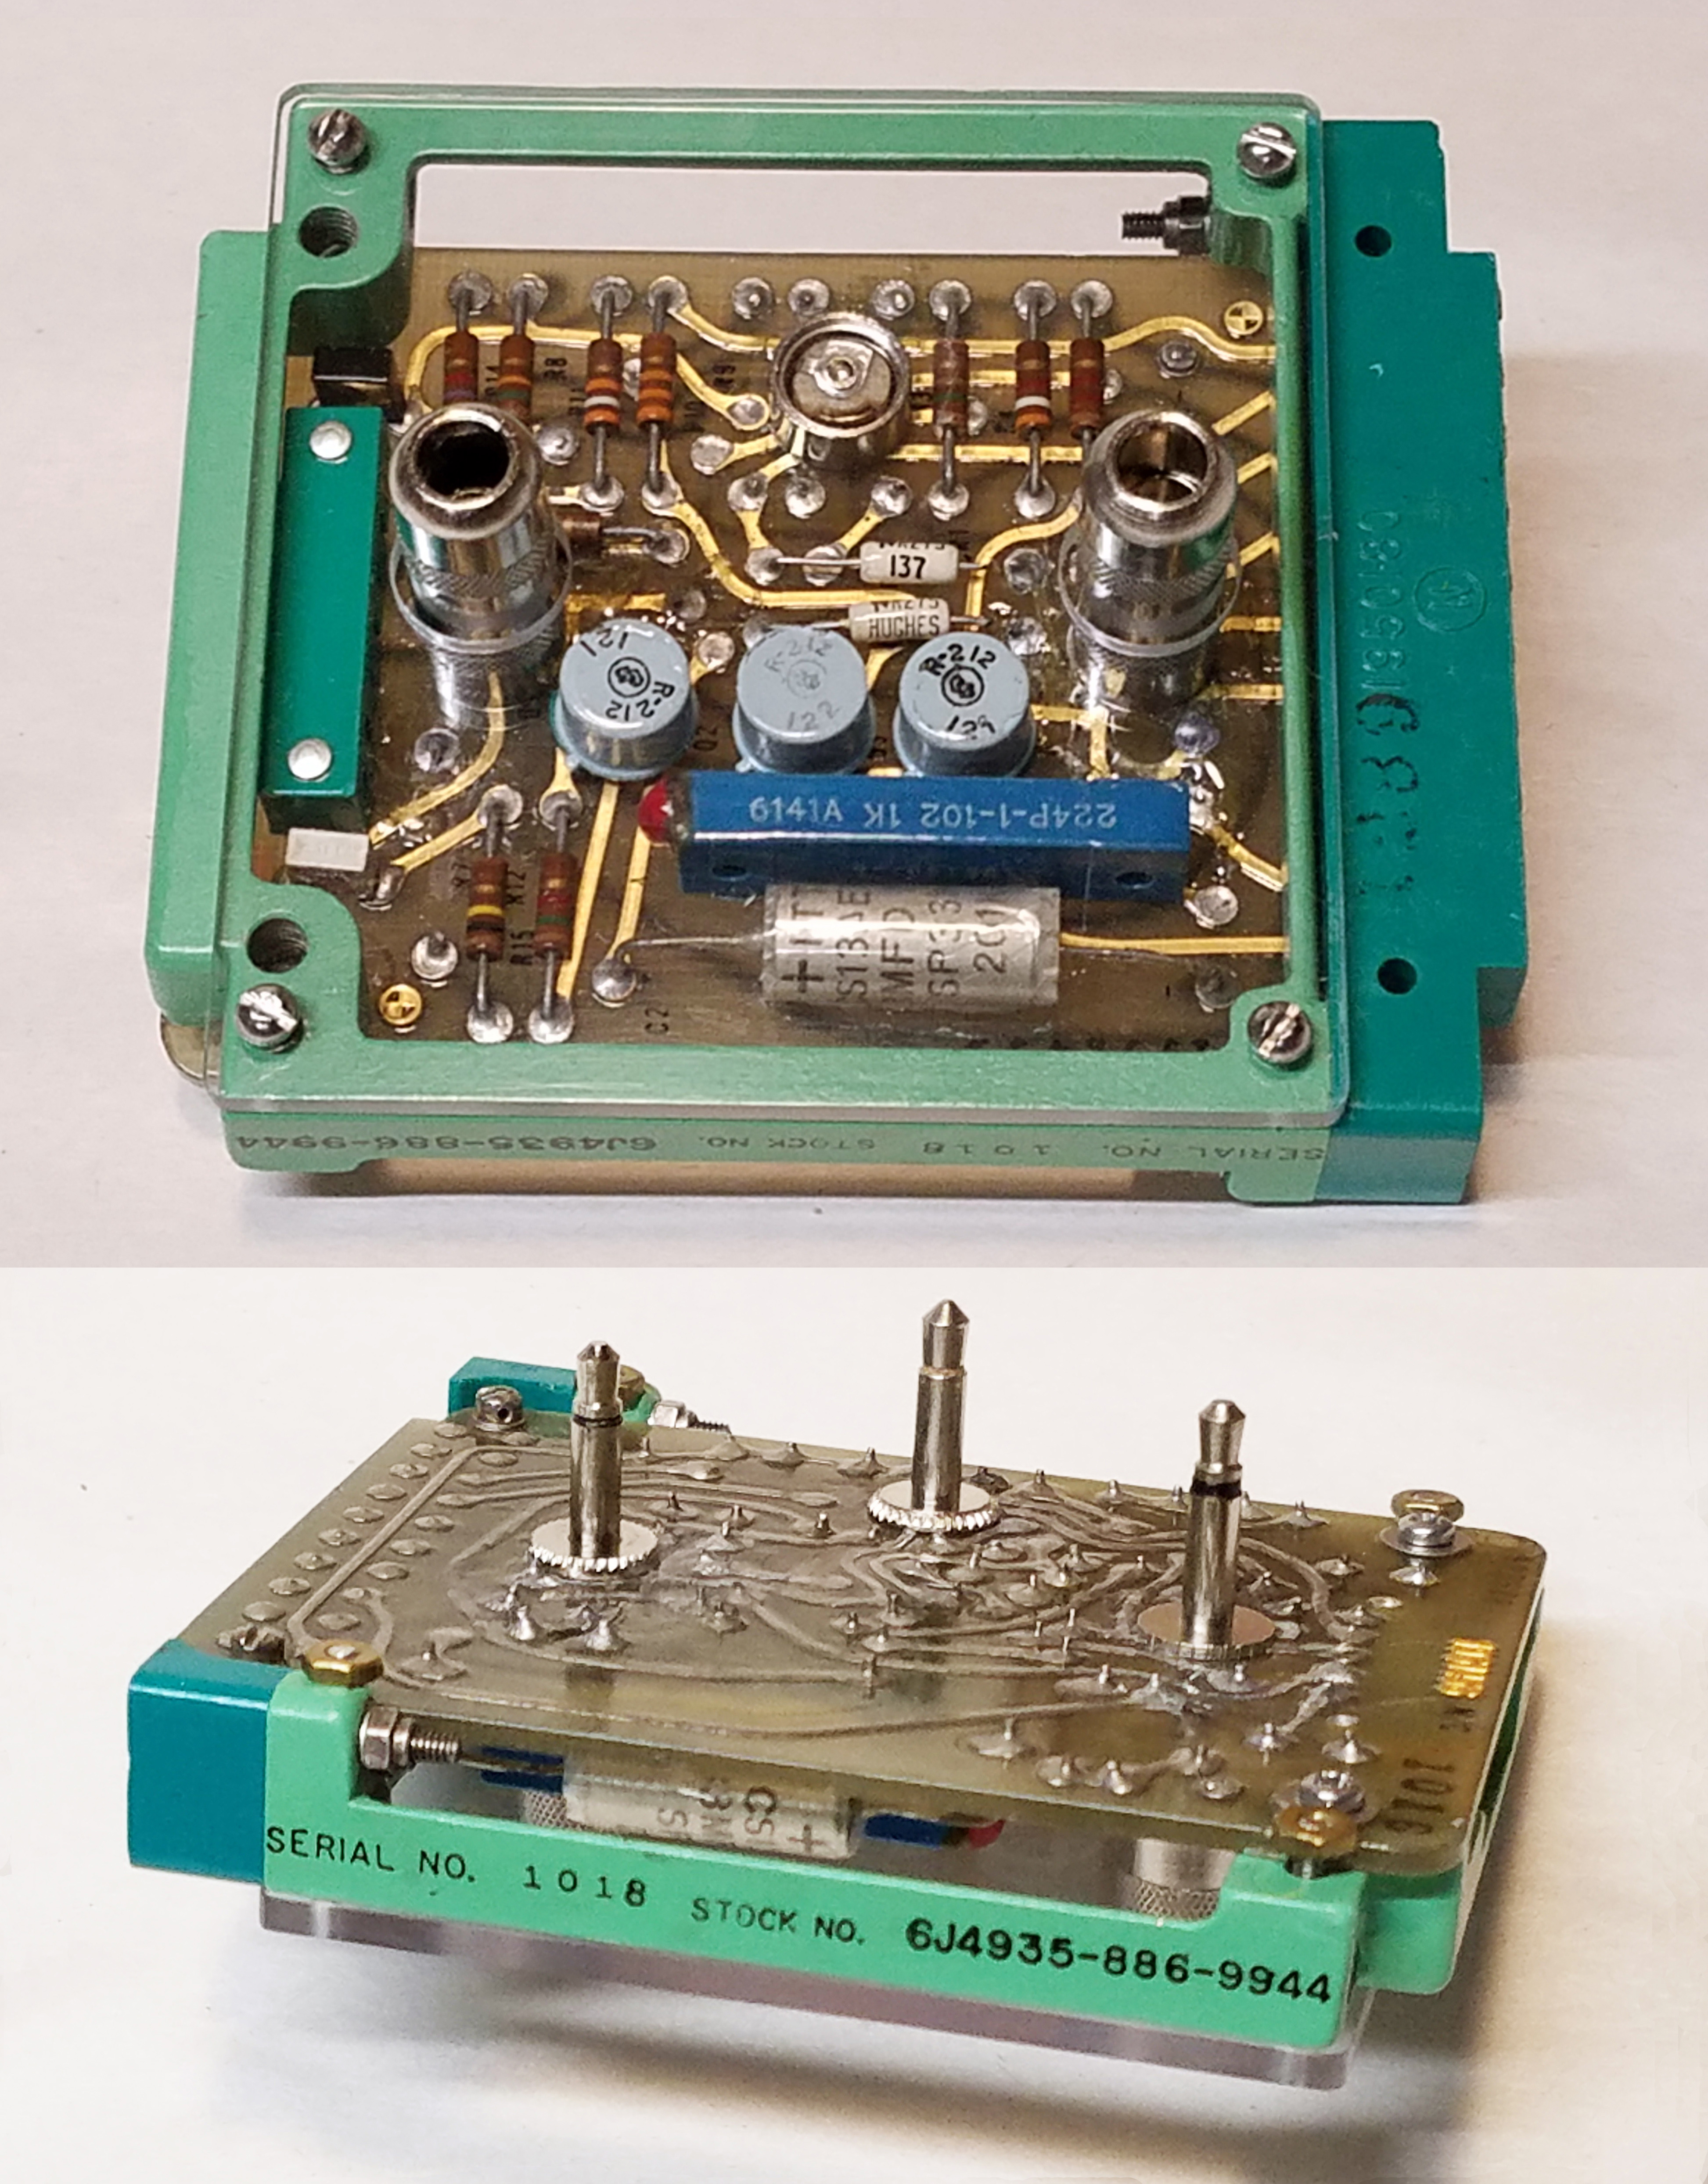
But my Power Pack story doesn't end here... With all the great parts I have accumulated over the years, I really wanted to make a very accurate backup Power Pack replica for times when I don't want to leave this original Librascope piece on my Robot at a convention, when unattended. That story coming soon.. Stay tuned!
|
|||
 The Story of One Man's Journy to Build the Perfict Power Pack