Updated 04/24/2010

Updated 12/19/2006
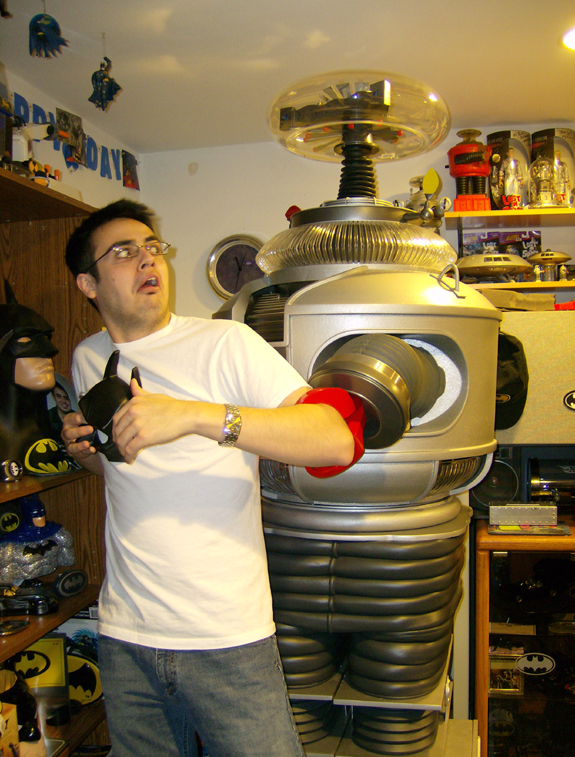
Check out the Picture of the Robot catching my son looking at
stuff in the BatCave with his hands.
B9-Leo Construction
Journal
Activation
Charlie Garcia B9-0259
This Chapter
is actually the last chapter of the Robot Construction.
I've been so busy working and planning that I haven't had the
time to write down what I have been doing.
In short, I finished the Robot a day ahead of schedule and way
under budget.
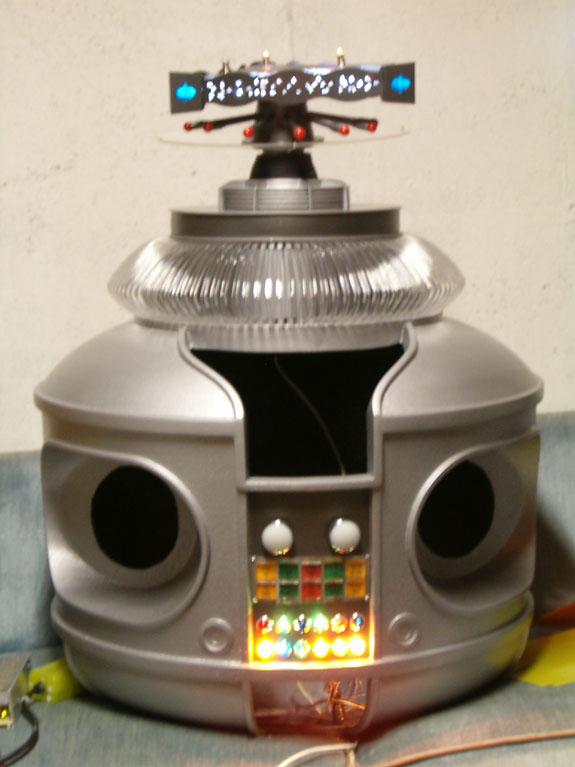
Here are some pictures from his "Activation Party" held
December 3, 2005 which happens to be my birthday.
The Robot is a Birthday Present to me.
I will complete the "Building Chapters" later. Right
now I just want to watch and listen to the Robot and rest.
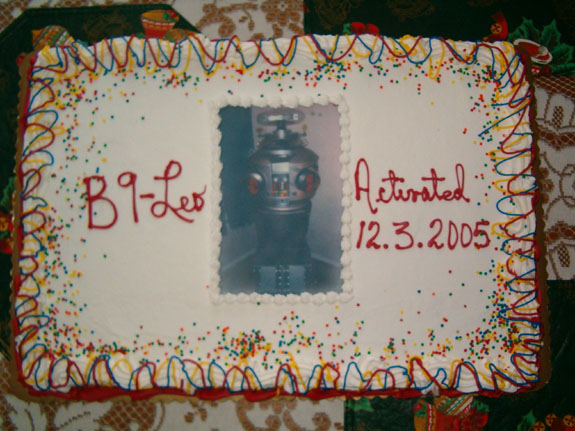
The cake.. The person who did the cake also put this same picture
on a T-Shirt for me. How cool is that?

Before the unvailing....
The hi-lite of the night was when I uncovered him. There were
about 35 people in the room and they all said "wow",
"Ohh" or "Ahhh" and then to my surprise eveyone
applauded!! It was awesome!!
Robot speaking his I-B9 lines! This brought the cheers and applause
again!
This guy is in charge of the security company at my building and
sat there for five minutes and just stared. He couldn't
believe it! I think he took 50 pictures!
This guy works for me and wanted to know how I made everything.

This woman is my interior designer for the facility. She
is very sharp and as a designer has the eye for missed details
and I knew that if I could get a good comment from her I would
have done a good job. She called him beautiful. I passed.
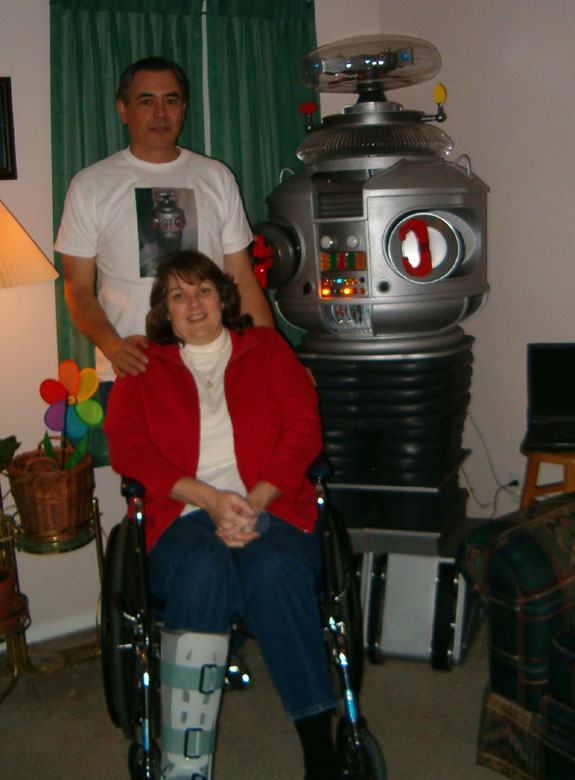
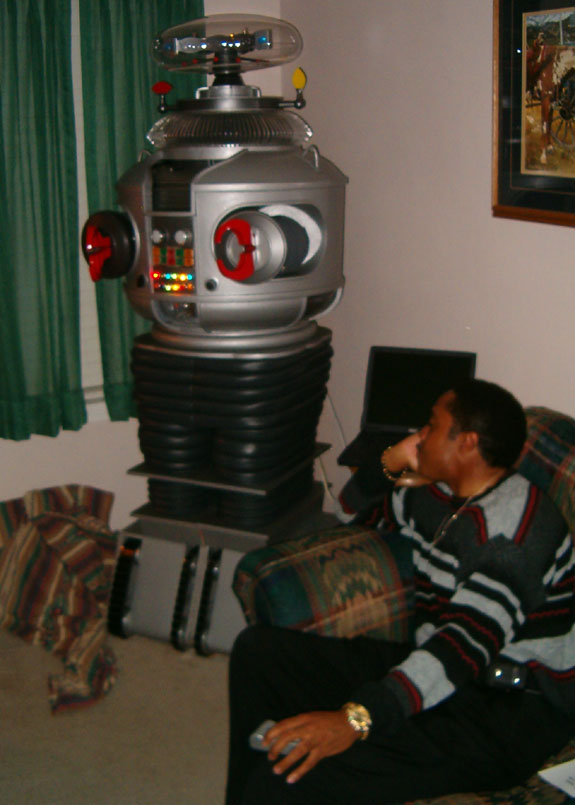
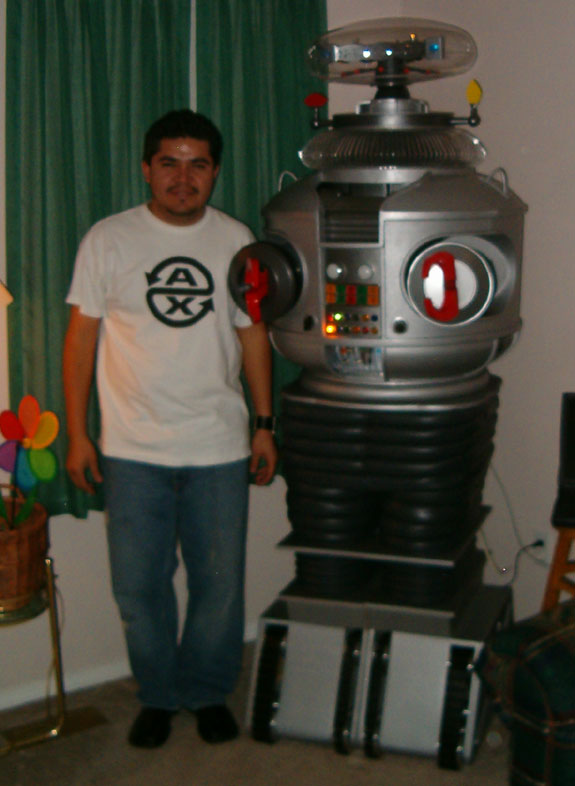
The Robot, my wife and I. She had major foot surgery and
is confined to the wheel chair until January 2006.
Whew! I made it. Thank you to all who sent the congratulatory
emails. This has been the best birthday yet. I hope
that he meets with everyone's approval and that I've upheld the
high standard that has been set by everyone. There are a
few things left to do for one reason or another, but all in all,
he is ready for Phase II.
More to come on how I finished him but for now, I'm going to bed
and sleep until noon.
Charlie
B9-0259
B9-Leo Construction
Journal
Chapter #1
Charlie Garcia B9-0259
Like many of the Club
members I grew up watching Lost in Space, Batman, Voyage to the
Bottom of the Sea, and Land of the Giants. But my absolute favorite
was Lost in Space and it was because of, The Robot. I wanted to
be like Will Robinson and have a big Robot as a pal. My Dad bought
me the Remco Robot for Christmas and it’s a treasure that
I still have today. In November of 2004 I stumbled across the
B9 Robot Builders Club and join as soon as finished reading almost
the entire site. I didn’t actually start building my Robot
until February of 2005. My wife asked me what I was going to name
the Robot and when I told her he never had a name, he was alway
just called the Robot. But after more of the same questions over
the next few days, I decided that perhaps I should name him. My
Father past away 2 years ago and since he bought me my first B9
Robot that has made me happy for years since that Christmas, I
decided to name him B9-Leo, after my Dad. Here’s my Robot
story…………..
I decided
to start from the top and work down. The reason, I wanted rubber
legs and they may be available by the end of the year. So I started
ordering parts to that end, the brain kit and light controller
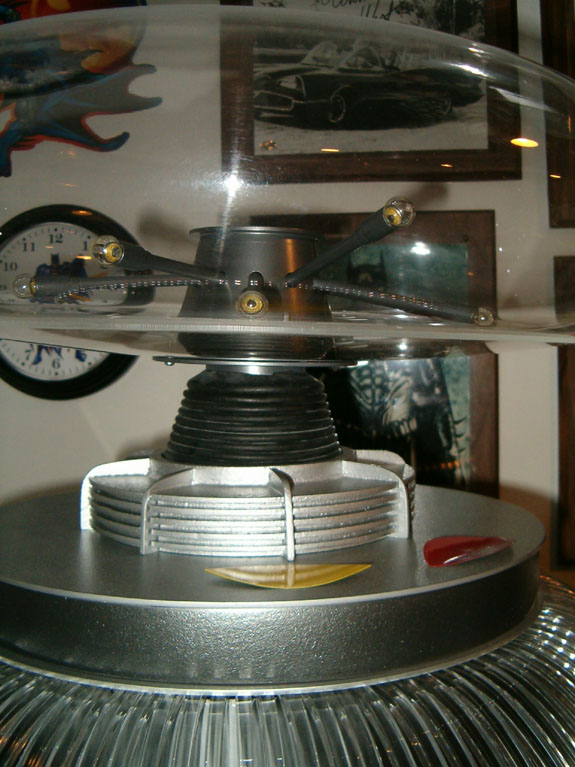
kit from Tom W, The Brain and ears from Scott S., the Bubble from
Fred Barton., Programming Bay from Craig R and the collar from
Greg L.
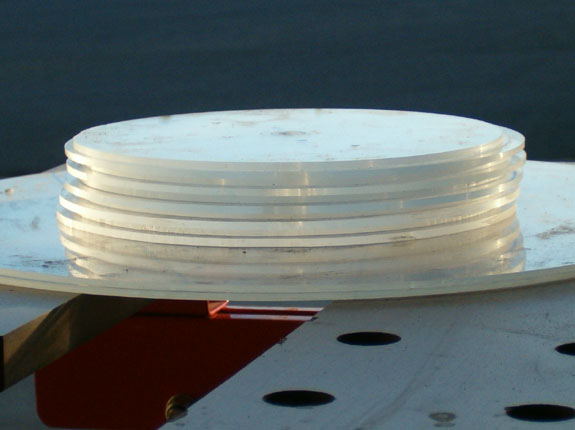
On March
19th I began building the radar section from sheet plastic that
I had stocked in the garage. It took about 5 days (About 20 actual
working hours) to complete. Here are a couple of pictures of the
progression..
Raw plastic disks routered from sheet plastic.
Glued and drying
Textured and Painted

Next Week......
Chapter Two - Finger Lights and Programming Bay
B9-Leo Construction
Journal
Chapter
#2
Charlie
Garcia B9-0259
March was a busy month.
I ordered and received the Programming Bay Kit, and some wheels
from a person who decided not to build the robot and was selling
off his stuff, I purchased the neck bracket and brain cup from
Norm. I also built some parts.
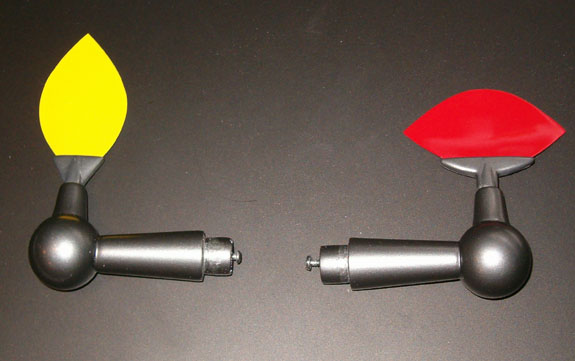
I started on the finger
lights by using the method described by Craig R in the Construction
Tips Section of the Club Website. I made a total of 10 and scraped
out 3. For the lights I didn’t want to be removing the bubble
to replace the bulbs a lot so I cut the base of the bulb off on
my band saw, cleaned out the insulation with my Dremel and small
cutter. My plan is to insert a led down the brass tube and into
the bulb for illumination. Less power usage, almost no heat and
longer life. Here are the results, less the led
If you look closely you can see the hole in the base of the bulb.
The bulbs are hot glued in the finger lights
At the same time I was making the finger lights I was working
on the Lower Radar Section. I used two pieces of particle board
and lots of Bondo. Since I don’t own a lathe, yet, I used
my drill press to turn it and I sanded it perfectly round. Then
some Bondo on the edge to mask the seam and wood texture. More
Bondo and sanding and then some texturing and final paint. I chose
a medium charcoal metallic for this section. I’ll probably
use it on the chest area and ears and brain.
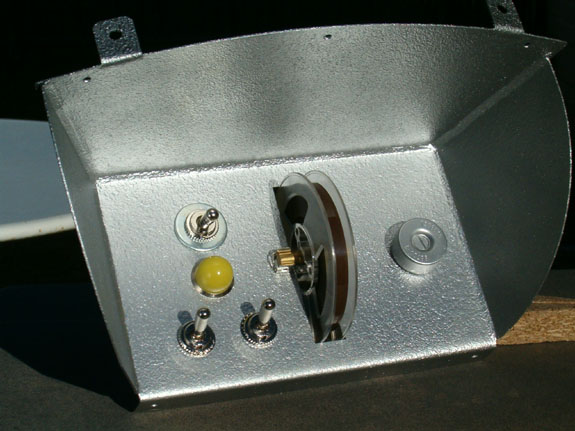
I received the Programming Bay from Craig R and is it ever a time
saver. I assembled it, added bondo to the seams to give the appearance
of being welded, textured it, and Painted it all in one weekend.
Next Week......
Chapter Three - The Torso
B9-Leo Construction
Journal
Chapter #3
Charlie Garcia B9-0259
Before I start
I have one question:
What is it that causes the irresistable urge to stack all the
parts you have regardless of how complete they are?
I finished the Programming Bay Last week by applying the stickers.
I had re-painted it a Platinum color.
Last month as you recall..........I ordered a bunch of parts and
they finally arrived this month. I received the Bubble from Fred
and all I could do was unpack it to make sure it wasn't damaged
and then repack it and put it away. I was surprised at how light
it was. A few days later the Collar from Greg arrived (I did the
same thing as the bubble) and then the Norm S. made wheels I purchased
from someone giving up on building the Robot.
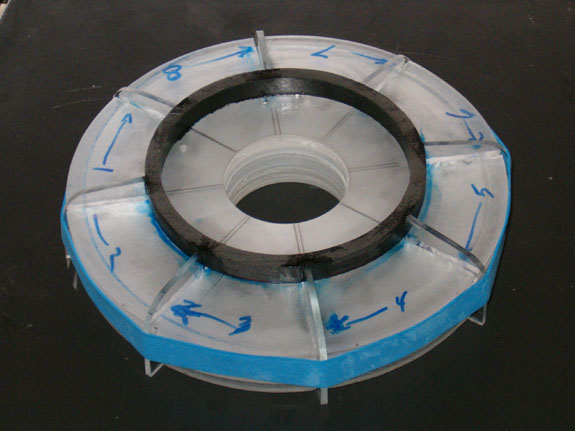
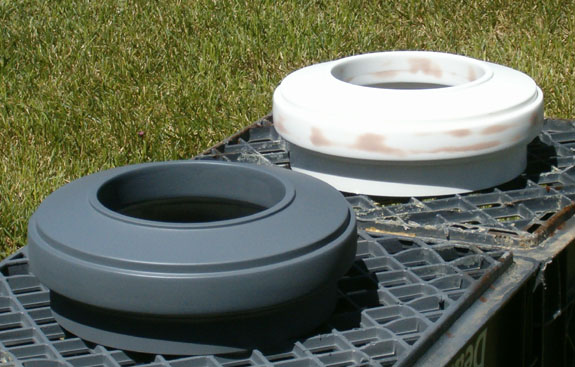
I began the lower Radar Section and used MDF wood and plastic.
I routered out the OD and ID dimensions and the step for the lazy
suzan. I then glued the wood pieces together and used 5 wood screws
to draw them tight. I then sanded and applied Bondo again and
again until the OD was almost perfect. I then glued the two plastic
discs on the top and bottom and placed 150 of weights on it to
ensure a good seal all around. Here are the results:

Initial application of Bondo (See?! couldn't resist stacking them)
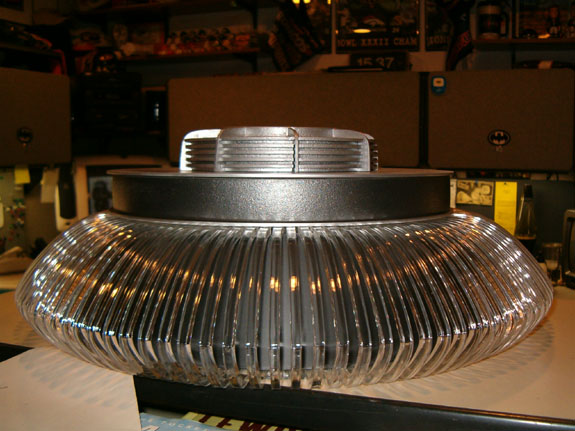
Completed Lower Radar Section.
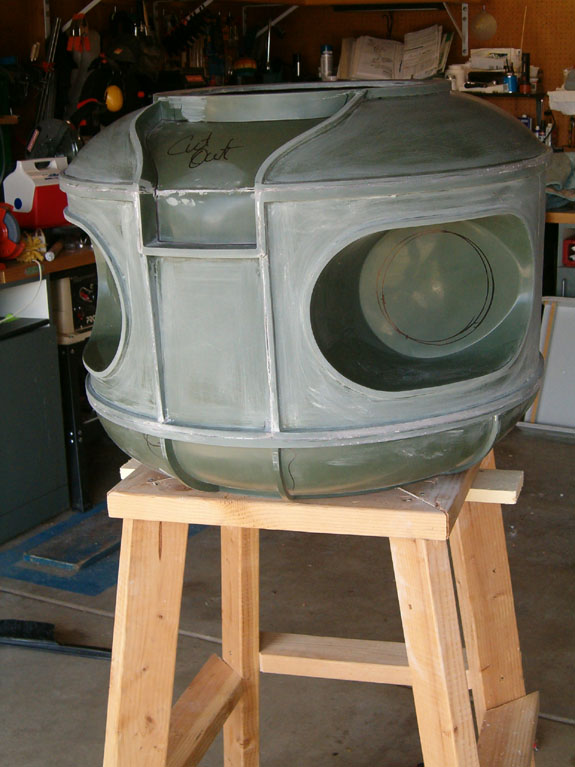
I received MikeJ's Torso and my wife just watched in disbelief
as I tore into that box just like a kid at Christmas opening his
presents. The Torso! She told me I just had to be entering my
2nd childhood and I told her "Whoever said I left the first!"
She had no arguement! I sanded and applied Bondo and sanded and
applied Bondo and ...... I ordered the 2 lazy suzans needed then
cut out all the openings and light holes Here are some progress
shots.
Right out of the box
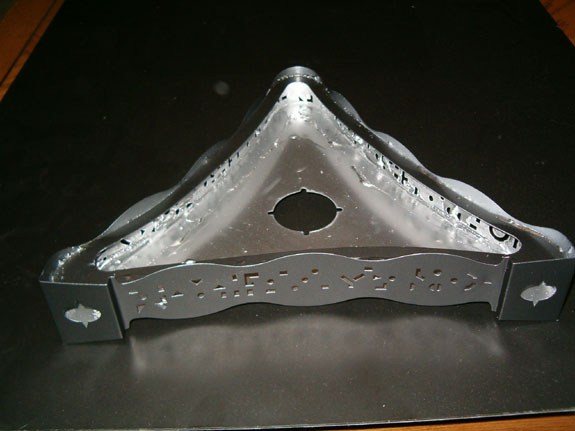
I made a stand so I would have someplace to work on him, keep
him out of the way and to move him easily. This was a big help
in working on him. I estimated the height of the stand to close
as the same as the lower half of the Robot.
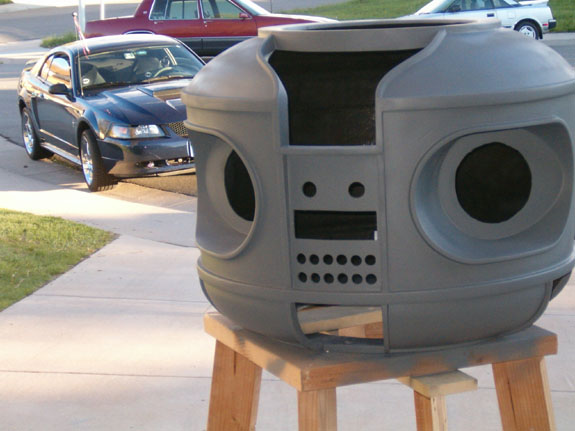
All cut out and primed. (My other love in the background)

B9-Leo in his display area, in the BatCave
While working on the Torso I also completed the Sensors. I followed
Craig's Construction Tips but used some HVAC ducting rather than
laminating the paint cans. Here's what they turned out like:
I really like the display stand
This brings me to the end of May. I've been busy and got a lot
of work done but now I have to change projects and build a bathroom
downstairs. Pictures of the "BAT-Bathroom" next month.
Same Bat-Time,
Same Bat-Channel.
Next Week......
Chapter Four- Claws, Brain, Ears, Lights
B9-Leo Construction
Journal
Chapter #4 - Claws, Brain, Ears
Charlie Garcia B9-0259
I received
the claws and wrists from Bill K in June but due to the bathroom
I didn't actually do anything on them until August 10. I started
by taking pictures of the assembly and following Bill's advice
engraved his Sharpie ID numbers into each component. The I disassembled
them and started the....bondo and sand, bondo and sand and routine
on the claws and wrists........After what seemed like days I applied
the primer, sanded a little more then the final coat of primer.
I let it cure for about 3 days in the hot garage and then applied
8 coats of the finish red paint inbetween I wet sanded with 400
grit paper to the Claws and 6 coats of Medium Charcoal Metallic.
I reassembled them which was alot easier than I expected and to
my surprise no left over parts which is always a good thing. Here
the before in progress and finished pictures.

Claws out of the box.
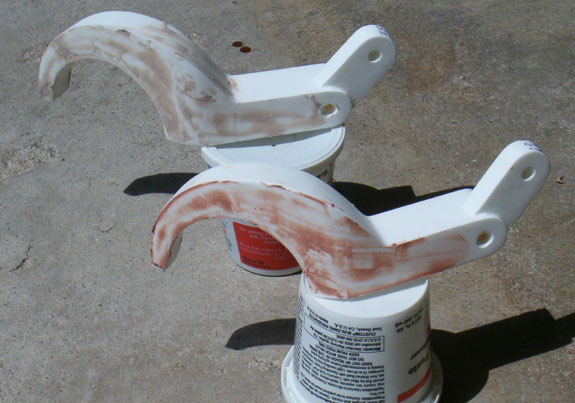
Claws with 1st bondo
Wrists, primed and ready for primer
Completed and re-assembled
I received the brain and it looks good enough to just use as it
is. I soldered it together, ground off the tab and applied Bondo
and let it cure for 3 days. (How did I ever get along without
this stuff!) I applied a coat of primer then after 3 days curing
I sanded it applied a little bondo to a couple of place and let
that cure for three days. For the inside I taped off the holes
and sprayed three coats of Chrome Paint inside. I figure this
will act like mirrors and give a good strong light from the brain.
I'll make some dividers from plastic and do the same thing once
the light board is in stalled. I applied the final coat of primer
and then 4 coats of Medium Charcoal Metallic. I know it's not
the right color but I like it.

Brain showing the chromed inside.
Completed brain
While working on the Brain I also completed the ears. They are
non-motorized for now, later I will purchase the motors. I left
the mounting screw off as well just to see if I liked it. I can
always add it later if I decide to.
Finished product.
Next Week.........
Chapter 5 - Brian and Chest lights
Thanks for Looking.
B9-Leo Construction
Journal
Chapter #5- Brain and Chest Lights
Charlie Garcia B9-0259
I bought the chestlight and brain controller kit from Tom W. in
February installed it in the finished torso this week. I built
a mock-up board to make the circuit connections and building the
wiring harness easier. After all circuits checked out I installed
the lights into the Robot and made the connections. Everything
came on just like it was supposed to. I attached the brain onto
the cup and installed the light board using double-sided tape
folded four layers thick to keep it from contacting the metal
brain. I am making some plastic dividers for the brain to segregate
the lights. I'll paint the divider the same as the inside of the
Brain, chrome. This will give it some nice reflective surfaces.
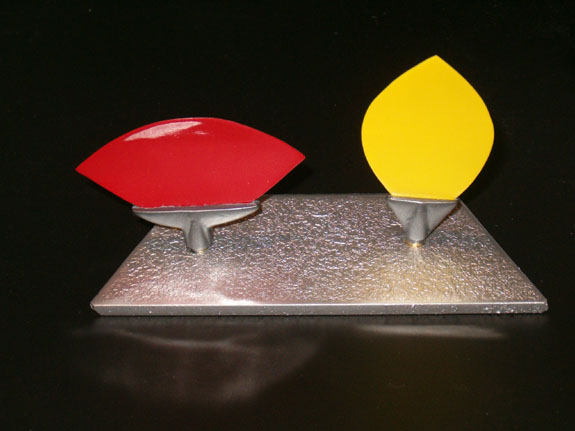
I took some colored plastic document holds I bought from Wal-Mart
and cut pieces to size and placed it behind the eye lens. I tried
yellow, red and blue, I stuck with blue.
I attached the three bulbs on top of the brain and wired those
in. Everything works great. I decided to wanted the dail-lites
to blink random so I removed those from the circuit board and
will place them on the same circuit as the finger lights.
Here's pictures of the results
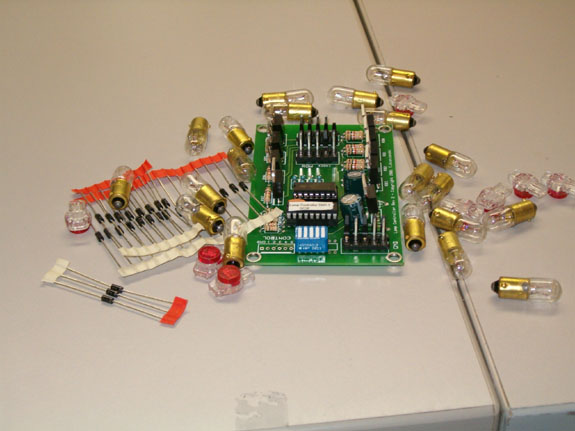
Chest and Brain Light Controller from Tom W
The Brain lights from Tom W.
The mock-up board
Picture of the Brain's chrome interior.
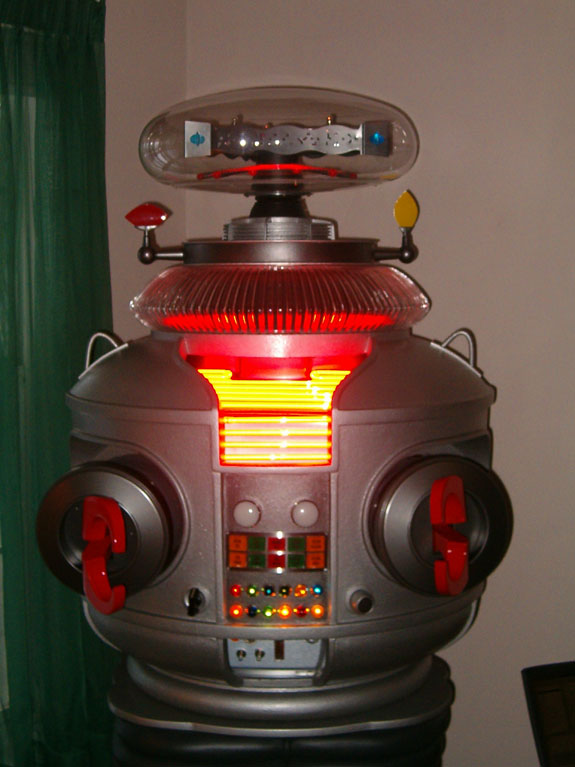
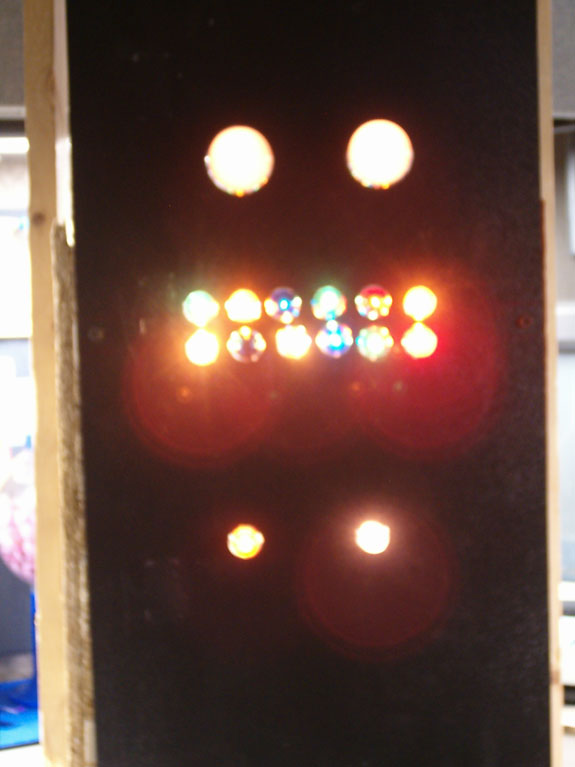
All lit up!!!
Next Week.........
Chapter 6 - Programming Bay- Side Vents- and Neon installation
Thanks for Looking.


 Charlie
G. ( B9-0259 )
Charlie
G. ( B9-0259 )